

Billing accounts list
All accounts start with a free sandbox billing account. This gives access to sandbox functionality and allows you to keep track of the pops usage of your sandbox workspaces.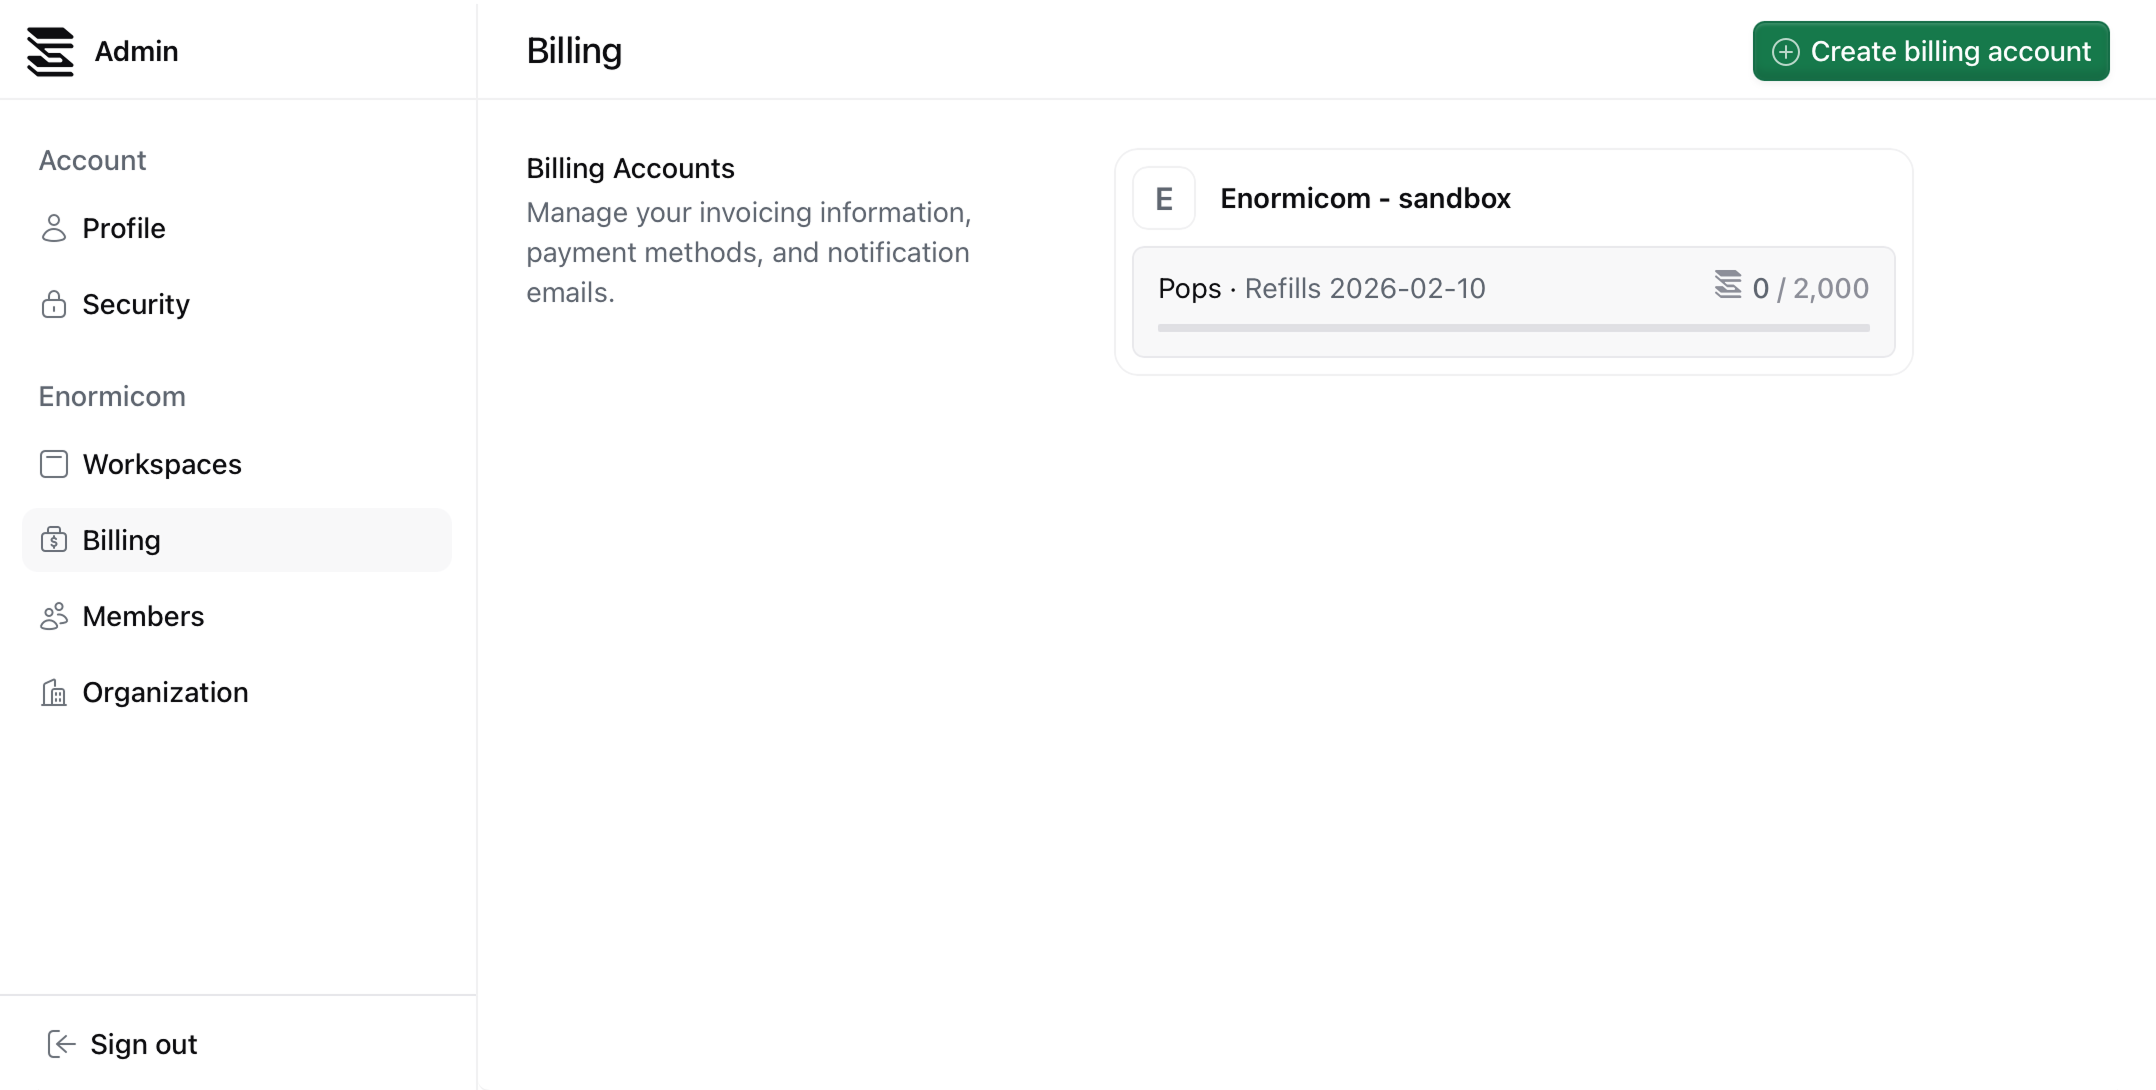
Create a billing account
To create a billing account, click on the Create billing account button in the top right corner of the billing page. You will be prompted to name the account. We recommend naming the account after your company or organization + “billing” or “account”.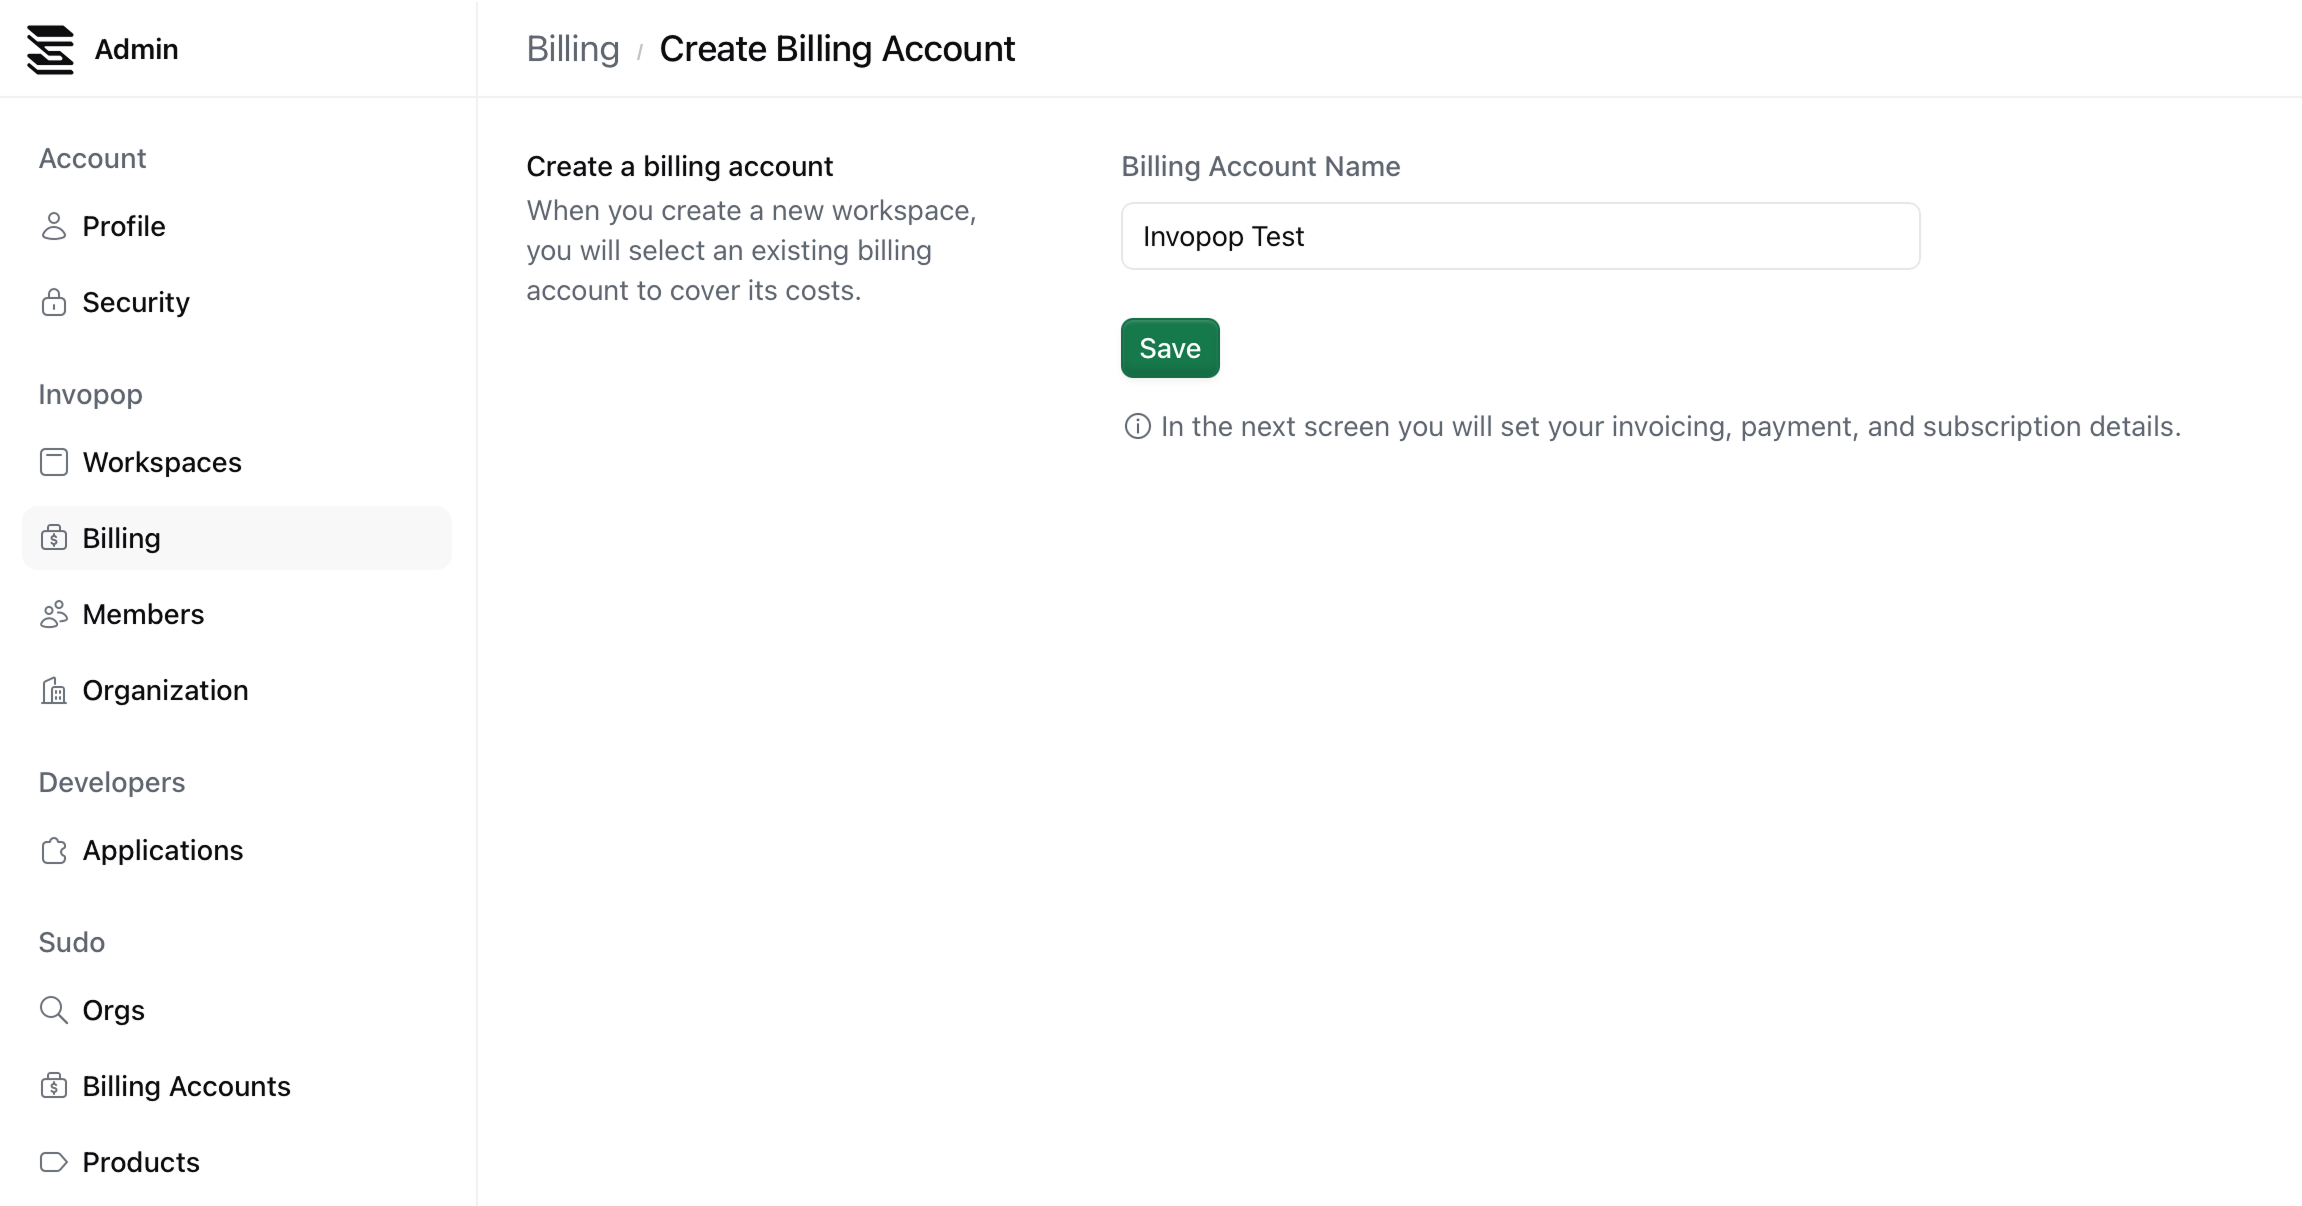
Add your invoicing information
Introduce your tax information and click on Save.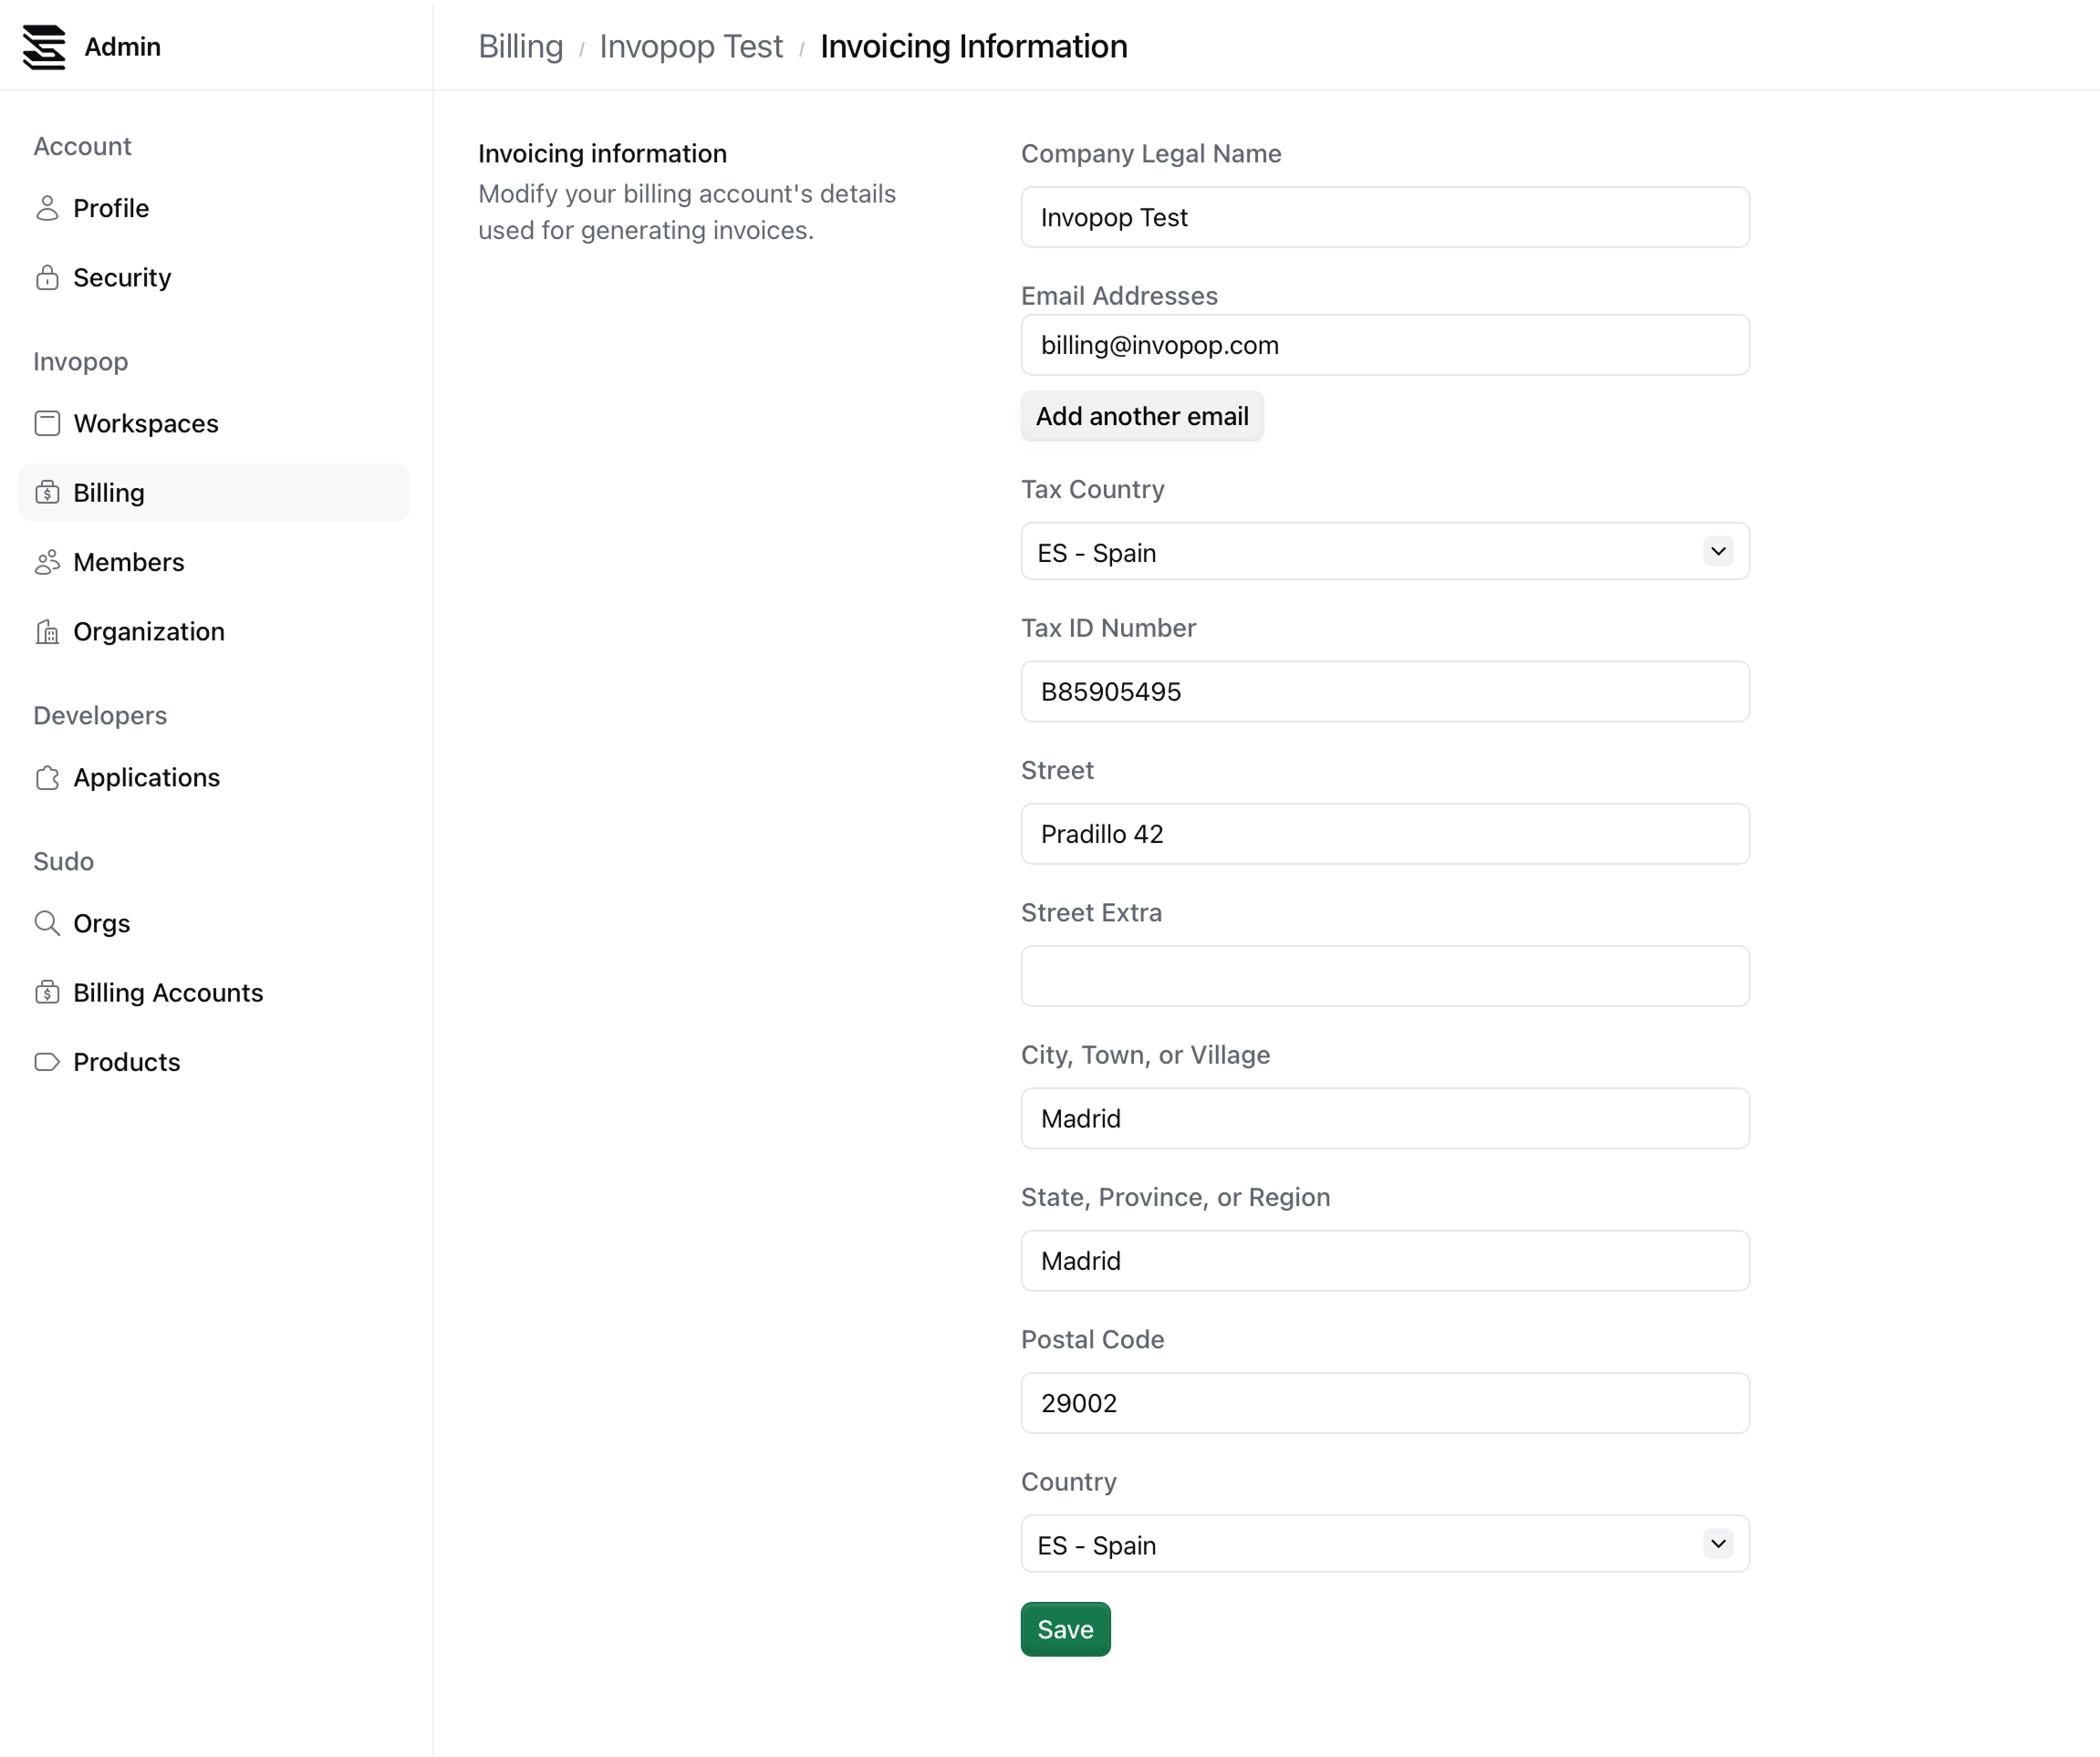
Add a payment method
Click on the Add payment method button to add a payment method to your billing account. You will be redirected to a Stripe page to add your payment method.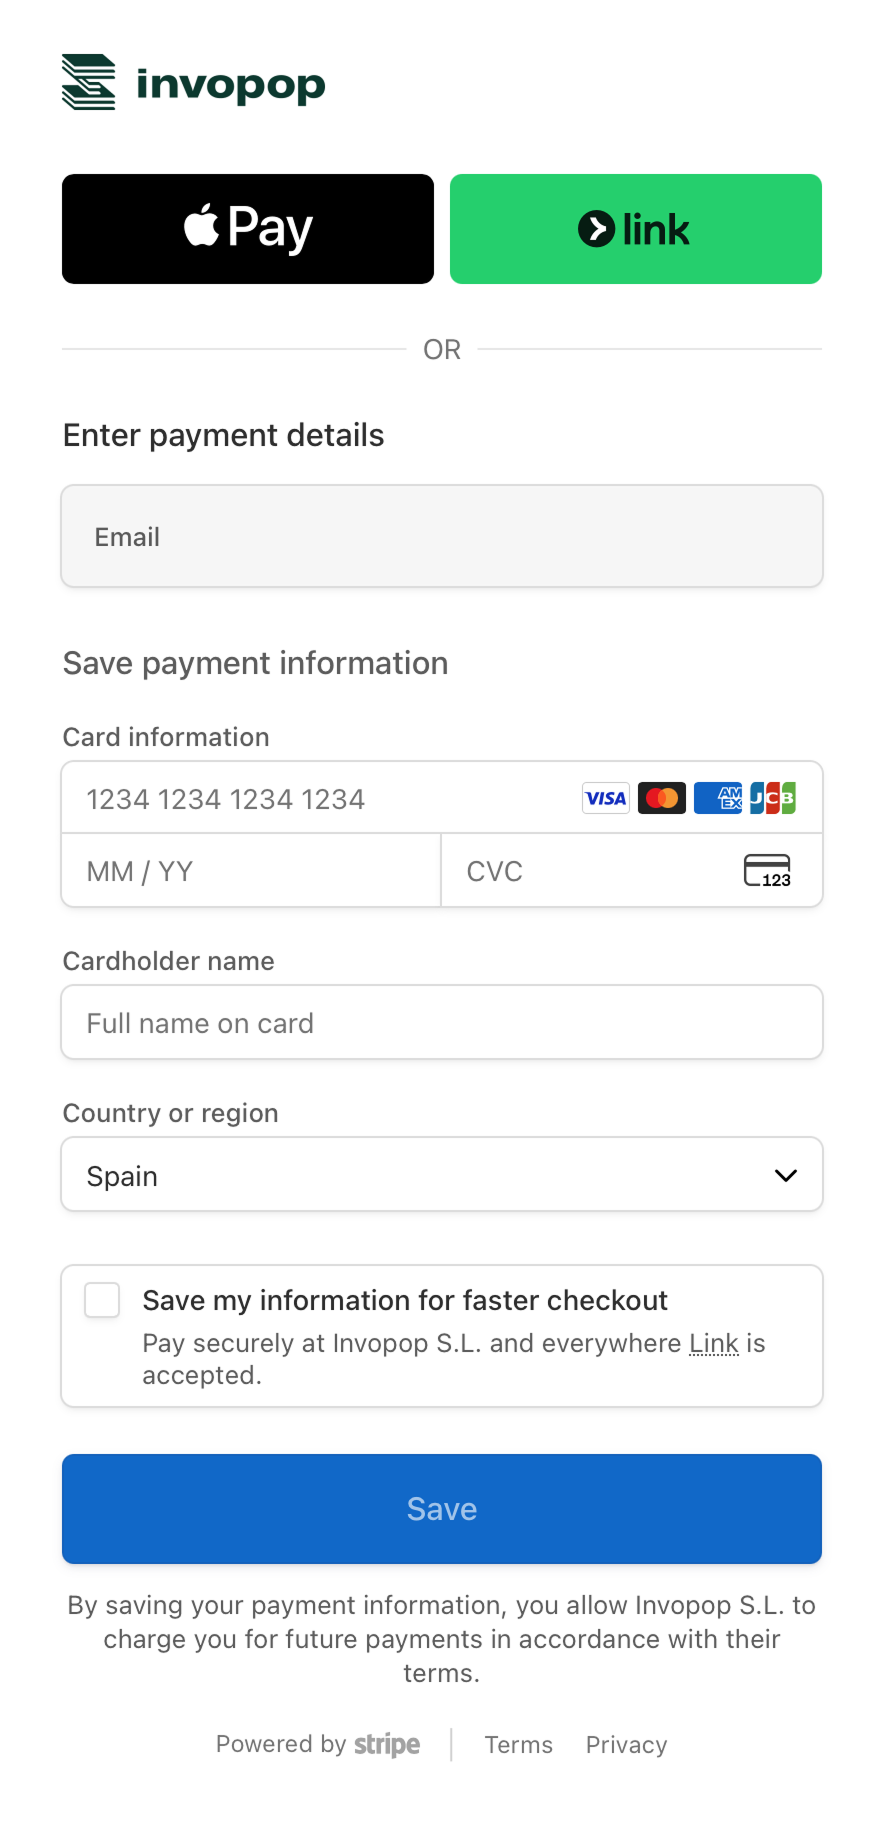
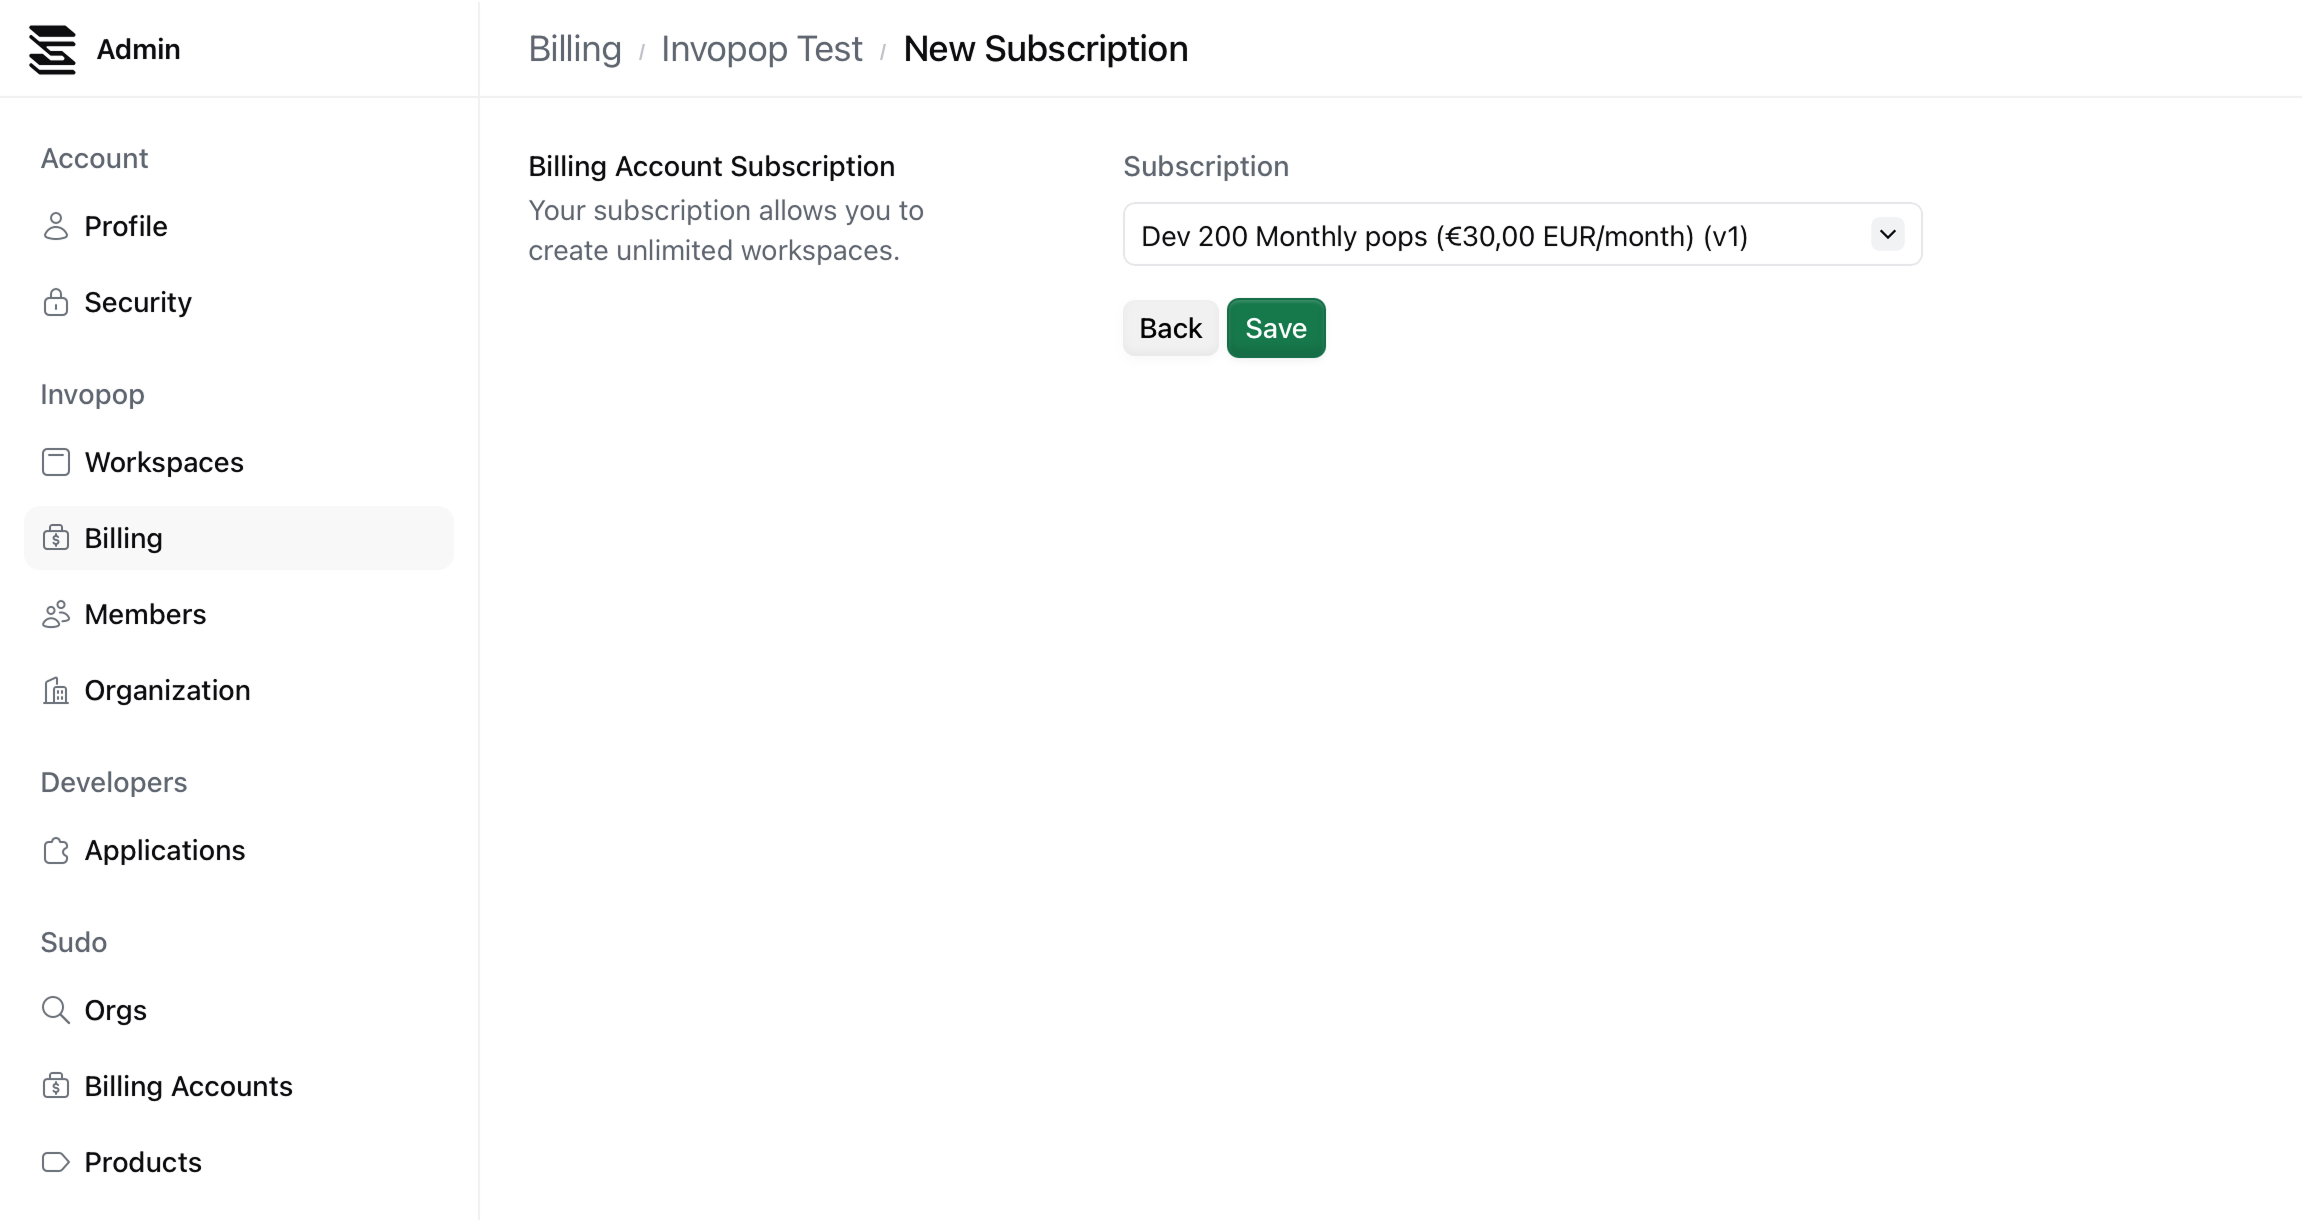
Select a subscription plan
Click on the Select subscription button to select a subscription plan for your billing account. You will be asked to select a payment frequency and currency.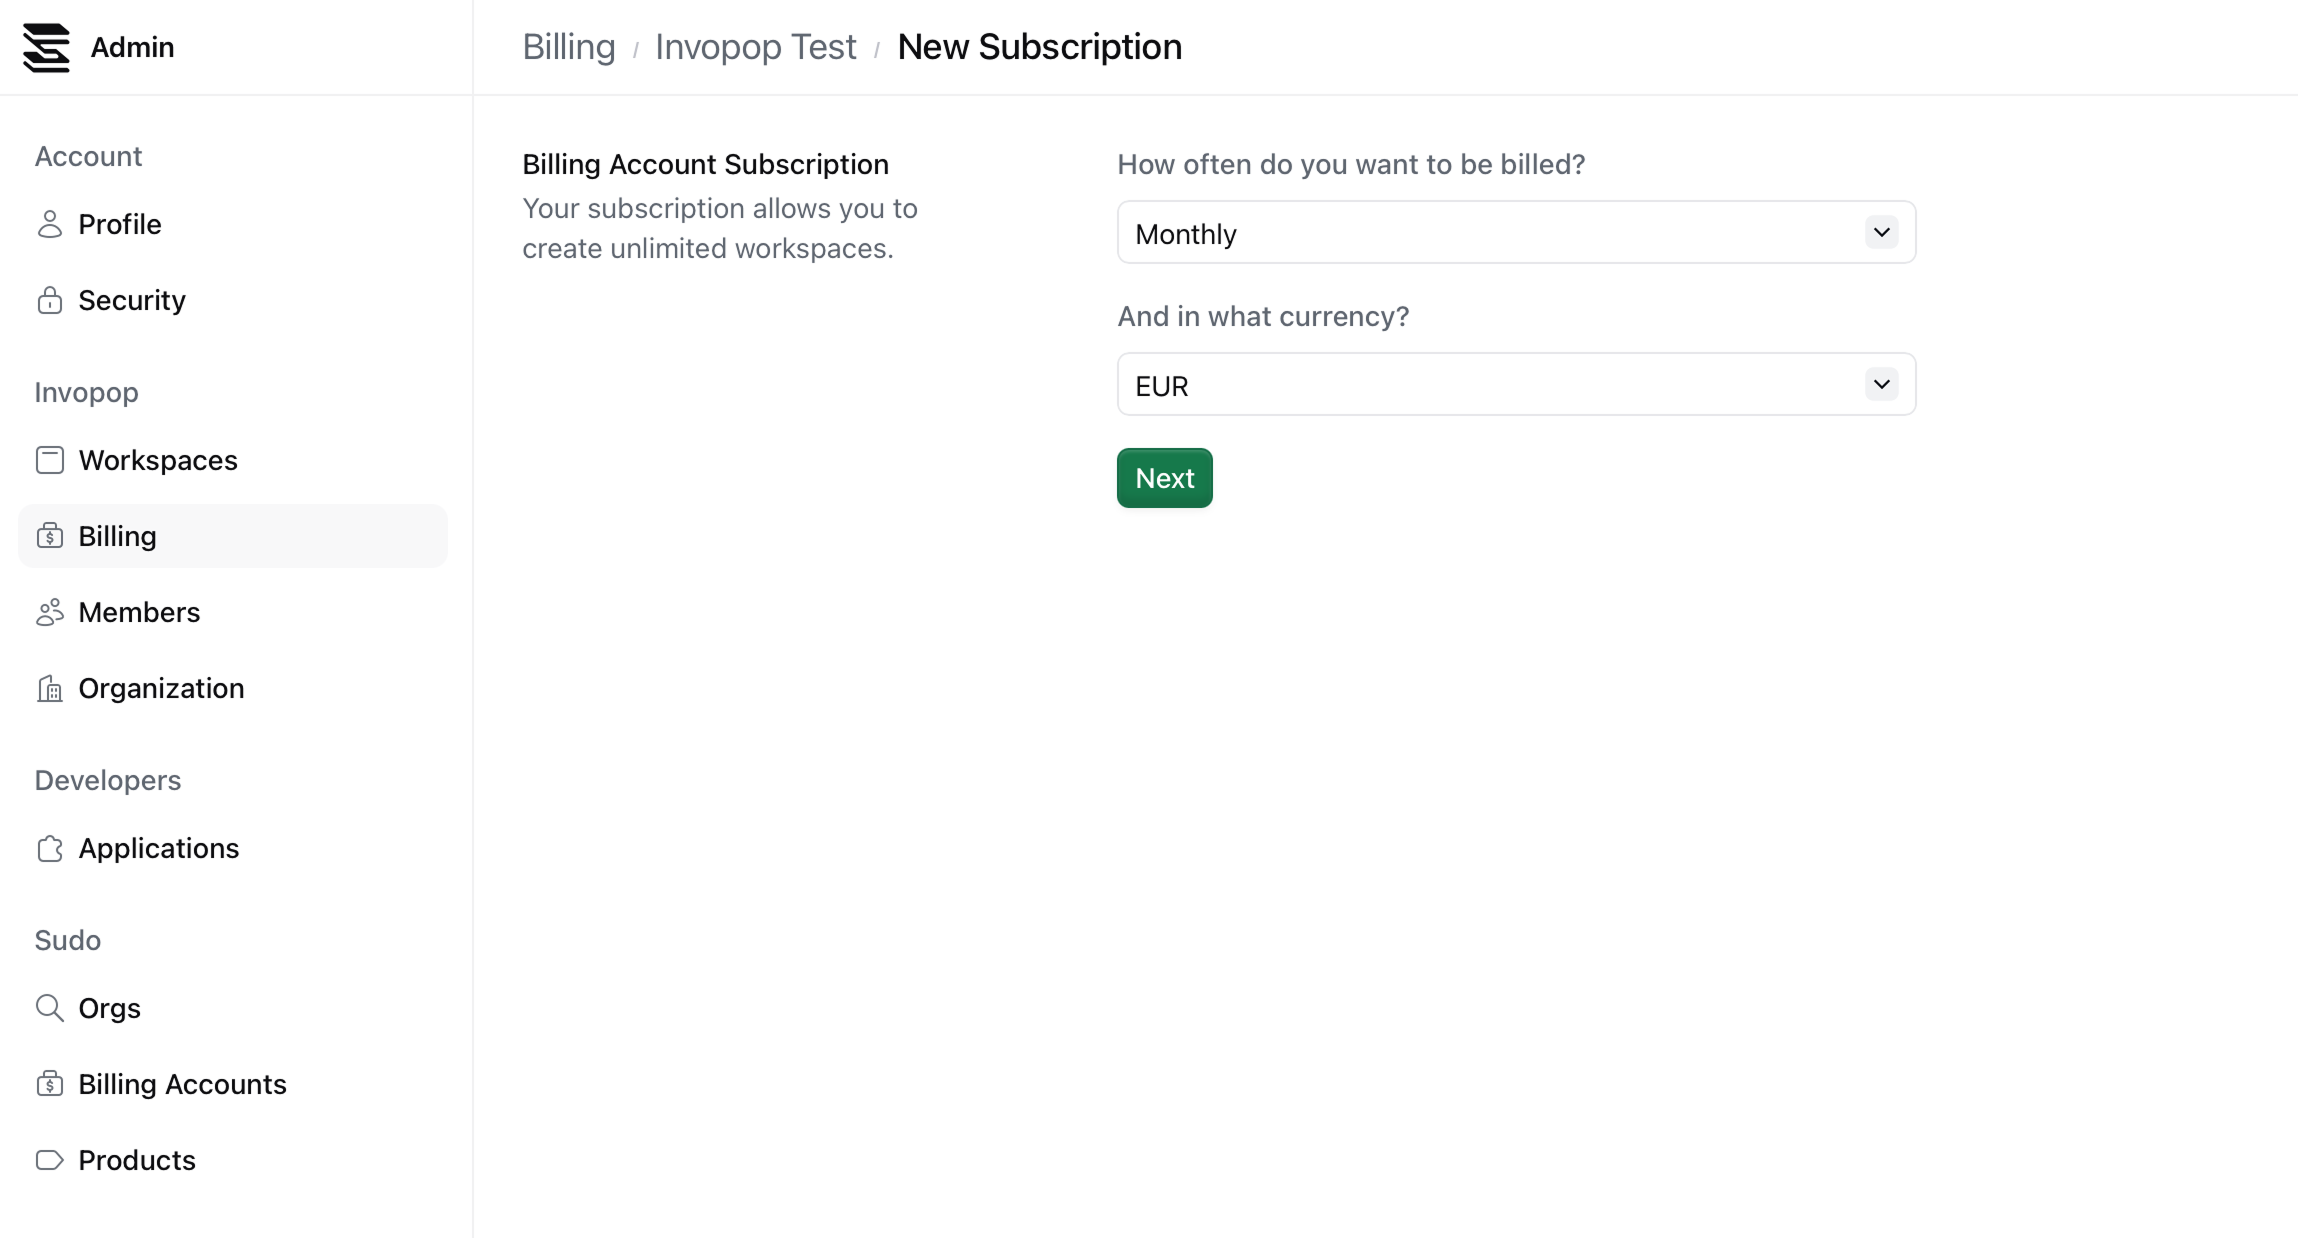

FAQ
What happens if I run out of pops in my sandbox billing account?
What happens if I run out of pops in my sandbox billing account?
Get in touch with us at support@invopop.com, and unless we detect abnormal usage, we will extend your sandbox billing account with additional pops.
Can I pay by direct deposit?
Can I pay by direct deposit?
This option is only available for Enterprise plans.