

Introduction
The CFDI (Comprobante Fiscal Digital por Internet) is the standardized electronic invoicing format in Mexico, managed by the country’s tax authority, the SAT (Servicio de Administración Tributaria). This system ensures that all fiscal documents are digitally generated, validated, and reported to SAT in compliance with national tax laws. In this guide you’ll learn how to register a supplier and issue invoices in their name using the SAT Mexico app. For importing received invoices, see the companion guide: Mexico: Receiving invoices.Prerequisites
To issue invoices in Mexico via the SAT, you will need:- Supplier Information:
- Name
- Taxpayer ID (RFC - Registro Federal de Contribuyentes)
- Address
- Fiscal regime code (as defined by SAT)
- Customer Information (same as supplier, plus):
- CFDI use code (Código de uso CFDI)
- Line items:
- Quantity, unit price, and applicable tax rates
- SAT product/service code (Clave Producto-Servicio)
- Additional requirements
- Selected invoice series
- Place of issue code (Lugar de expedición)
- Two certificates required by the SAT:
- e.firma (FIEL): Confirms your identity before SAT. Required to obtain the CSD below and to authorize the PAC to issue on your behalf as explained in step 3 of the Register a Supplier section below.
- CSD (Certificado de Sello Digital): Required to sign electronic invoices and prove they were issued by you.
Setup
Configure your Invopop workspace for CFDI invoicing by following these steps in the Invopop Console:Set up the Supplier Post-Registration Workflow
- Template
- Code
- Build from scratch
SAT supplier post-registration workflow
Registered. You will select this workflow in the SAT (Mexico) app configuration later.Set up the Supplier Registration Workflow
- Template
- Code
- Build from scratch
SAT register supplier workflow
Connect the SAT Mexico App
- Environment: Sandbox / Live
- Post-registration workflow: SAT supplier post-registration
Set up the SAT Issue Invoice Workflow
- Template
- Code
- Build from scratch
SAT issue invoice workflow
Running
Learn how to register a business entity (supplier) and issue CFDI invoices:Register a supplier
Registering a business entity requires uploading the CSD to our local provider, SW Sapiens, via a form (see Step 2: Complete Supplier Registration). This upload goes to either the sandbox or live environment, depending on your SAT Mexico App configuration. Each CSD is tied to an RFC. When you submit an e-invoice, including the supplier’s RFC, SW Sapiens checks for a valid CSD linked to it, as SAT requires a valid certificate to issue invoices.Run the Supplier Registration Workflow
</> icon) to paste the data directly.Here is an example supplier for reference:Complete Supplier Registration
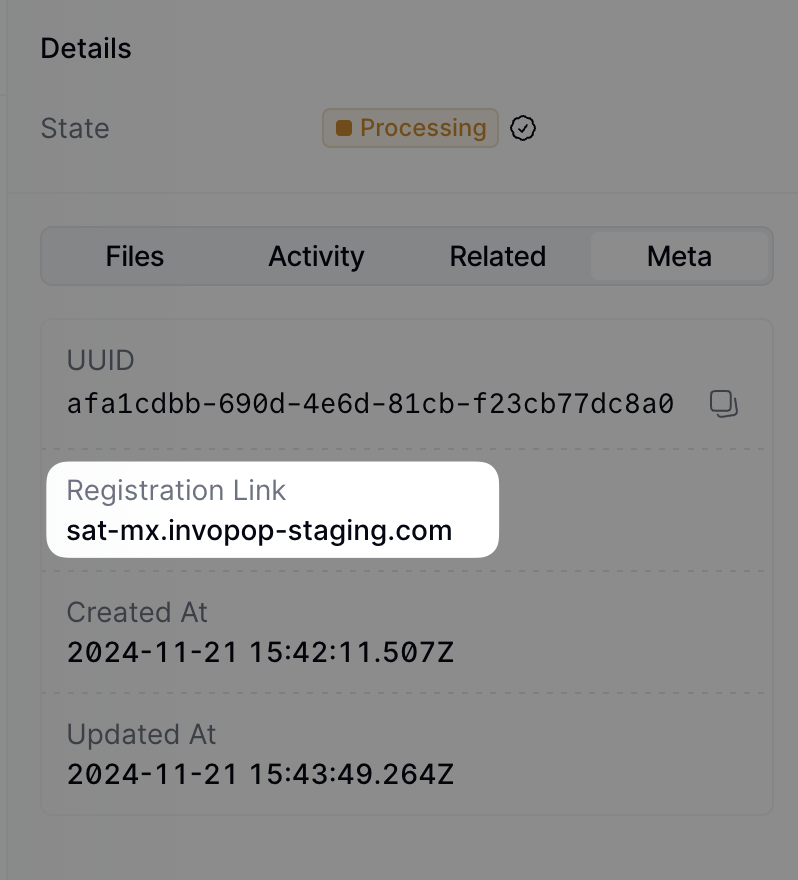
registration-link.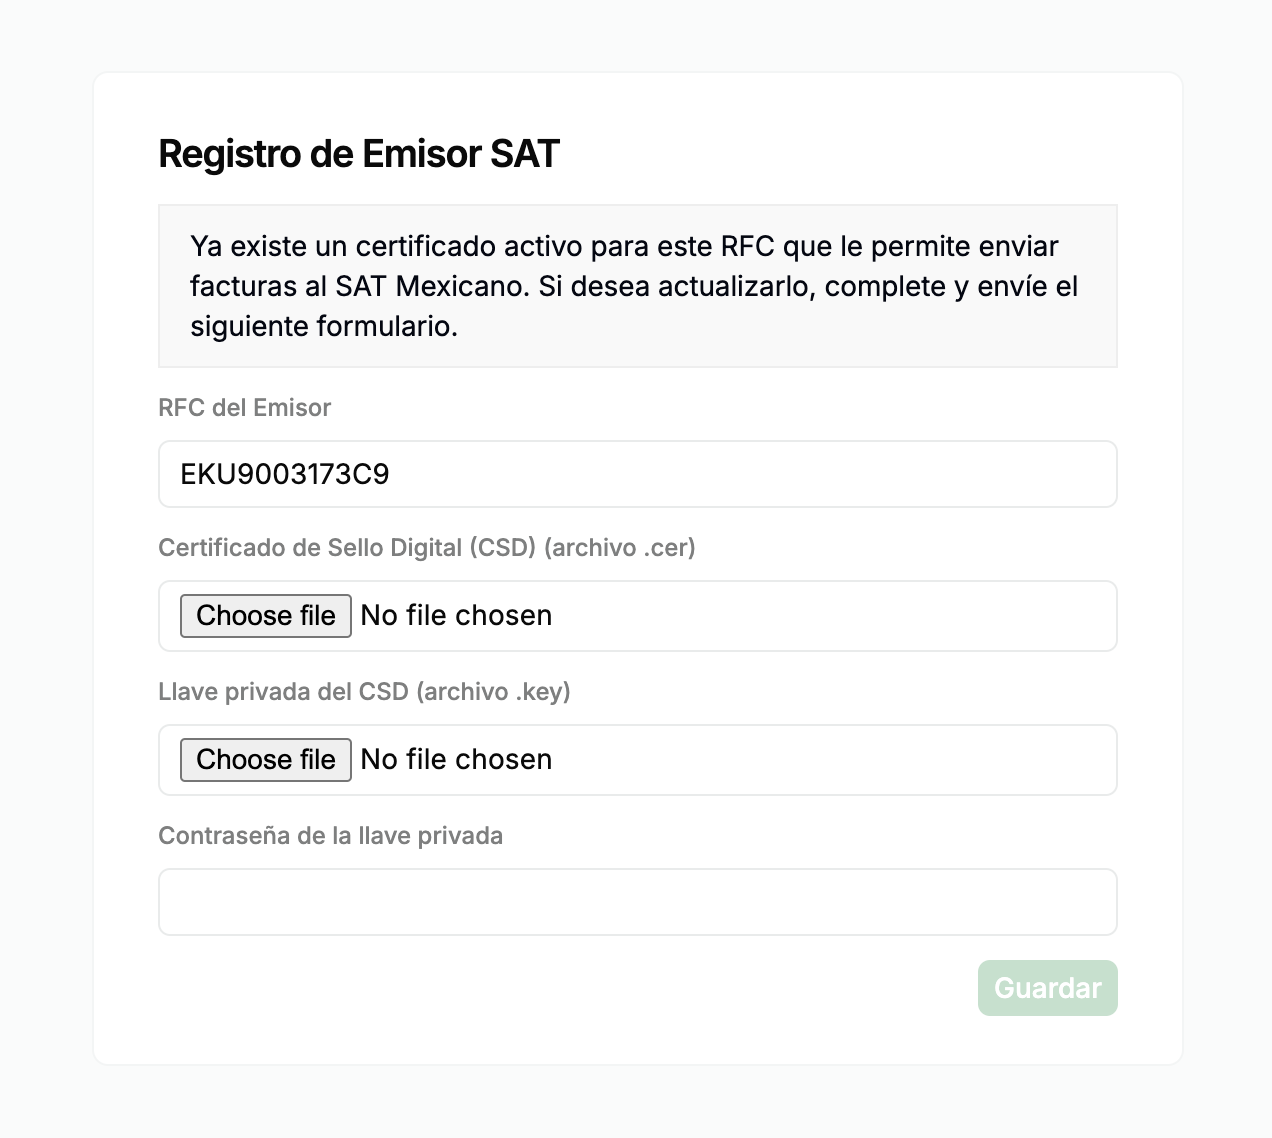
.crt), private key (.key), and the private key password.Follow this guide to generate the CSD certificate and key if you need to.When you click Save, the form details are securely sent to the PAC (Proveedor Autorizado de Certificación), who will handle invoice signing and submission to the SAT.csd_file(string): The CSD certificate file (.crt).key_file(string): The private key (.key).password(string): The private key password.
rfc(string): The RFC of the supplier.active_cert(boolean): Whether the certificate is active.
Authorize PAC to Issue Invoices
Send an invoice
The following examples are of partial GOBL documents you can copy and paste directly into the Invopop Console or store via the API as silo entries. GOBL Invoices sent to the SAT require the following properties in order to perform the correct normalization and validation steps. Invopop will try to assign these automatically, but we recommend defining them explicitly before upload:$regimeto be set toMX$addonsto includemx-cfdi-v4
B2B Invoice (Personas Morales)
B2B Invoice (Personas Morales)
- we’ve added the
mx-cfdi-v4addon, this ensures the document will be validated using the CFDI v4 rules built into the GOBL library, - extensions (
ext) fields have been used in multiple locations for fields whose values cannot be determined any other way, - VAT will be applied at the standard rate, the percentage will be set automatically, and,
- there are no totals nor calculations, all of these will be made automatically when uploading.
B2B Invoice on behalf of a third party (a cuenta de terceros)
B2B Invoice on behalf of a third party (a cuenta de terceros)
seller object (RFC, fiscal regime, address), while supplier remains the party issuing the CFDI.Notice:- the line
sellercarries the third party’s tax identity and regime so SAT can relate the CFDI to cuenta de terceros rules, - the
mx-cfdi-v4addon validates extensions on supplier, customer, and line seller, - the minimal
tax.extonly needs the place of issue;gobl buildadds document type and payment method (PPDin the built example) like other B2B invoices, - there are no totals in the minimal version; upload or
gobl buildwill compute IVA and totals, and, - the built example shows a consignment-style line (
Venta en consignación) with full tax breakdown.
B2C Invoice (Personas Físicas)
B2C Invoice (Personas Físicas)
- the presence of an RFC in the same format as for companies, and,
- the
mx-cfdi-fiscal-regimeandmx-cfdi-useextensions have been set to616andS01respectively reflecting that the customer is not subject to tax.
Simplified Invoice (Factura al público en general)
Simplified Invoice (Factura al público en general)
- XAXX010101000 for domestic transactions
- XEXX010101000 for foreign transactions
- the
customerfield is not required - the
$tagsfield is used to identify this as a simplified invoice.
Global Invoice
Global Invoice
- the
$tagsfield has been used to identify this as a global invoice, - each
linehas arefwhich is used to identify the invoice that it belongs to, - the
tax.ext.mx-cfdi-global-month,mx-cfdi-global-period, andmx-cfdi-global-yearfields have been used to identify the global invoice period.
Credit Note
Credit Note
- the
$typefield has been set tocredit-note, - the
precedingfield has been used to identify the invoice that is being cancelled.
Unregister a supplier
Unregistering a supplier revokes their invoice issuing privileges from your workspace. You might need to unregister an entity because the supplier is no longer your client or because of a change in their Tax ID. To do so, use the following workflow template:- Template
- Code
- Build from scratch
SAT unregister supplier
FAQ
Do I have to issue B2C invoices in Mexico?
Do I have to issue B2C invoices in Mexico?
Does Invopop support the white label (B2B2B) model in Mexico?
Does Invopop support the white label (B2B2B) model in Mexico?
Can I issue a PPD invoice through Invopop?
Can I issue a PPD invoice through Invopop?
mx-cfdi-v4 addon supports both PUE and PPD on the original invoice. What is not automated is the issuance of the subsequent payment receipts (REPs / Pago / complemento de pago) that must be emitted as payments are collected. If your operation regularly issues PPD invoices, you will need a separate mechanism for the REP lifecycle.My customer paid late and now I have to cancel and re-issue?
My customer paid late and now I have to cancel and re-issue?
FormaPago = 99, then issuing REPs as payments come in. This is calendar-driven, not payment-event-driven, and it surprises most non-Mexican implementations. The conservative approach is to issue PPD whenever there is any uncertainty about same-month payment.What happens if I miss the REP deadline?
What happens if I miss the REP deadline?
How do I configure my workspace for Mexican invoicing?
How do I configure my workspace for Mexican invoicing?
mx-cfdi-issue-place. Run invoices through the Issue CFDI workflow.Where can I find the mapping of GOBL fields to CFDI?
Where can I find the mapping of GOBL fields to CFDI?
The PAC keeps rejecting my invoice with a postal code error
The PAC keeps rejecting my invoice with a postal code error
- The postal code is real but not yet in
c_CodigoPostal. Use the closest catalog code from the place of issuance. - The receiver is
XAXX010101000orXEXX010101000andDomicilioFiscalReceptordiffers fromLugarExpedicion. They must be equal for generic RFCs. - The branch issuing the document is configured with the matriz’s postal code instead of its own.
How do I issue invoices with the 8% tax rate in border zones?
How do I issue invoices with the 8% tax rate in border zones?
- The supplier’s RFC must be enabled by the SAT to invoice with the reduced rate in border zones.
- Both the
mx-cfdi-issue-placefield and the customer’s postal code (when included) must correspond to border zones.
What does the CFDI40999 error mean and how do I resolve it?
What does the CFDI40999 error mean and how do I resolve it?
- RFC registration: The supplier’s RFC must be registered in the taxpayers registry for the appropriate border region tax incentive. Without this registration, the SAT will reject all invoices with the reduced rate. See SAT’s registration requirements and procedures for more information.
- Issue place postal code: The
mx-cfdi-issue-placefield must contain a postal code from a municipality within a border zone. - Tax rate: Ensure you’re applying the correct percentage (typically 8%) for the border zone.
I'm getting the error 'Access denied, supplier XXX is not registered in this workspace'. What should I do?
I'm getting the error 'Access denied, supplier XXX is not registered in this workspace'. What should I do?
Why does my customer's UsoCFDI keep getting rejected?
Why does my customer's UsoCFDI keep getting rejected?
RegimenFiscal. The catalog defines the valid combinations; not every code works for every régimen. For example, D01–D10 (personal deductions) are only valid for individuals, never for legal entities. RESICO contributors (régimen 626) have a restricted set. When in doubt, default to S01 (Sin efectos fiscales) — it is always valid but produces a non-deductible invoice for the receiver. Always ask the customer which UsoCFDI they need before issuing.How does Invopop handle time zones for Mexican invoices?
How does Invopop handle time zones for Mexican invoices?
issue_date and issue_time fields. However, the SAT validates these fields based on the time zone of the postal code specified in mx-cfdi-issue-place.If the issuing location is in a different time zone, the SAT may reject the invoice with an error indicating the timestamp is in the future, as it only allows up to 5 minutes ahead of the local time.To avoid this, explicitly set issue_date and issue_time in your GOBL invoice using the local time zone of the issuing location when operating outside Mexico City’s time zone.My foreign-currency invoice is failing validation
My foreign-currency invoice is failing validation
TipoCambio must be present and use the FIX rate published by Banxico in the DOF the day prior to the operation (Article 20 CFF, Article 56 Ley Aduanera). Common errors:- Using the day-of rate instead of the prior day’s.
- Quoting the inverse (USD per MXN instead of MXN per USD).
- Setting
TipoCambioon an MXN invoice (it must be 1 or absent). - Rounding inconsistently between line totals and document totals — Anexo 20 has specific rounding rules.
Where do I find Mexico-specific GOBL documentation?
Where do I find Mexico-specific GOBL documentation?
mx-cfdi-v4 addon documents required fields including UsoCFDI, RegimenFiscal, and place-of-issue.🇲🇽 Invopop resources for Mexico
🇲🇽 Invopop resources for Mexico
| Compliance | Invoicing compliance in Mexico Compliance timeline |
| Apps | SAT Mexico SW Sapien Cron |
| Guides | Issuing invoices Receiving invoices |
| FAQ | Mexico FAQ |
| GOBL | Mexico Tax Regime Mexican SAT CFDI Addon |
| GitHub | gobl.cfdi |
