

Introduction
Peppol (Pan-European Public Procurement On-Line) is a global network for electronic document exchange, widely adopted for e-invoicing across multiple countries. It provides a standardized protocol for companies to exchange business documents like invoices, credit notes, and purchase orders. The Peppol network is particularly popular in:- Nordic countries (Norway, Finland)
- Asia-Pacific region (Japan, Singapore, Malaysia, Australia, New Zealand)
- Several EU countries for business-to-government invoicing (Germany, Italy, Croatia)
| - | Sandbox | Live |
|---|---|---|
| Supplier approval | Automatically approved | Invopop validates company identity and ownership (up to 72 hours) |
| Network | Peppol Test Network | Peppol Production Network |
Setup
Let’s prepare your workspace to work with Peppol. We’ll configure the Peppol app and create three workflows:- Invoice issuance workflow: Send invoices through the Peppol network
- Invoice reception workflow: Receive invoices from the Peppol network
- Party registration workflow: Programmatically onboard companies (Parties) with Invopop
Connect the Peppol app
- Within the Console, navigate to Configuration → Apps
- Find the Peppol app in the list
- Click Connect to activate it. The Peppol app should now appear in the list of Enabled apps

Configure a workflow to issue invoices
- Template
- Code
- Build from scratch
Peppol issue invoice workflow
{
"name": "Peppol send invoice",
"description": "Send a Peppol BIS invoice through the Peppol network",
"schema": "bill/invoice",
"steps": [
{
"id": "33e23480-10ab-11f0-a09e-7b63571a4ae2",
"name": "Set state",
"provider": "silo.state",
"summary": "Set state to `processing`{.state .processing}",
"config": {
"state": "processing"
}
},
{
"id": "2354afd0-10ab-11f0-a09e-7b63571a4ae2",
"name": "Add sequential code",
"provider": "sequence.enumerate",
"summary": "Dynamic · Peppol · PPL000001",
"config": {
"name": "PPL",
"padding": 6,
"prefix": "PPL",
"start": 1
}
},
{
"id": "fb06b190-10aa-11f0-a09e-7b63571a4ae2",
"name": "Sign envelope",
"provider": "silo.close"
},
{
"id": "fc5aa8d0-10aa-11f0-a09e-7b63571a4ae2",
"name": "Generate UBL document",
"provider": "ubl.generate",
"summary": "Peppol BIS Billing v3",
"config": {
"doc_type": "bis-invoice-v3",
"private": false,
"validate_ubl": true
}
},
{
"id": "075442a0-10ab-11f0-a09e-7b63571a4ae2",
"name": "Send Peppol document",
"provider": "peppol.send"
},
{
"id": "3037a310-10ab-11f0-a09e-7b63571a4ae2",
"name": "Set state",
"provider": "silo.state",
"summary": "Set state to `sent`{.state .sent}",
"config": {
"state": "sent"
}
}
],
"rescue": [
{
"id": "39513240-10ab-11f0-a09e-7b63571a4ae2",
"name": "Set state",
"provider": "silo.state",
"summary": "Set state to `error`{.state .error}",
"config": {
"state": "error"
}
}
]
}
- Set state - to
Processing. - Sign envelope - Signs the GOBL document (can be substituted with
Add sequential codewith theSign Documentoption enabled) - Generate UBL document - Converts the GOBL document to a Peppol BIS Billing UBL 3.0 document and attaches it to the original invoice entry.
- Send Peppol document - Sends the generated XML attachment through the Peppol network
- Set state - to
Sent.
Error.Configure a workflow to receive invoices
- Template
- Code
- Build from scratch
Peppol receive document workflow
{
"name": "Peppol receive invoice",
"description": "Receive an invoice through Peppol",
"schema": "bill/invoice",
"steps": [
{
"id": "db61c3c0-0fb5-11f0-b078-9fc456829eca",
"name": "Import Peppol document",
"provider": "peppol.import",
"next": [
{
"status": "OK",
"code": "UBL",
"steps": [
{
"id": "62e94570-8fdb-11f0-a8fb-61ec9e5a76ba",
"name": "Import UBL document",
"provider": "ubl.import"
}
],
"stop": false
},
{
"status": "OK",
"code": "CII",
"steps": [
{
"id": "6480ae50-8fdb-11f0-a8fb-61ec9e5a76ba",
"name": "Import CII document",
"provider": "cii.import"
}
],
"stop": false
}
]
},
{
"id": "fdfc81a0-6e23-11f0-913b-5732f966b346",
"name": "Set folder",
"provider": "silo.folder",
"summary": "Set folder to `Invoices · Expenses`{.font-medium}",
"config": {
"folder": "expenses"
}
},
{
"id": "dd14a3e0-0fb5-11f0-b078-9fc456829eca",
"name": "Set state",
"provider": "silo.state",
"summary": "Set state to `registered`{.state .registered}",
"config": {
"state": "registered"
}
}
],
"rescue": [
{
"id": "e109d2e0-0fb5-11f0-b078-9fc456829eca",
"name": "Set state",
"provider": "silo.state",
"summary": "Set state to `error`{.state .error}",
"config": {
"state": "error"
}
}
]
}
- Import Peppol document - Add two conditions with codes UBL and CII to handle both formats.
- Import UBL document - Add this to the condition with UBL.
- Import CII document - Add this to the condition with CII.
- Set state - to
Registered. - Send Webhook (optional) - let your services know a Peppol document was received.
Error.Configure the Peppol app
- Incoming Workflow: Select the Receive Invoice Workflow created in Step 3. This is where the app will send incoming invoices (expenses) received from the Peppol network.
Configure a Party registration workflow
- Template
- Code
- Build from scratch
Peppol supplier registration workflow
{
"name": "Peppol register party",
"description": "Register a party with Peppol to issue and receive invoices",
"schema": "org/party",
"steps": [
{
"id": "0adf46e0-8fdb-11f0-a8fb-61ec9e5a76ba",
"name": "Register party for Peppol approval",
"provider": "peppol.register.approval"
},
{
"id": "0e44b900-8fdb-11f0-a8fb-61ec9e5a76ba",
"name": "Set state",
"provider": "silo.state",
"summary": "Set state to `processing`{.state .processing}",
"config": {
"state": "processing"
}
},
{
"id": "12aaf950-8fdb-11f0-a8fb-61ec9e5a76ba",
"name": "Wait for Peppol approval",
"provider": "peppol.wait.approval"
},
{
"id": "7a5a4db0-0fae-11f0-b37b-0be1c251a274",
"name": "Register party on Peppol",
"provider": "peppol.register",
"summary": "Enabled · groups: ubl-invoice",
"config": {
"disable": false,
"doc_groups": [
"ubl-invoice"
],
"visibility": "smp+sml+peppol"
}
},
{
"id": "7c2fa9f0-0fae-11f0-b37b-0be1c251a274",
"name": "Set state",
"provider": "silo.state",
"summary": "Set state to `registered`{.state .registered}",
"config": {
"state": "registered"
}
}
],
"rescue": [
{
"id": "a34e83f0-25dc-11f0-b641-350e77c28eed",
"name": "Set state",
"provider": "silo.state",
"summary": "Set state to `error`{.state .error}",
"config": {
"state": "error"
}
}
]
}
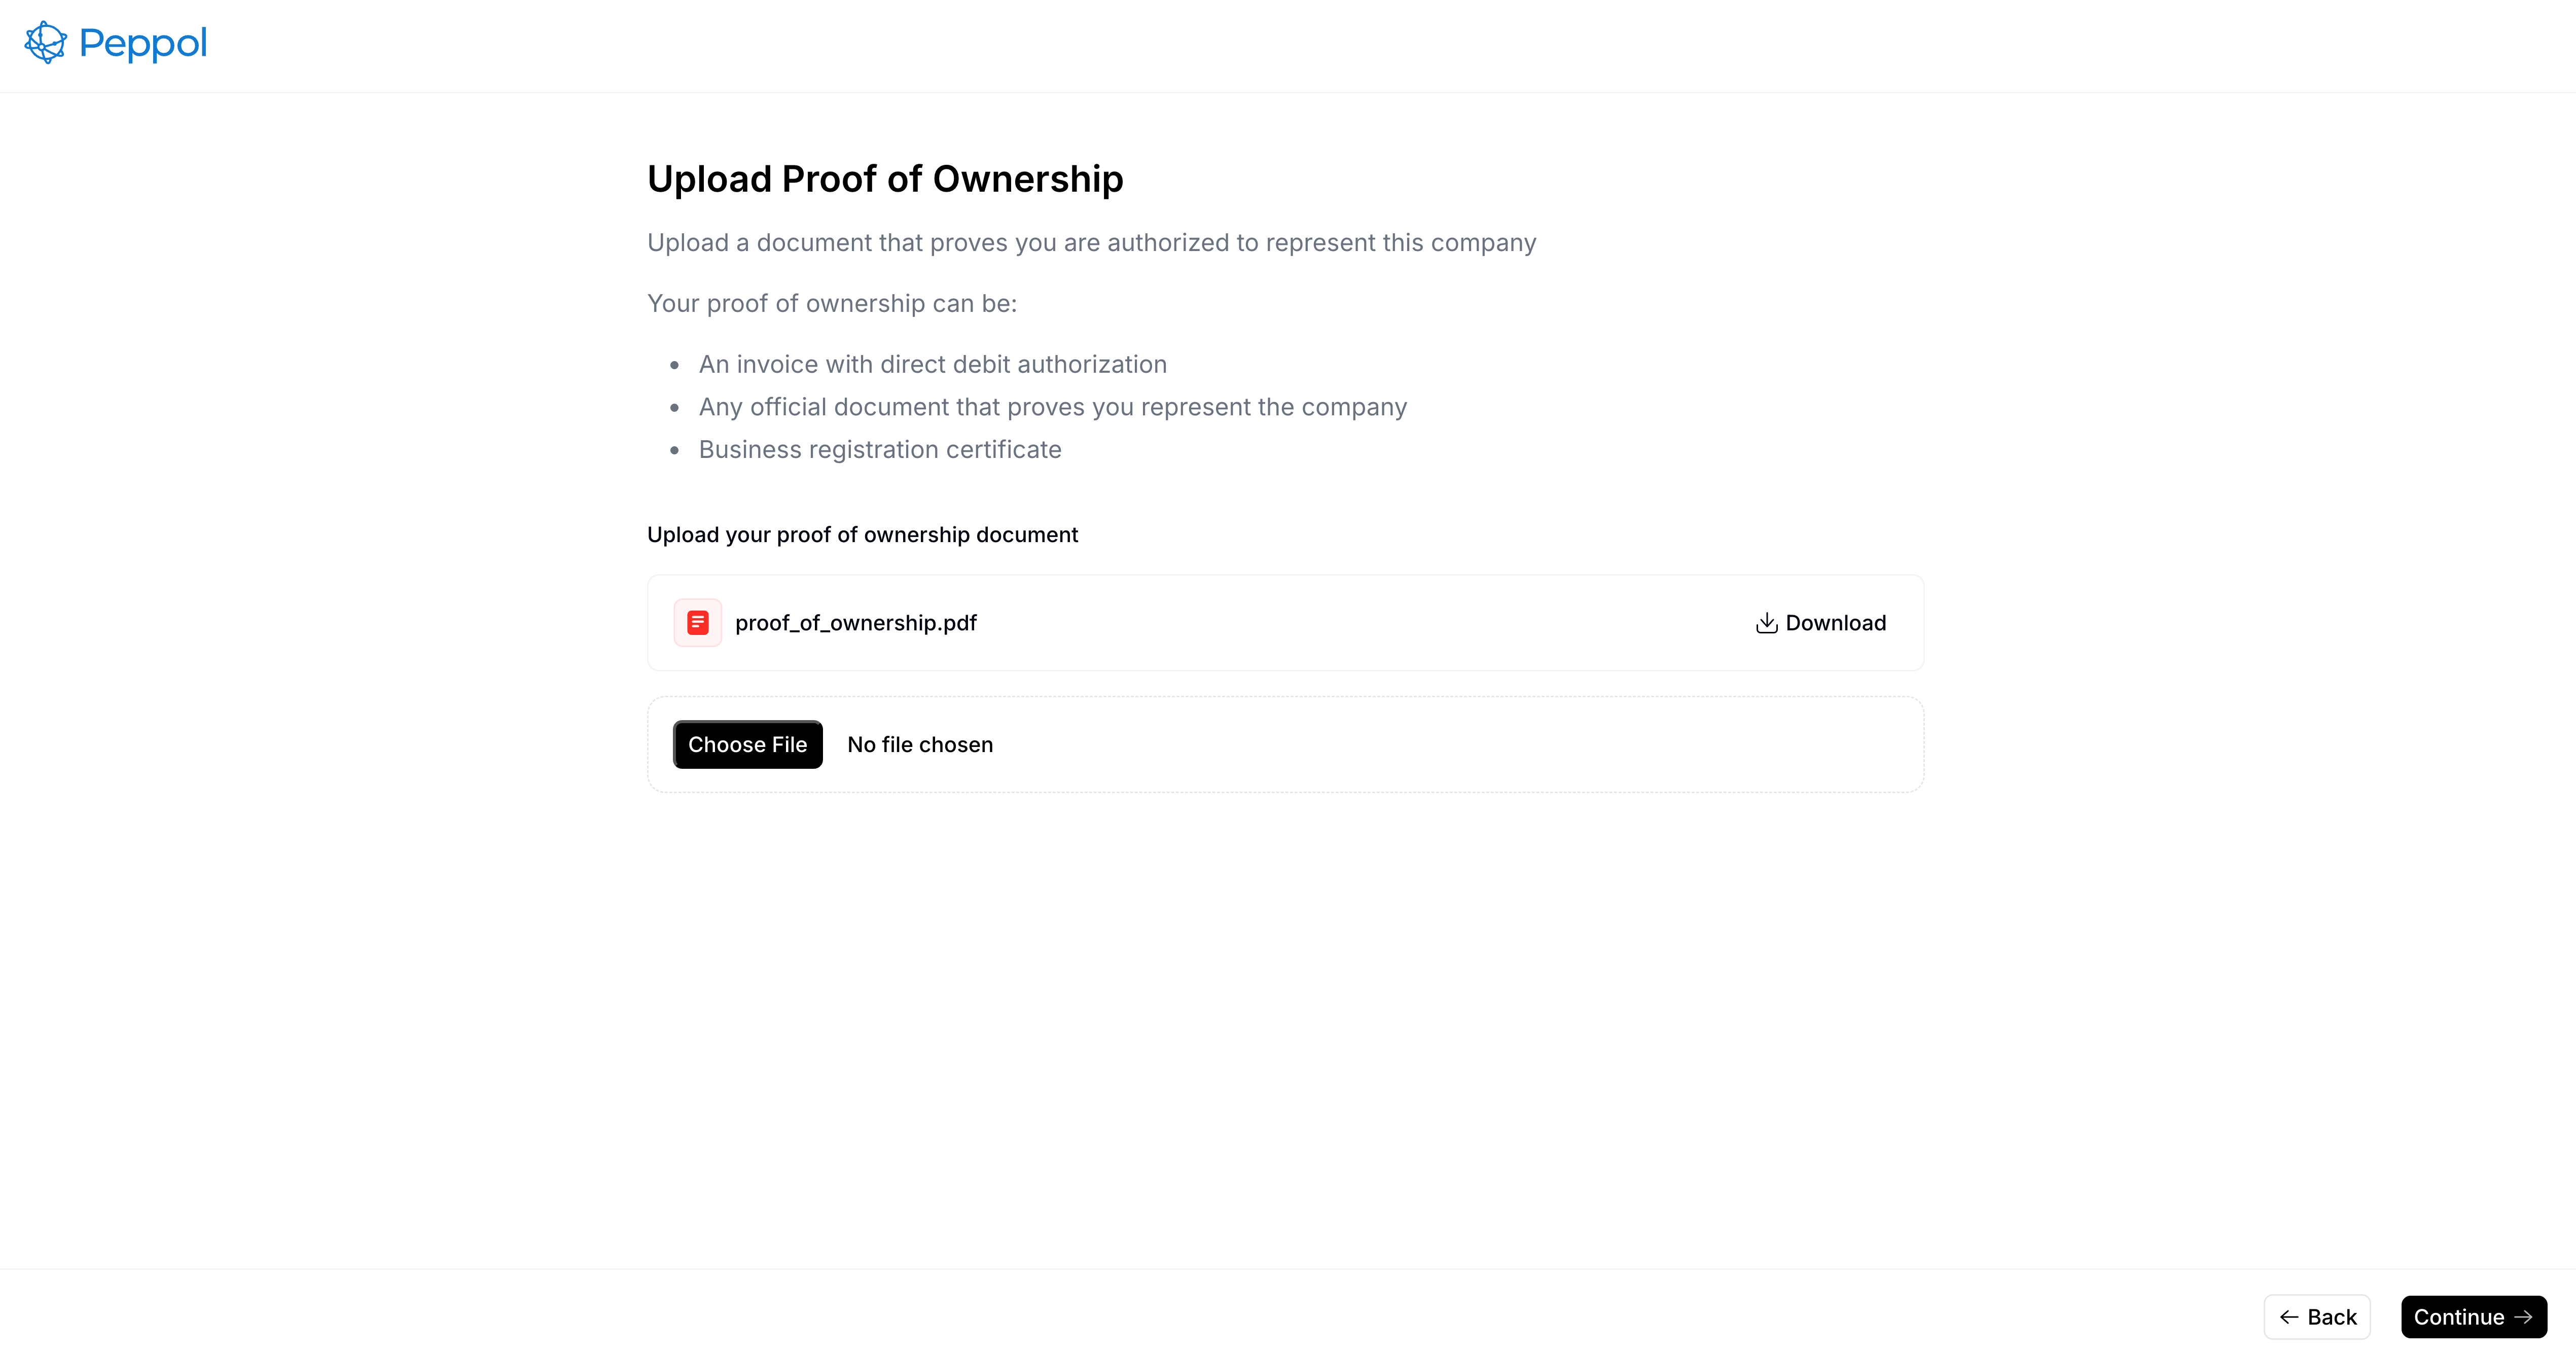
- Register party for Peppol approval - This generates a link to the registration wizard where proof of ownership will be collected.
- Set state - select
Processing. - Wait for Peppol approval - Invopop will validate the company identity and ownership. This can take up to 72 hours.
- Register party on Peppol - Complete the normal registration process after approval.
- Set state - select
Registered.
Error.Running
After setup, you can perform three key operations with Peppol in Invopop: onboarding entities (parties) so they can use Peppol, sending invoices through Peppol, and receiving Peppol invoices.Registering parties
Business entities are represented in Invopop as GOBLorg.party objects, which we call Parties.
Peppol requires Invopop to collect proof of ownership for regulatory compliance. As outlined in Section 3.3 End user Identification of the Internal Regulations II document, key details such as VAT number, address, contact information, and company name must be provided and validated during registration.
To register a party:
- Upload it to the Silo with required company information
- Send it to the party registration workflow
Upload a party document
You can upload parties via the Create an Entry API endpoint or manually through the Console. For this guide, we’ll demonstrate the manual process:- Find the Parties section in the sidebar and click Suppliers
- Click + New Supplier to open the editor
- Use one of the following examples and adapt to your needs
 Belgium
 Germany
 Italy
Italy Spain
Spain
{
"$schema": "https://gobl.org/draft-0/org/party",
"name": "Benelux Industries SA/NV",
"tax_id": {
"country": "BE",
"code": "0316597904"
},
"addresses": [
{
"num": "42",
"street": "Rue de la Loi",
"locality": "Brussels",
"region": "Brussels-Capital",
"code": "1040",
"country": "BE"
}
],
"emails": [
{
"addr": "billing+test@example.com"
}
]
}
{
"$schema": "https://gobl.org/draft-0/org/party",
"name": "Rheinland Technologies GmbH",
"tax_id": {
"country": "DE",
"code": "879558966"
},
"addresses": [
{
"num": "27",
"street": "Friedrichstraße",
"locality": "Berlin",
"region": "BE",
"code": "10117",
"country": "DE"
}
],
"emails": [
{
"addr": "rechnungen@rheinlandtech.de"
}
]
}
{
"$schema": "https://gobl.org/draft-0/org/party",
"name": "Tecnologie Adriatico S.r.l.",
"tax_id": {
"country": "IT",
"code": "00159560366"
},
"addresses": [
{
"num": "15",
"street": "Via Giuseppe Verdi",
"locality": "Milano",
"region": "MI",
"code": "20121",
"country": "IT"
}
],
"emails": [
{
"addr": "fatturazione@tecnologieadriatico.it"
}
],
"ext": {
"it-sdi-fiscal-regime": "RF01"
}
}
{
"$schema": "https://gobl.org/draft-0/org/party",
"name": "Invopop S.L.",
"tax_id": {
"country": "ES",
"code": "B85905495"
},
"people": [
{
"name": {
"given": "Juan",
"surname": "Pérez González"
},
"identities": [
{
"key": "national",
"code": "123456789A"
}
],
"addresses": [
{
"num": "10",
"street": "Calle Ejemplo",
"locality": "Madrid",
"region": "Madrid",
"code": "28020",
"country": "ES"
}
]
}
],
"addresses": [
{
"num": "42",
"street": "Calle Pradillo",
"locality": "Madrid",
"region": "Madrid",
"code": "28002",
"country": "ES"
}
],
"emails": [
{
"addr": "billing@example.com"
}
]
}
- Company name (fiscal name)
- VAT number (tax ID)
- Complete company address
- Contact information
- Peppol Participant ID*
"inboxes": [
{
"key": "peppol",
"scheme": "9920", // country schemeID
"code": "ESB85905495" // Participant ID derived from VAT ID
}
],
Send to the registration workflow
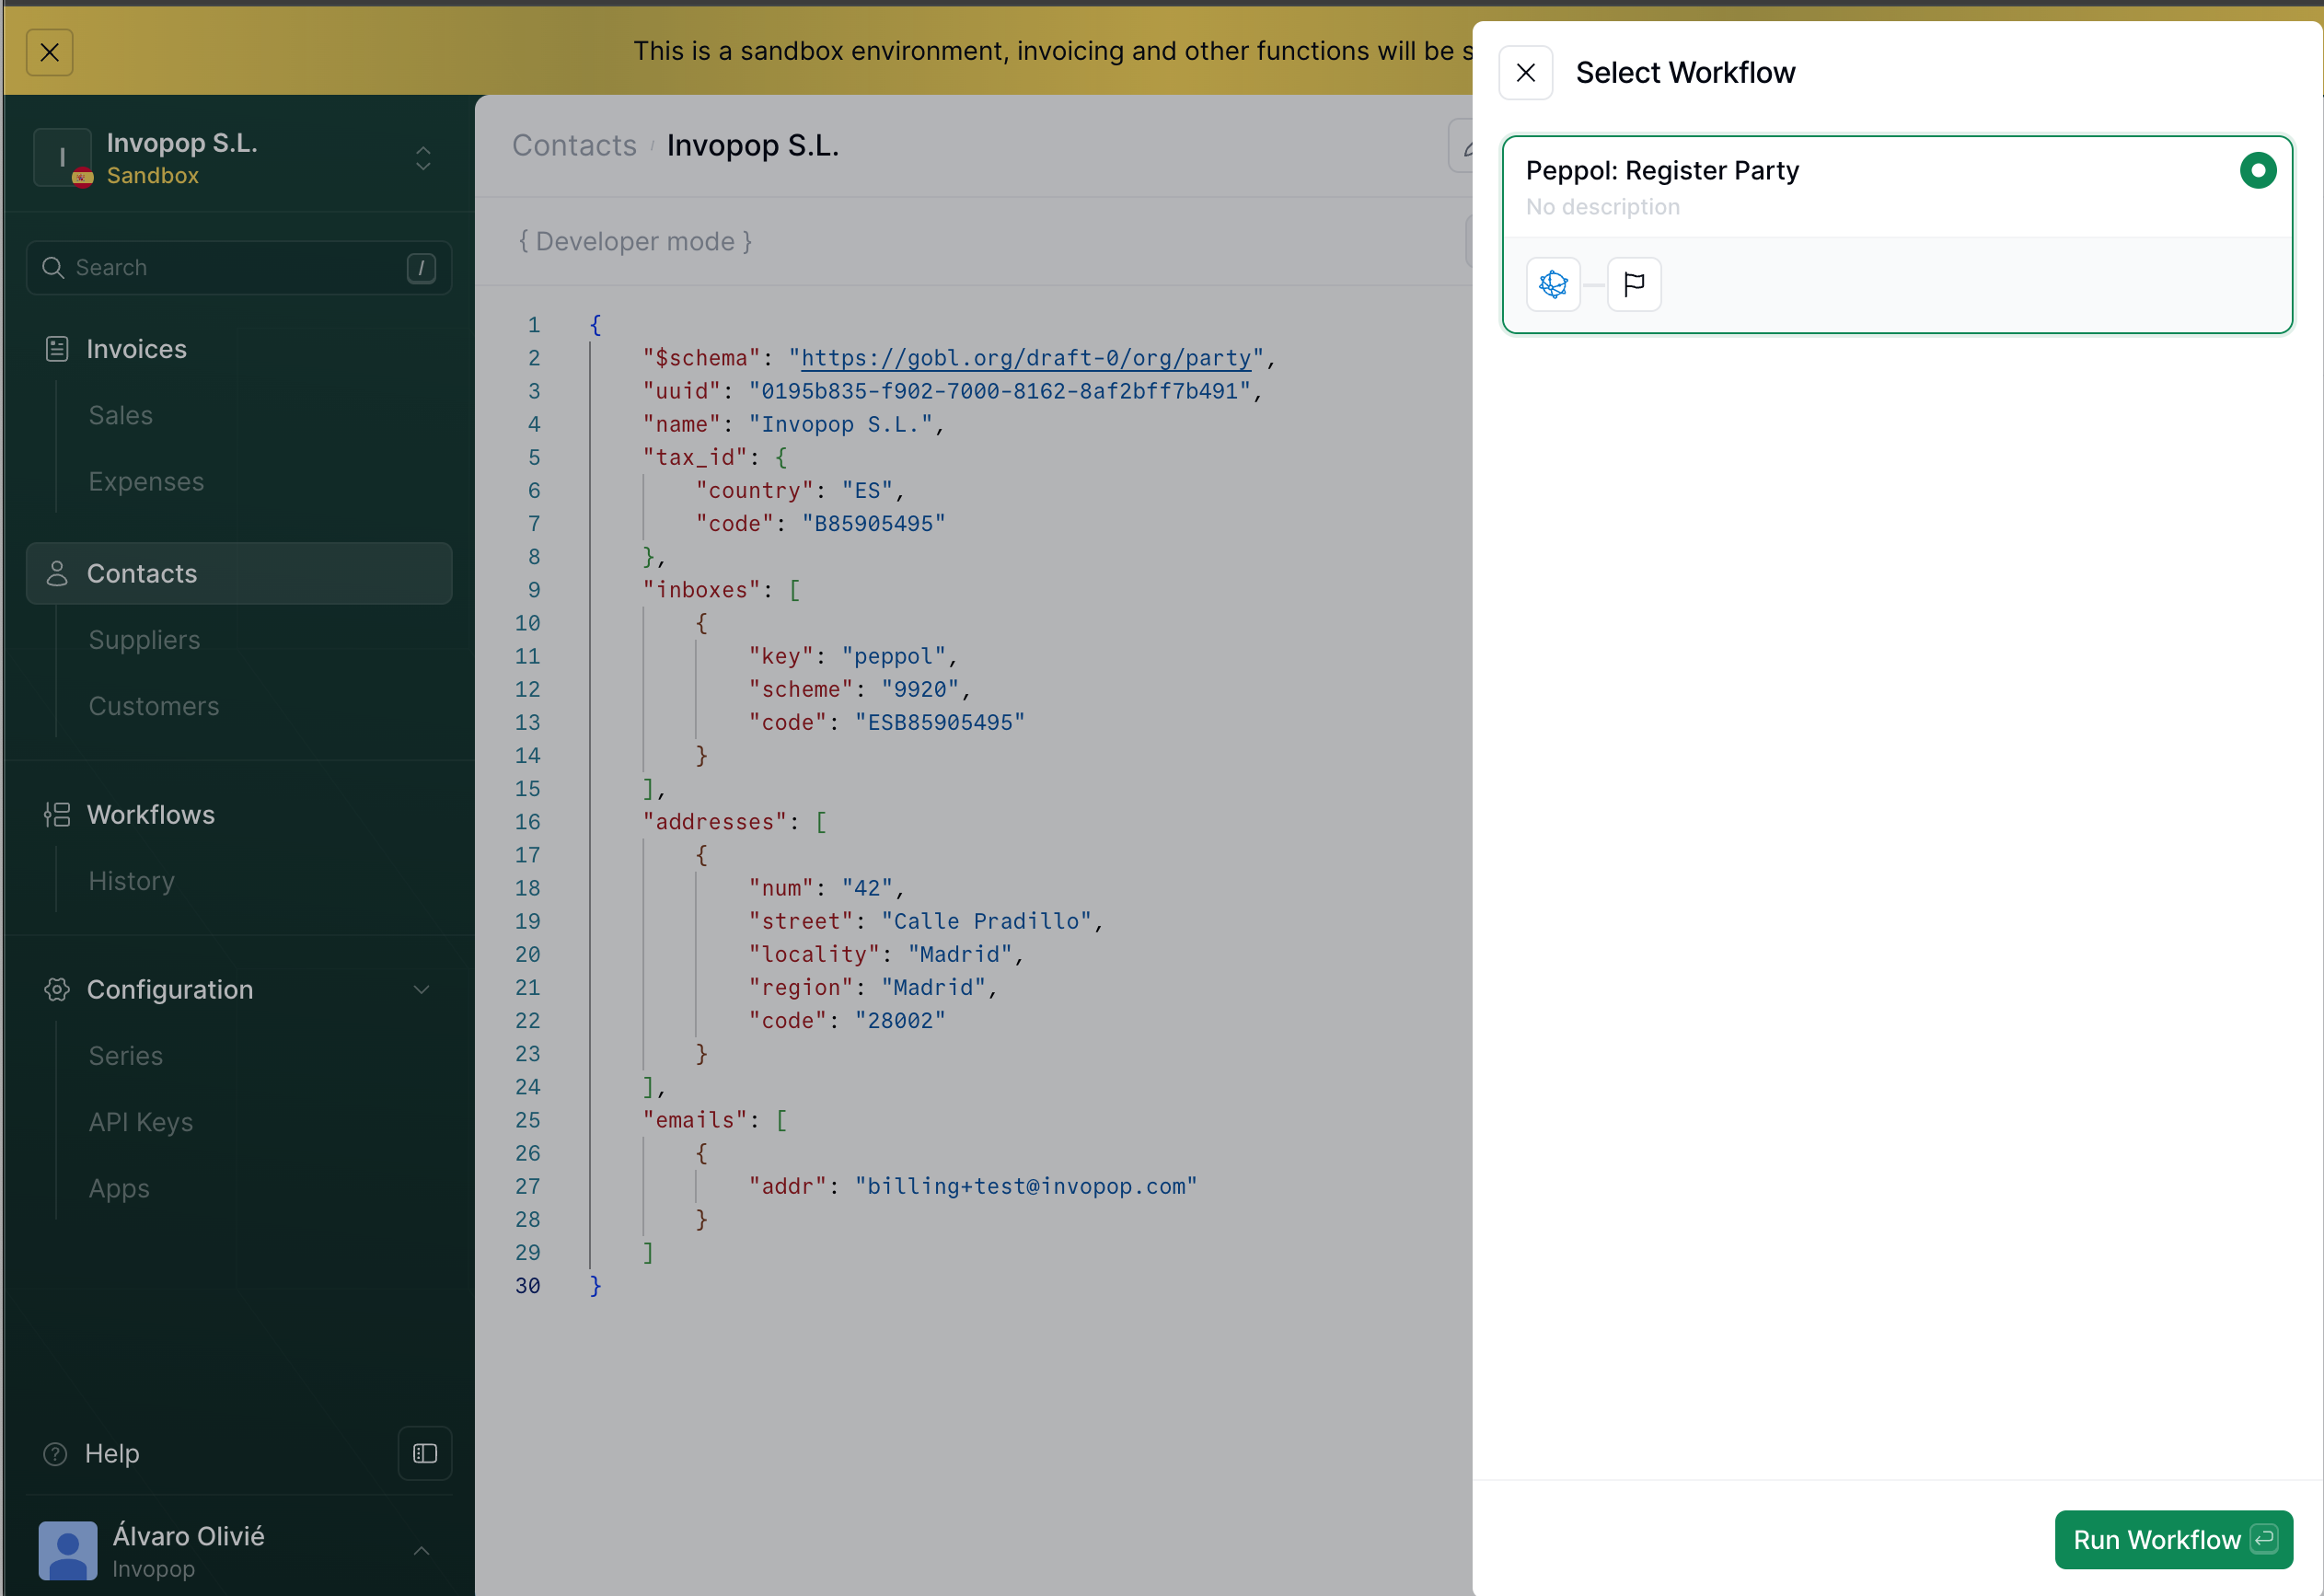
Once the document is saved:- Click the Select Workflow button
- Select the Register Supplier workflow created during setup
- Click Run Workflow
Programmatic registration (white-label)
For programmatic integration, upload the proof of ownership document using the API. This is particularly useful for white-label implementations when you want to integrate the registration process into your own application. After using this API endpoint the verification process will begin automatically.Completion
After Invopop approves your registration, your party will be registered in the Peppol network. You’ll see the Peppol Participant ID in the Meta tab of the entry, and the GOBL document will contain aninboxes array.
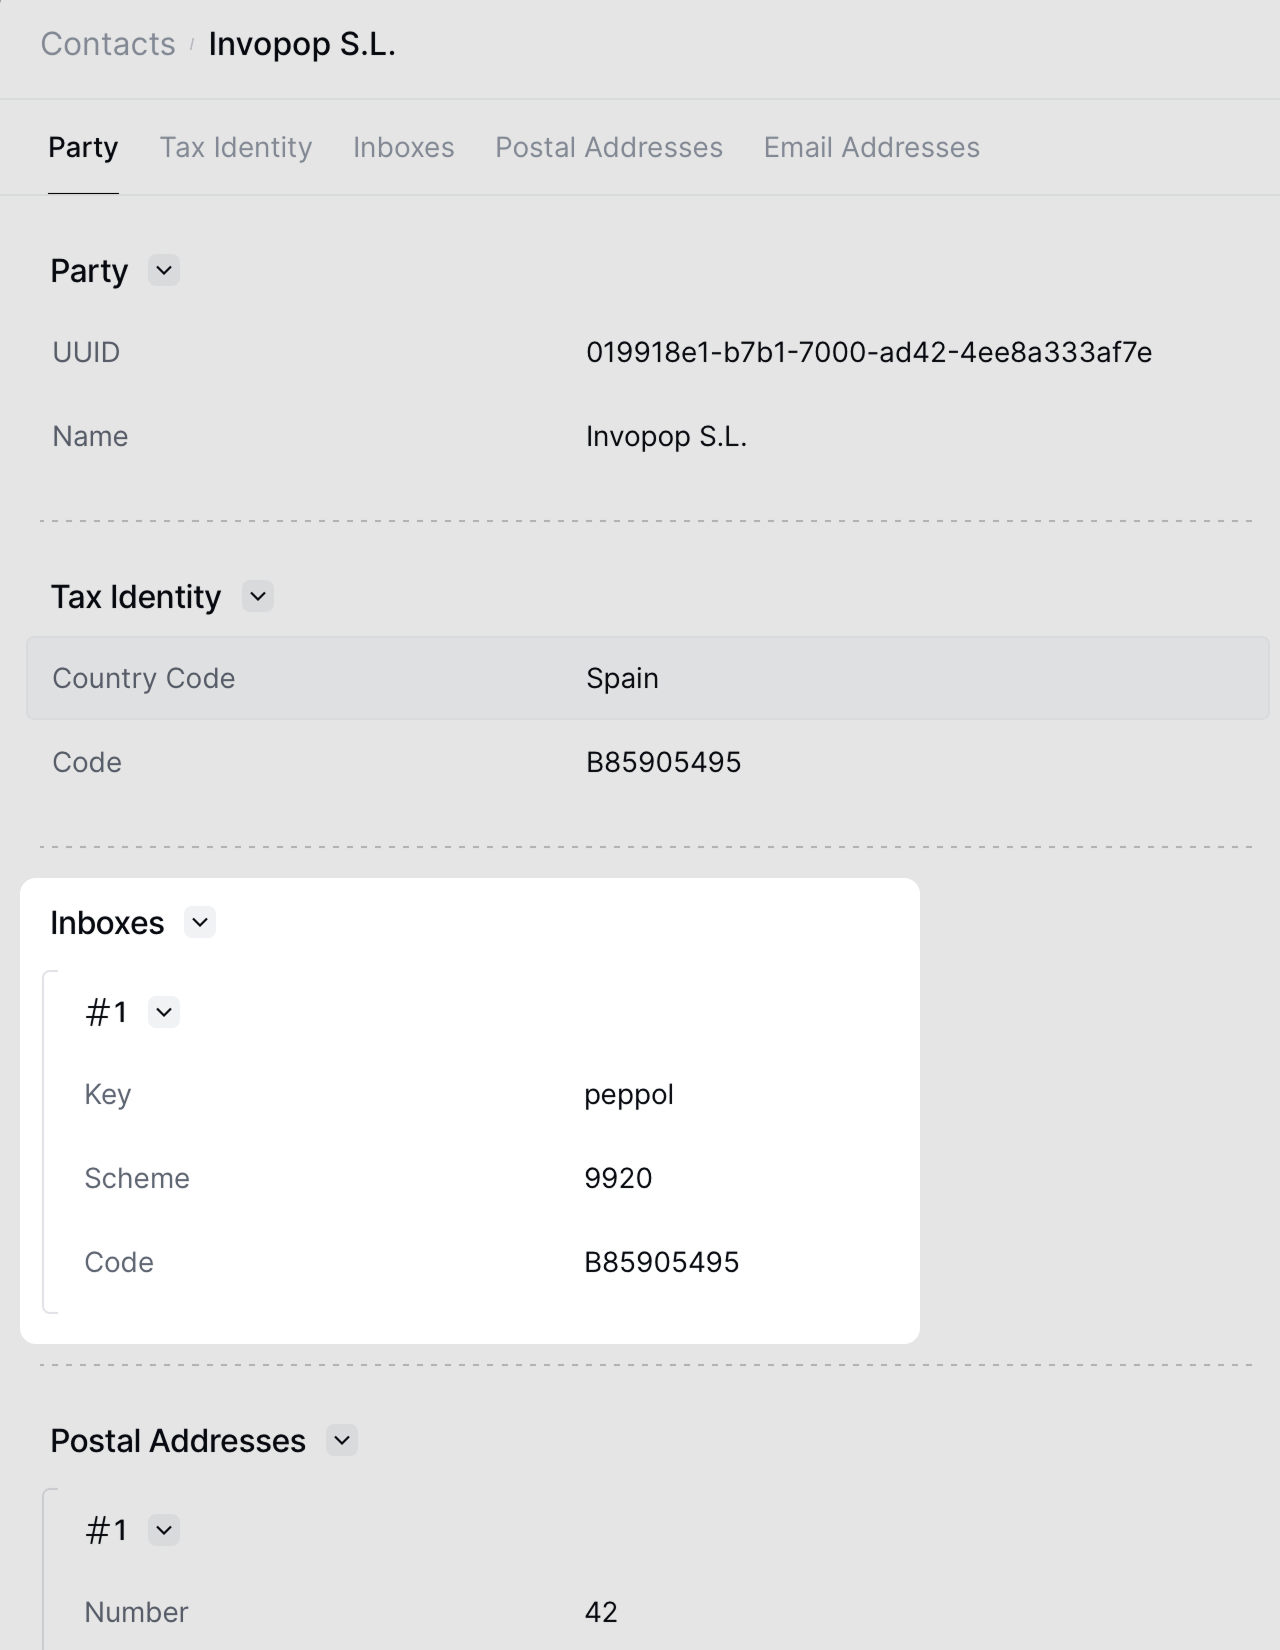
Peppol participant inboxes
Unregistering a participant
If you need to unregister an entity (because the supplier is no longer your client, for example), use the following workflow template:{
"name": "Peppol unregister party",
"description": "Unregister a party from Peppol",
"schema": "org/party",
"steps": [
{
"id": "453beac0-70a7-11f1-aca9-697108ec55ef",
"name": "Unregister supplier from Peppol",
"provider": "peppol.unregister"
},
{
"id": "7e79f610-adc5-11f0-abd8-03a58bc40d2a",
"name": "Set state",
"provider": "silo.state",
"summary": "Set state to `void`{.state .void}",
"config": {
"state": "void"
}
}
],
"rescue": [
{
"id": "9141b350-adc5-11f0-abd8-03a58bc40d2a",
"name": "Set state",
"provider": "silo.state",
"summary": "Set state to `error`{.state .error}",
"config": {
"state": "error"
}
}
]
}
Sending invoices
To send an invoice:- Store it as a Silo Entry with the Peppol inboxes previously obtained.
- Send it to the Sending Invoice Workflow created during setup
eu-en16931-v2017 addon to enable validations and extensions needed for Peppol
- General
- Belgium
- Germany
- Italy
- Spain
Peppol B2B invoice
Peppol B2B invoice
eu-en16931-v2017 addon applies the European norm rules; the peppol inboxes on both parties identify the sending and receiving participants.Notice:- both parties carry a
peppolinbox with the participantschemeandcodeused for routing, - the line tax states the VAT
percentexplicitly along with theuntdid-tax-categoryextension, and, - totals are calculated automatically when the document is built.
{
"$schema": "https://gobl.org/draft-0/bill/invoice",
"$addons": [
"eu-en16931-v2017"
],
"type": "standard",
"series": "INV",
"code": "PP000003",
"issue_date": "2025-04-03",
"currency": "EUR",
"tax": {
"rounding": "currency"
},
"supplier": {
"name": "Cyberdyne Systems Spain S.L.",
"tax_id": {
"country": "ES",
"code": "B98602642"
},
"addresses": [
{
"street": "Paseo de la Castellana 120",
"locality": "Madrid",
"region": "Madrid",
"code": "28020",
"country": "ES"
}
],
"inboxes": [
{
"key": "peppol",
"scheme": "9920",
"code": "ESB98602642"
}
],
"emails": [
{
"addr": "billing@cyberdynesys.com"
}
]
},
"customer": {
"name": "Invopop S.L.",
"tax_id": {
"country": "ES",
"code": "B85905495"
},
"addresses": [
{
"street": "Calle Pradillo 42",
"locality": "Madrid",
"region": "Madrid",
"code": "28002",
"country": "ES"
}
],
"inboxes": [
{
"key": "peppol",
"scheme": "9920",
"code": "ESB85905495"
}
],
"emails": [
{
"addr": "billing+test@invopop.com"
}
]
},
"lines": [
{
"quantity": "12",
"item": {
"name": "Sambox services",
"price": "145.00",
"unit": "one"
},
"taxes": [
{
"cat": "VAT",
"percent": "21.0%",
"ext": {
"untdid-tax-category": "S"
}
}
]
}
],
"payment": {
"terms": {
"detail": "Will be paid by 2026-06-02"
}
}
}
{
"$schema": "https://gobl.org/draft-0/bill/invoice",
"$regime": "ES",
"$addons": [
"eu-en16931-v2017"
],
"type": "standard",
"series": "INV",
"code": "PP000003",
"issue_date": "2025-04-03",
"currency": "EUR",
"tax": {
"rounding": "currency",
"ext": {
"untdid-document-type": "380"
}
},
"supplier": {
"name": "Cyberdyne Systems Spain S.L.",
"tax_id": {
"country": "ES",
"code": "B98602642"
},
"endpoints": [
{
"uri": "iso6523-actorid-upis::9920:ESB98602642"
}
],
"inboxes": [
{
"key": "peppol",
"scheme": "9920",
"code": "ESB98602642"
}
],
"addresses": [
{
"street": "Paseo de la Castellana 120",
"locality": "Madrid",
"region": "Madrid",
"code": "28020",
"country": "ES"
}
],
"emails": [
{
"addr": "billing@cyberdynesys.com"
}
]
},
"customer": {
"name": "Invopop S.L.",
"tax_id": {
"country": "ES",
"code": "B85905495"
},
"endpoints": [
{
"uri": "iso6523-actorid-upis::9920:ESB85905495"
}
],
"inboxes": [
{
"key": "peppol",
"scheme": "9920",
"code": "ESB85905495"
}
],
"addresses": [
{
"street": "Calle Pradillo 42",
"locality": "Madrid",
"region": "Madrid",
"code": "28002",
"country": "ES"
}
],
"emails": [
{
"addr": "billing+test@invopop.com"
}
]
},
"lines": [
{
"i": 1,
"quantity": "12",
"item": {
"name": "Sambox services",
"price": "145.00",
"unit": "one"
},
"sum": "1740.00",
"taxes": [
{
"cat": "VAT",
"key": "standard",
"percent": "21.0%",
"ext": {
"untdid-tax-category": "S"
}
}
],
"total": "1740.00"
}
],
"payment": {
"terms": {
"notes": "Will be paid by 2026-06-02"
}
},
"totals": {
"sum": "1740.00",
"total": "1740.00",
"taxes": {
"categories": [
{
"code": "VAT",
"rates": [
{
"key": "standard",
"ext": {
"untdid-tax-category": "S"
},
"base": "1740.00",
"percent": "21.0%",
"amount": "365.40"
}
],
"amount": "365.40"
}
],
"sum": "365.40"
},
"tax": "365.40",
"total_with_tax": "2105.40",
"payable": "2105.40"
}
}
Peppol B2B invoice with tax-inclusive prices (Belgium)
Peppol B2B invoice with tax-inclusive prices (Belgium)
tax.prices_includeis set toVAT, so line prices are treated as tax-inclusive and the base amounts are derived automatically,- the supplier’s inbox uses the combined
scheme:codeform (0208:0735585741), while the customer statesschemeandcodeseparately — both are equivalent, and, - the two lines apply the
general(21%) andreduced(6%) Belgian VAT rates.
{
"$schema": "https://gobl.org/draft-0/bill/invoice",
"$regime": "BE",
"$addons": ["eu-en16931-v2017"],
"type": "standard",
"series": "S2025",
"code": "001",
"issue_date": "2025-05-20",
"currency": "EUR",
"tax": {
"prices_include": "VAT"
},
"supplier": {
"name": "Provide One BV",
"tax_id": {
"country": "BE",
"code": "0735585741"
},
"inboxes": [
{
"key": "peppol",
"code": "0208:0735585741"
}
],
"addresses": [
{
"num": "12",
"street": "Rue de la Loi",
"locality": "Bruxelles",
"region": "Bruxelles",
"code": "1040",
"country": "BE"
}
],
"emails": [
{
"addr": "billing@example.com"
}
]
},
"customer": {
"name": "Sample Consumer",
"tax_id": {
"country": "BE",
"code": "0699912507"
},
"inboxes": [
{
"key": "peppol",
"scheme": "0208",
"code": "0699912507"
}
],
"addresses": [{
"country": "BE"
}]
},
"payment": {
"terms": {
"due_dates": [
{
"date": "2025-05-30",
"percent": "100%"
}
]
}
},
"lines": [
{
"quantity": "20",
"item": {
"name": "Development services",
"price": "90.00",
"unit": "h"
},
"discounts": [
{
"reason": "Special discount",
"percent": "10%"
}
],
"taxes": [
{
"cat": "VAT",
"rate": "general"
}
]
},
{
"quantity": "1",
"item": {
"name": "Promotional cookies",
"price": "10.00"
},
"taxes": [
{
"cat": "VAT",
"rate": "reduced"
}
]
}
]
}
{
"$schema": "https://gobl.org/draft-0/bill/invoice",
"$regime": "BE",
"$addons": [
"eu-en16931-v2017"
],
"type": "standard",
"series": "S2025",
"code": "001",
"issue_date": "2025-05-20",
"currency": "EUR",
"tax": {
"prices_include": "VAT",
"ext": {
"untdid-document-type": "380"
}
},
"supplier": {
"name": "Provide One BV",
"tax_id": {
"country": "BE",
"code": "0735585741"
},
"endpoints": [
{
"uri": "iso6523-actorid-upis::0208:0735585741"
}
],
"inboxes": [
{
"key": "peppol",
"scheme": "0208",
"code": "0735585741"
}
],
"addresses": [
{
"num": "12",
"street": "Rue de la Loi",
"locality": "Bruxelles",
"region": "Bruxelles",
"code": "1040",
"country": "BE"
}
],
"emails": [
{
"addr": "billing@example.com"
}
]
},
"customer": {
"name": "Sample Consumer",
"tax_id": {
"country": "BE",
"code": "0699912507"
},
"endpoints": [
{
"uri": "iso6523-actorid-upis::0208:0699912507"
}
],
"inboxes": [
{
"key": "peppol",
"scheme": "0208",
"code": "0699912507"
}
],
"addresses": [
{
"country": "BE"
}
]
},
"lines": [
{
"i": 1,
"quantity": "20",
"item": {
"name": "Development services",
"price": "90.00",
"unit": "h"
},
"sum": "1800.00",
"discounts": [
{
"reason": "Special discount",
"percent": "10%",
"amount": "180.00"
}
],
"taxes": [
{
"cat": "VAT",
"key": "standard",
"rate": "general",
"percent": "21.0%",
"ext": {
"untdid-tax-category": "S"
}
}
],
"total": "1620.00"
},
{
"i": 2,
"quantity": "1",
"item": {
"name": "Promotional cookies",
"price": "10.00",
"unit": "one"
},
"sum": "10.00",
"taxes": [
{
"cat": "VAT",
"key": "standard",
"rate": "reduced",
"percent": "6.0%",
"ext": {
"untdid-tax-category": "S"
}
}
],
"total": "10.00"
}
],
"payment": {
"terms": {
"due_dates": [
{
"date": "2025-05-30",
"amount": "1630.00",
"percent": "100%"
}
]
}
},
"totals": {
"sum": "1630.00",
"tax_included": "281.72",
"total": "1348.28",
"taxes": {
"categories": [
{
"code": "VAT",
"rates": [
{
"key": "standard",
"ext": {
"untdid-tax-category": "S"
},
"base": "1338.84",
"percent": "21.0%",
"amount": "281.16"
},
{
"key": "standard",
"ext": {
"untdid-tax-category": "S"
},
"base": "9.43",
"percent": "6.0%",
"amount": "0.57"
}
],
"amount": "281.72"
}
],
"sum": "281.72"
},
"tax": "281.72",
"total_with_tax": "1630.00",
"payable": "1630.00"
}
}
Peppol B2B credit note
Peppol B2B credit note
- the
typeis set tocredit-note, which theeu-en16931-v2017addon maps to UNTDID document type381, - the
precedingarray references the original invoice byseries,code, andissue_date, with areasonfor the correction, and, - the lines state the credited amounts as positive values — the document type is what reverses them.
{
"$schema": "https://gobl.org/draft-0/bill/invoice",
"$addons": [
"eu-en16931-v2017"
],
"type": "credit-note",
"series": "CN",
"code": "PP000104",
"issue_date": "2025-04-10",
"currency": "EUR",
"tax": {
"rounding": "currency"
},
"preceding": [
{
"type": "standard",
"series": "INV",
"code": "PP000003",
"issue_date": "2025-04-03",
"reason": "Services not delivered"
}
],
"supplier": {
"name": "Cyberdyne Systems Spain S.L.",
"tax_id": {
"country": "ES",
"code": "B98602642"
},
"addresses": [
{
"street": "Paseo de la Castellana 120",
"locality": "Madrid",
"region": "Madrid",
"code": "28020",
"country": "ES"
}
],
"inboxes": [
{
"key": "peppol",
"scheme": "9920",
"code": "ESB98602642"
}
],
"emails": [
{
"addr": "billing@cyberdynesys.com"
}
]
},
"customer": {
"name": "Invopop S.L.",
"tax_id": {
"country": "ES",
"code": "B85905495"
},
"addresses": [
{
"street": "Calle Pradillo 42",
"locality": "Madrid",
"region": "Madrid",
"code": "28002",
"country": "ES"
}
],
"inboxes": [
{
"key": "peppol",
"scheme": "9920",
"code": "ESB85905495"
}
],
"emails": [
{
"addr": "billing+test@invopop.com"
}
]
},
"lines": [
{
"quantity": "2",
"item": {
"name": "Sambox services",
"price": "145.00",
"unit": "one"
},
"taxes": [
{
"cat": "VAT",
"percent": "21.0%",
"ext": {
"untdid-tax-category": "S"
}
}
]
}
]
}
{
"$schema": "https://gobl.org/draft-0/bill/invoice",
"$regime": "ES",
"$addons": [
"eu-en16931-v2017"
],
"type": "credit-note",
"series": "CN",
"code": "PP000104",
"issue_date": "2025-04-10",
"currency": "EUR",
"preceding": [
{
"type": "standard",
"issue_date": "2025-04-03",
"series": "INV",
"code": "PP000003",
"reason": "Services not delivered"
}
],
"tax": {
"rounding": "currency",
"ext": {
"untdid-document-type": "381"
}
},
"supplier": {
"name": "Cyberdyne Systems Spain S.L.",
"tax_id": {
"country": "ES",
"code": "B98602642"
},
"endpoints": [
{
"uri": "iso6523-actorid-upis::9920:ESB98602642"
}
],
"inboxes": [
{
"key": "peppol",
"scheme": "9920",
"code": "ESB98602642"
}
],
"addresses": [
{
"street": "Paseo de la Castellana 120",
"locality": "Madrid",
"region": "Madrid",
"code": "28020",
"country": "ES"
}
],
"emails": [
{
"addr": "billing@cyberdynesys.com"
}
]
},
"customer": {
"name": "Invopop S.L.",
"tax_id": {
"country": "ES",
"code": "B85905495"
},
"endpoints": [
{
"uri": "iso6523-actorid-upis::9920:ESB85905495"
}
],
"inboxes": [
{
"key": "peppol",
"scheme": "9920",
"code": "ESB85905495"
}
],
"addresses": [
{
"street": "Calle Pradillo 42",
"locality": "Madrid",
"region": "Madrid",
"code": "28002",
"country": "ES"
}
],
"emails": [
{
"addr": "billing+test@invopop.com"
}
]
},
"lines": [
{
"i": 1,
"quantity": "2",
"item": {
"name": "Sambox services",
"price": "145.00",
"unit": "one"
},
"sum": "290.00",
"taxes": [
{
"cat": "VAT",
"key": "standard",
"percent": "21.0%",
"ext": {
"untdid-tax-category": "S"
}
}
],
"total": "290.00"
}
],
"totals": {
"sum": "290.00",
"total": "290.00",
"taxes": {
"categories": [
{
"code": "VAT",
"rates": [
{
"key": "standard",
"ext": {
"untdid-tax-category": "S"
},
"base": "290.00",
"percent": "21.0%",
"amount": "60.90"
}
],
"amount": "60.90"
}
],
"sum": "60.90"
},
"tax": "60.90",
"total_with_tax": "350.90",
"payable": "350.90"
}
}
Peppol Belgium - B2B standard invoice
Peppol Belgium - B2B standard invoice
- The customer is a registered business (has a tax identification number).
- The customer needs a complete invoice with all tax details for accounting or tax purposes.
eu-en16931-v2017 addon and ensure the customer field contains valid tax identification details. The addon will automatically set the document type to 380 when the silo entry is built (which happens automatically when saving a silo entry through the API or console).{
"$schema": "https://gobl.org/draft-0/bill/invoice",
"$regime": "BE",
"$addons": [
"eu-en16931-v2017"
],
"type": "standard",
"series": "INV",
"code": "PP000003",
"issue_date": "2025-04-03",
"currency": "EUR",
"supplier": {
"name": "Benelux Industries SA/NV",
"tax_id": {
"country": "BE",
"code": "0316597904"
},
"inboxes": [
{
"key": "peppol",
"scheme": "0208",
"code": "0316597904"
}
],
"addresses": [
{
"num": "42",
"street": "Rue de la Loi",
"locality": "Brussels",
"region": "Brussels-Capital",
"code": "1040",
"country": "BE"
}
],
"emails": [
{
"addr": "test@example.com"
}
]
},
"customer": {
"name": "Benelux Industries SA/NV",
"tax_id": {
"country": "BE",
"code": "0859536301"
},
"inboxes": [
{
"key": "peppol",
"scheme": "0208",
"code": "0859536301"
}
],
"addresses": [
{
"num": "127",
"street": "Avenue Louise",
"locality": "Ixelles",
"region": "Brussels-Capital",
"code": "1050",
"country": "BE"
}
],
"emails": [
{
"addr": "test@example.com"
}
]
},
"lines": [
{
"i": 1,
"quantity": "12",
"item": {
"name": "Sambox services",
"price": "145.00",
"unit": "one"
},
"sum": "1740.00",
"taxes": [
{
"cat": "VAT",
"rate": "general"
}
],
"total": "1740.00"
}
],
"payment": {
"terms": {
"detail": "Will be paid by 2026-06-02"
}
}
}
{
"$schema": "https://gobl.org/draft-0/bill/invoice",
"$regime": "BE",
"$addons": [
"eu-en16931-v2017"
],
"type": "standard",
"series": "INV",
"code": "PP000003",
"issue_date": "2025-04-03",
"currency": "EUR",
"tax": {
"ext": {
"untdid-document-type": "380"
}
},
"supplier": {
"name": "Benelux Industries SA/NV",
"tax_id": {
"country": "BE",
"code": "0316597904"
},
"endpoints": [
{
"uri": "iso6523-actorid-upis::0208:0316597904"
}
],
"inboxes": [
{
"key": "peppol",
"scheme": "0208",
"code": "0316597904"
}
],
"addresses": [
{
"num": "42",
"street": "Rue de la Loi",
"locality": "Brussels",
"region": "Brussels-Capital",
"code": "1040",
"country": "BE"
}
],
"emails": [
{
"addr": "test@example.com"
}
]
},
"customer": {
"name": "Benelux Industries SA/NV",
"tax_id": {
"country": "BE",
"code": "0859536301"
},
"endpoints": [
{
"uri": "iso6523-actorid-upis::0208:0859536301"
}
],
"inboxes": [
{
"key": "peppol",
"scheme": "0208",
"code": "0859536301"
}
],
"addresses": [
{
"num": "127",
"street": "Avenue Louise",
"locality": "Ixelles",
"region": "Brussels-Capital",
"code": "1050",
"country": "BE"
}
],
"emails": [
{
"addr": "test@example.com"
}
]
},
"lines": [
{
"i": 1,
"quantity": "12",
"item": {
"name": "Sambox services",
"price": "145.00",
"unit": "one"
},
"sum": "1740.00",
"taxes": [
{
"cat": "VAT",
"key": "standard",
"rate": "general",
"percent": "21.0%",
"ext": {
"untdid-tax-category": "S"
}
}
],
"total": "1740.00"
}
],
"payment": {
"terms": {
"notes": "Will be paid by 2026-06-02"
}
},
"totals": {
"sum": "1740.00",
"total": "1740.00",
"taxes": {
"categories": [
{
"code": "VAT",
"rates": [
{
"key": "standard",
"ext": {
"untdid-tax-category": "S"
},
"base": "1740.00",
"percent": "21.0%",
"amount": "365.40"
}
],
"amount": "365.40"
}
],
"sum": "365.40"
},
"tax": "365.40",
"total_with_tax": "2105.40",
"payable": "2105.40"
}
}
Peppol Belgium - B2B zero rated goods invoice
Peppol Belgium - B2B zero rated goods invoice
- Daily and weekly newspapers, as well as periodical publications that meet a specific criteria.
- Recyclable materials such as waste and scrap intended for recycling.
- Educational materials under specific conditions.
zero in your invoice lines. The eu-en16931-v2017 addon will automatically set the UNTDID 5305 tax category to Z (zero rated goods) when the silo entry is built.{
"$schema": "https://gobl.org/draft-0/bill/invoice",
"$regime": "BE",
"$addons": [
"eu-en16931-v2017"
],
"type": "standard",
"series": "INV",
"code": "PP000003",
"issue_date": "2025-04-03",
"currency": "EUR",
"supplier": {
"name": "Benelux Industries SA/NV",
"tax_id": {
"country": "BE",
"code": "0316597904"
},
"inboxes": [
{
"key": "peppol",
"scheme": "0208",
"code": "0316597904"
}
],
"addresses": [
{
"num": "42",
"street": "Rue de la Loi",
"locality": "Brussels",
"region": "Brussels-Capital",
"code": "1040",
"country": "BE"
}
],
"emails": [
{
"addr": "test@example.com"
}
]
},
"customer": {
"name": "Benelux Industries SA/NV",
"tax_id": {
"country": "BE",
"code": "0859536301"
},
"inboxes": [
{
"key": "peppol",
"scheme": "0208",
"code": "0859536301"
}
],
"addresses": [
{
"num": "127",
"street": "Avenue Louise",
"locality": "Ixelles",
"region": "Brussels-Capital",
"code": "1050",
"country": "BE"
}
],
"emails": [
{
"addr": "test@example.com"
}
]
},
"lines": [
{
"i": 1,
"quantity": "1",
"item": {
"name": "Het Laatste Nieuws",
"price": "2.00",
"unit": "one"
},
"taxes": [
{
"cat": "VAT",
"key": "zero"
}
],
"total": "2.00"
}
],
"payment": {
"terms": {
"detail": "Will be paid by 2026-06-02"
}
}
}
{
"$schema": "https://gobl.org/draft-0/bill/invoice",
"$regime": "BE",
"$addons": [
"eu-en16931-v2017"
],
"type": "standard",
"series": "INV",
"code": "PP000003",
"issue_date": "2025-04-03",
"currency": "EUR",
"tax": {
"ext": {
"untdid-document-type": "380"
}
},
"supplier": {
"name": "Benelux Industries SA/NV",
"tax_id": {
"country": "BE",
"code": "0316597904"
},
"endpoints": [
{
"uri": "iso6523-actorid-upis::0208:0316597904"
}
],
"inboxes": [
{
"key": "peppol",
"scheme": "0208",
"code": "0316597904"
}
],
"addresses": [
{
"num": "42",
"street": "Rue de la Loi",
"locality": "Brussels",
"region": "Brussels-Capital",
"code": "1040",
"country": "BE"
}
],
"emails": [
{
"addr": "test@example.com"
}
]
},
"customer": {
"name": "Benelux Industries SA/NV",
"tax_id": {
"country": "BE",
"code": "0859536301"
},
"endpoints": [
{
"uri": "iso6523-actorid-upis::0208:0859536301"
}
],
"inboxes": [
{
"key": "peppol",
"scheme": "0208",
"code": "0859536301"
}
],
"addresses": [
{
"num": "127",
"street": "Avenue Louise",
"locality": "Ixelles",
"region": "Brussels-Capital",
"code": "1050",
"country": "BE"
}
],
"emails": [
{
"addr": "test@example.com"
}
]
},
"lines": [
{
"i": 1,
"quantity": "1",
"item": {
"name": "Het Laatste Nieuws",
"price": "2.00",
"unit": "one"
},
"sum": "2.00",
"taxes": [
{
"cat": "VAT",
"key": "zero",
"percent": "0%",
"ext": {
"untdid-tax-category": "Z"
}
}
],
"total": "2.00"
}
],
"payment": {
"terms": {
"notes": "Will be paid by 2026-06-02"
}
},
"totals": {
"sum": "2.00",
"total": "2.00",
"taxes": {
"categories": [
{
"code": "VAT",
"rates": [
{
"key": "zero",
"ext": {
"untdid-tax-category": "Z"
},
"base": "2.00",
"percent": "0%",
"amount": "0.00"
}
],
"amount": "0.00"
}
],
"sum": "0.00"
},
"tax": "0.00",
"total_with_tax": "2.00",
"payable": "2.00"
}
}
Peppol Belgium - B2B exempt invoice
Peppol Belgium - B2B exempt invoice
exempt in your invoice lines. The eu-en16931-v2017 addon will automatically set the UNTDID 5305 tax category to E when the silo entry is built. You must also state the reason for the exemption through the CEF VATEX - VAT exemption reason codes.supplier must be previously registered with the tax authority and the customer tax id must be valid.{
"$schema": "https://gobl.org/draft-0/bill/invoice",
"$regime": "BE",
"$addons": [
"eu-en16931-v2017"
],
"type": "standard",
"series": "INV",
"code": "PP000003",
"issue_date": "2025-04-03",
"currency": "EUR",
"supplier": {
"name": "Benelux Industries SA/NV",
"tax_id": {
"country": "BE",
"code": "0316597904"
},
"inboxes": [
{
"key": "peppol",
"scheme": "0208",
"code": "0316597904"
}
],
"addresses": [
{
"num": "42",
"street": "Rue de la Loi",
"locality": "Brussels",
"region": "Brussels-Capital",
"code": "1040",
"country": "BE"
}
],
"emails": [
{
"addr": "test@example.com"
}
]
},
"customer": {
"name": "Singapore Company LTD",
"tax_id": {
"country": "SG",
"code": "199904785Z"
},
"inboxes": [
{
"key": "peppol",
"scheme": "0195",
"code": "SGUEN199904785Z"
}
],
"addresses": [
{
"street": "18 Marina Gardens Drive",
"locality": "Singapore",
"region": "Central Region",
"code": "018953",
"country": "SG"
}
],
"emails": [
{
"addr": "billing+test@invopop.com"
}
]
},
"lines": [
{
"i": 1,
"quantity": "12",
"item": {
"name": "Sambox product",
"price": "145.00",
"unit": "one"
},
"sum": "145.00",
"taxes": [
{
"cat": "VAT",
"key": "exempt",
"ext": {
"cef-vatex": "VATEX-EU-132-1I"
}
}
],
"total": "145.00"
}
],
"payment": {
"terms": {
"detail": "Will be paid by 2026-06-02"
}
}
}
{
"$schema": "https://gobl.org/draft-0/bill/invoice",
"$regime": "BE",
"$addons": [
"eu-en16931-v2017"
],
"type": "standard",
"series": "INV",
"code": "PP000003",
"issue_date": "2025-04-03",
"currency": "EUR",
"tax": {
"ext": {
"untdid-document-type": "380"
}
},
"supplier": {
"name": "Benelux Industries SA/NV",
"tax_id": {
"country": "BE",
"code": "0316597904"
},
"endpoints": [
{
"uri": "iso6523-actorid-upis::0208:0316597904"
}
],
"inboxes": [
{
"key": "peppol",
"scheme": "0208",
"code": "0316597904"
}
],
"addresses": [
{
"num": "42",
"street": "Rue de la Loi",
"locality": "Brussels",
"region": "Brussels-Capital",
"code": "1040",
"country": "BE"
}
],
"emails": [
{
"addr": "test@example.com"
}
]
},
"customer": {
"name": "Singapore Company LTD",
"tax_id": {
"country": "SG",
"code": "199904785Z"
},
"endpoints": [
{
"uri": "iso6523-actorid-upis::0195:SGUEN199904785Z"
}
],
"inboxes": [
{
"key": "peppol",
"scheme": "0195",
"code": "SGUEN199904785Z"
}
],
"addresses": [
{
"street": "18 Marina Gardens Drive",
"locality": "Singapore",
"region": "Central Region",
"code": "018953",
"country": "SG"
}
],
"emails": [
{
"addr": "billing+test@invopop.com"
}
]
},
"lines": [
{
"i": 1,
"quantity": "12",
"item": {
"name": "Sambox product",
"price": "145.00",
"unit": "one"
},
"sum": "1740.00",
"taxes": [
{
"cat": "VAT",
"key": "exempt",
"ext": {
"cef-vatex": "VATEX-EU-132-1I",
"untdid-tax-category": "E"
}
}
],
"total": "1740.00"
}
],
"payment": {
"terms": {
"notes": "Will be paid by 2026-06-02"
}
},
"totals": {
"sum": "1740.00",
"total": "1740.00",
"taxes": {
"categories": [
{
"code": "VAT",
"rates": [
{
"key": "exempt",
"ext": {
"cef-vatex": "VATEX-EU-132-1I",
"untdid-tax-category": "E"
},
"base": "1740.00",
"amount": "0.00"
}
],
"amount": "0.00"
}
],
"sum": "0.00"
},
"tax": "0.00",
"total_with_tax": "1740.00",
"payable": "1740.00"
}
}
Peppol Belgium - B2B services → EU customer (Reverse Charge)
Peppol Belgium - B2B services → EU customer (Reverse Charge)
- The customer is a registered business in another EU member state (has a valid EU VAT ID).
- The service is provided to a business customer (B2B), not a consumer.
- The service is subject to VAT but the customer accounts for the VAT in their own country.
reverse-charge in your invoice lines. The eu-en16931-v2017 addon will automatically set the UNTDID 5305 tax category to AE (reverse charge) when the silo entry is built.supplier and customer VAT ID must be valid and registered in the EU VIES system.{
"$schema": "https://gobl.org/draft-0/bill/invoice",
"$regime": "BE",
"$addons": [
"eu-en16931-v2017"
],
"type": "standard",
"series": "INV",
"code": "PP000003",
"issue_date": "2025-04-03",
"currency": "EUR",
"supplier": {
"name": "Benelux Industries SA/NV",
"tax_id": {
"country": "BE",
"code": "0316597904"
},
"inboxes": [
{
"key": "peppol",
"scheme": "0208",
"code": "0316597904"
}
],
"addresses": [
{
"num": "42",
"street": "Rue de la Loi",
"locality": "Brussels",
"region": "Brussels-Capital",
"code": "1040",
"country": "BE"
}
],
"emails": [
{
"addr": "test@example.com"
}
]
},
"customer": {
"name": "Invopop SL",
"tax_id": {
"country": "ES",
"code": "B85905495"
},
"inboxes": [
{
"key": "peppol",
"scheme": "9920",
"code": "ESB85905495"
}
],
"addresses": [
{
"street": "Calle Pradillo 42",
"locality": "Madrid",
"region": "Madrid",
"code": "28002",
"country": "ES"
}
],
"emails": [
{
"addr": "billing+test@invopop.com"
}
]
},
"lines": [
{
"i": 1,
"quantity": "12",
"item": {
"name": "Sambox services",
"price": "145.00",
"unit": "one"
},
"sum": "1740.00",
"taxes": [
{
"cat": "VAT",
"key": "reverse-charge",
"ext": {
"cef-vatex": "VATEX-EU-AE"
}
}
],
"total": "1740.00"
}
],
"payment": {
"terms": {
"detail": "Will be paid by 2026-06-02"
}
}
}
{
"$schema": "https://gobl.org/draft-0/bill/invoice",
"$regime": "BE",
"$addons": [
"eu-en16931-v2017"
],
"type": "standard",
"series": "INV",
"code": "PP000003",
"issue_date": "2025-04-03",
"currency": "EUR",
"tax": {
"ext": {
"untdid-document-type": "380"
}
},
"supplier": {
"name": "Benelux Industries SA/NV",
"tax_id": {
"country": "BE",
"code": "0316597904"
},
"endpoints": [
{
"uri": "iso6523-actorid-upis::0208:0316597904"
}
],
"inboxes": [
{
"key": "peppol",
"scheme": "0208",
"code": "0316597904"
}
],
"addresses": [
{
"num": "42",
"street": "Rue de la Loi",
"locality": "Brussels",
"region": "Brussels-Capital",
"code": "1040",
"country": "BE"
}
],
"emails": [
{
"addr": "test@example.com"
}
]
},
"customer": {
"name": "Invopop SL",
"tax_id": {
"country": "ES",
"code": "B85905495"
},
"endpoints": [
{
"uri": "iso6523-actorid-upis::9920:ESB85905495"
}
],
"inboxes": [
{
"key": "peppol",
"scheme": "9920",
"code": "ESB85905495"
}
],
"addresses": [
{
"street": "Calle Pradillo 42",
"locality": "Madrid",
"region": "Madrid",
"code": "28002",
"country": "ES"
}
],
"emails": [
{
"addr": "billing+test@invopop.com"
}
]
},
"lines": [
{
"i": 1,
"quantity": "12",
"item": {
"name": "Sambox services",
"price": "145.00",
"unit": "one"
},
"sum": "1740.00",
"taxes": [
{
"cat": "VAT",
"key": "reverse-charge",
"ext": {
"cef-vatex": "VATEX-EU-AE",
"untdid-tax-category": "AE"
}
}
],
"total": "1740.00"
}
],
"payment": {
"terms": {
"notes": "Will be paid by 2026-06-02"
}
},
"totals": {
"sum": "1740.00",
"total": "1740.00",
"taxes": {
"categories": [
{
"code": "VAT",
"rates": [
{
"key": "reverse-charge",
"ext": {
"cef-vatex": "VATEX-EU-AE",
"untdid-tax-category": "AE"
},
"base": "1740.00",
"amount": "0.00"
}
],
"amount": "0.00"
}
],
"sum": "0.00"
},
"tax": "0.00",
"total_with_tax": "1740.00",
"payable": "1740.00"
}
}
Peppol Belgium - B2B goods → EU customer (Intra-Community)
Peppol Belgium - B2B goods → EU customer (Intra-Community)
- The customer is a registered business in another EU member state (has a valid EU VAT ID).
- Goods are physically delivered to another EU member state.
- The supply is exempt from VAT in the origin country and subject to VAT in the destination country.
intra-community in your invoice lines. The eu-en16931-v2017 addon will automatically set the UNTDID 5305 tax category to K (VAT exempt for EEA intra-community supply of goods and services) when the silo entry is built.supplier must be previously registered with the tax authority and the customer VAT ID must be valid and registered in the EU VIES system.{
"$schema": "https://gobl.org/draft-0/bill/invoice",
"$addons": [
"eu-en16931-v2017"
],
"$regime": "BE",
"type": "standard",
"series": "INV",
"code": "PP000003",
"issue_date": "2025-04-03",
"currency": "EUR",
"supplier": {
"name": "Benelux Industries SA/NV",
"tax_id": {
"country": "BE",
"code": "0316597904"
},
"inboxes": [
{
"key": "peppol",
"scheme": "0208",
"code": "0316597904"
}
],
"addresses": [
{
"num": "42",
"street": "Rue de la Loi",
"locality": "Brussels",
"region": "Brussels-Capital",
"code": "1040",
"country": "BE"
}
],
"emails": [
{
"addr": "test@example.com"
}
]
},
"customer": {
"name": "Invopop SL",
"tax_id": {
"country": "ES",
"code": "B85905495"
},
"inboxes": [
{
"key": "peppol",
"scheme": "9920",
"code": "ESB85905495"
}
],
"addresses": [
{
"street": "Calle Pradillo 42",
"locality": "Madrid",
"region": "Madrid",
"code": "28002",
"country": "ES"
}
],
"emails": [
{
"addr": "billing+test@invopop.com"
}
]
},
"lines": [
{
"i": 1,
"quantity": "12",
"item": {
"name": "Sambox product",
"price": "145.00",
"unit": "one"
},
"sum": "1740.00",
"taxes": [
{
"cat": "VAT",
"key": "intra-community",
"ext": {
"cef-vatex": "VATEX-EU-IC"
}
}
],
"total": "1740.00"
}
],
"payment": {
"terms": {
"detail": "Will be paid by 2026-06-02"
}
}
}
{
"$schema": "https://gobl.org/draft-0/bill/invoice",
"$regime": "BE",
"$addons": [
"eu-en16931-v2017"
],
"type": "standard",
"series": "INV",
"code": "PP000003",
"issue_date": "2025-04-03",
"currency": "EUR",
"tax": {
"ext": {
"untdid-document-type": "380"
}
},
"supplier": {
"name": "Benelux Industries SA/NV",
"tax_id": {
"country": "BE",
"code": "0316597904"
},
"endpoints": [
{
"uri": "iso6523-actorid-upis::0208:0316597904"
}
],
"inboxes": [
{
"key": "peppol",
"scheme": "0208",
"code": "0316597904"
}
],
"addresses": [
{
"num": "42",
"street": "Rue de la Loi",
"locality": "Brussels",
"region": "Brussels-Capital",
"code": "1040",
"country": "BE"
}
],
"emails": [
{
"addr": "test@example.com"
}
]
},
"customer": {
"name": "Invopop SL",
"tax_id": {
"country": "ES",
"code": "B85905495"
},
"endpoints": [
{
"uri": "iso6523-actorid-upis::9920:ESB85905495"
}
],
"inboxes": [
{
"key": "peppol",
"scheme": "9920",
"code": "ESB85905495"
}
],
"addresses": [
{
"street": "Calle Pradillo 42",
"locality": "Madrid",
"region": "Madrid",
"code": "28002",
"country": "ES"
}
],
"emails": [
{
"addr": "billing+test@invopop.com"
}
]
},
"lines": [
{
"i": 1,
"quantity": "12",
"item": {
"name": "Sambox product",
"price": "145.00",
"unit": "one"
},
"sum": "1740.00",
"taxes": [
{
"cat": "VAT",
"key": "intra-community",
"ext": {
"cef-vatex": "VATEX-EU-IC",
"untdid-tax-category": "K"
}
}
],
"total": "1740.00"
}
],
"payment": {
"terms": {
"notes": "Will be paid by 2026-06-02"
}
},
"totals": {
"sum": "1740.00",
"total": "1740.00",
"taxes": {
"categories": [
{
"code": "VAT",
"rates": [
{
"key": "intra-community",
"ext": {
"cef-vatex": "VATEX-EU-IC",
"untdid-tax-category": "K"
},
"base": "1740.00",
"amount": "0.00"
}
],
"amount": "0.00"
}
],
"sum": "0.00"
},
"tax": "0.00",
"total_with_tax": "1740.00",
"payable": "1740.00"
}
}
Peppol Belgium - B2B services → international customer (Outside Scope)
Peppol Belgium - B2B services → international customer (Outside Scope)
outside-scope in your invoice lines. The eu-en16931-v2017 addon will automatically set the UNTDID 5305 tax category to O (Services outside scope of tax) when the silo entry is built.{
"$schema": "https://gobl.org/draft-0/bill/invoice",
"$regime": "BE",
"$addons": [
"eu-en16931-v2017"
],
"type": "standard",
"series": "INV",
"code": "PP000003",
"issue_date": "2025-04-03",
"currency": "EUR",
"supplier": {
"name": "Benelux Industries SA/NV",
"tax_id": {
"country": "BE",
"code": "0316597904"
},
"inboxes": [
{
"key": "peppol",
"scheme": "0208",
"code": "0316597904"
}
],
"addresses": [
{
"num": "42",
"street": "Rue de la Loi",
"locality": "Brussels",
"region": "Brussels-Capital",
"code": "1040",
"country": "BE"
}
],
"emails": [
{
"addr": "test@example.com"
}
]
},
"customer": {
"name": "Singapore Company LTD",
"tax_id": {
"country": "SG",
"code": "199904785Z"
},
"inboxes": [
{
"key": "peppol",
"scheme": "0195",
"code": "SGUEN199904785Z"
}
],
"addresses": [
{
"street": "18 Marina Gardens Drive",
"locality": "Singapore",
"region": "Central Region",
"code": "018953",
"country": "SG"
}
],
"emails": [
{
"addr": "billing+test@invopop.com"
}
]
},
"lines": [
{
"i": 1,
"quantity": "12",
"item": {
"name": "Sambox service",
"price": "145.00",
"unit": "h"
},
"sum": "145.00",
"taxes": [
{
"cat": "VAT",
"key": "outside-scope",
"ext": {
"cef-vatex": "VATEX-EU-O"
}
}
],
"total": "145.00"
}
],
"payment": {
"terms": {
"detail": "Will be paid by 2026-06-02"
}
}
}
{
"$schema": "https://gobl.org/draft-0/bill/invoice",
"$regime": "BE",
"$addons": [
"eu-en16931-v2017"
],
"type": "standard",
"series": "INV",
"code": "PP000003",
"issue_date": "2025-04-03",
"currency": "EUR",
"tax": {
"ext": {
"untdid-document-type": "380"
}
},
"supplier": {
"name": "Benelux Industries SA/NV",
"tax_id": {
"country": "BE",
"code": "0316597904"
},
"endpoints": [
{
"uri": "iso6523-actorid-upis::0208:0316597904"
}
],
"inboxes": [
{
"key": "peppol",
"scheme": "0208",
"code": "0316597904"
}
],
"addresses": [
{
"num": "42",
"street": "Rue de la Loi",
"locality": "Brussels",
"region": "Brussels-Capital",
"code": "1040",
"country": "BE"
}
],
"emails": [
{
"addr": "test@example.com"
}
]
},
"customer": {
"name": "Singapore Company LTD",
"tax_id": {
"country": "SG",
"code": "199904785Z"
},
"endpoints": [
{
"uri": "iso6523-actorid-upis::0195:SGUEN199904785Z"
}
],
"inboxes": [
{
"key": "peppol",
"scheme": "0195",
"code": "SGUEN199904785Z"
}
],
"addresses": [
{
"street": "18 Marina Gardens Drive",
"locality": "Singapore",
"region": "Central Region",
"code": "018953",
"country": "SG"
}
],
"emails": [
{
"addr": "billing+test@invopop.com"
}
]
},
"lines": [
{
"i": 1,
"quantity": "12",
"item": {
"name": "Sambox service",
"price": "145.00",
"unit": "h"
},
"sum": "1740.00",
"taxes": [
{
"cat": "VAT",
"key": "outside-scope",
"ext": {
"cef-vatex": "VATEX-EU-O",
"untdid-tax-category": "O"
}
}
],
"total": "1740.00"
}
],
"payment": {
"terms": {
"notes": "Will be paid by 2026-06-02"
}
},
"totals": {
"sum": "1740.00",
"total": "1740.00",
"taxes": {
"categories": [
{
"code": "VAT",
"rates": [
{
"key": "outside-scope",
"ext": {
"cef-vatex": "VATEX-EU-O",
"untdid-tax-category": "O"
},
"base": "1740.00",
"amount": "0.00"
}
],
"amount": "0.00"
}
],
"sum": "0.00"
},
"tax": "0.00",
"total_with_tax": "1740.00",
"payable": "1740.00"
}
}
Peppol Belgium - B2B goods → international customer (Export)
Peppol Belgium - B2B goods → international customer (Export)
export in your invoice lines. The eu-en16931-v2017 addon will automatically set the UNTDID 5305 tax category to G (Free export item, tax not charged) when the silo entry is built.supplier must be previously registered with the tax authority. Customer tax identification is optional but recommended for record-keeping purposes.{
"$schema": "https://gobl.org/draft-0/bill/invoice",
"$regime": "BE",
"$addons": [
"eu-en16931-v2017"
],
"uuid": "019bb71c-7205-7000-9aef-878145b9fce6",
"type": "standard",
"series": "INV",
"code": "PP000003",
"issue_date": "2025-04-03",
"currency": "EUR",
"supplier": {
"name": "Benelux Industries SA/NV",
"tax_id": {
"country": "BE",
"code": "0316597904"
},
"inboxes": [
{
"key": "peppol",
"scheme": "0208",
"code": "0316597904"
}
],
"addresses": [
{
"num": "42",
"street": "Rue de la Loi",
"locality": "Brussels",
"region": "Brussels-Capital",
"code": "1040",
"country": "BE"
}
],
"emails": [
{
"addr": "test@example.com"
}
]
},
"customer": {
"name": "Singapore Company LTD",
"tax_id": {
"country": "SG",
"code": "199904785Z"
},
"inboxes": [
{
"key": "peppol",
"scheme": "0195",
"code": "SGUEN199904785Z"
}
],
"addresses": [
{
"street": "18 Marina Gardens Drive",
"locality": "Singapore",
"region": "Central Region",
"code": "018953",
"country": "SG"
}
],
"emails": [
{
"addr": "billing+test@invopop.com"
}
]
},
"lines": [
{
"quantity": "12",
"item": {
"name": "Sambox product",
"price": "145.00",
"unit": "one"
},
"sum": "1740.00",
"taxes": [
{
"cat": "VAT",
"key": "export",
"ext": {
"cef-vatex": "VATEX-EU-G"
}
}
],
"total": "1740.00"
}
],
"payment": {
"terms": {
"notes": "Will be paid by 2026-06-02"
}
}
}
{
"$schema": "https://gobl.org/draft-0/bill/invoice",
"$regime": "BE",
"$addons": [
"eu-en16931-v2017"
],
"uuid": "019bb71c-7205-7000-9aef-878145b9fce6",
"type": "standard",
"series": "INV",
"code": "PP000003",
"issue_date": "2025-04-03",
"currency": "EUR",
"tax": {
"ext": {
"untdid-document-type": "380"
}
},
"supplier": {
"name": "Benelux Industries SA/NV",
"tax_id": {
"country": "BE",
"code": "0316597904"
},
"endpoints": [
{
"uri": "iso6523-actorid-upis::0208:0316597904"
}
],
"inboxes": [
{
"key": "peppol",
"scheme": "0208",
"code": "0316597904"
}
],
"addresses": [
{
"num": "42",
"street": "Rue de la Loi",
"locality": "Brussels",
"region": "Brussels-Capital",
"code": "1040",
"country": "BE"
}
],
"emails": [
{
"addr": "test@example.com"
}
]
},
"customer": {
"name": "Singapore Company LTD",
"tax_id": {
"country": "SG",
"code": "199904785Z"
},
"endpoints": [
{
"uri": "iso6523-actorid-upis::0195:SGUEN199904785Z"
}
],
"inboxes": [
{
"key": "peppol",
"scheme": "0195",
"code": "SGUEN199904785Z"
}
],
"addresses": [
{
"street": "18 Marina Gardens Drive",
"locality": "Singapore",
"region": "Central Region",
"code": "018953",
"country": "SG"
}
],
"emails": [
{
"addr": "billing+test@invopop.com"
}
]
},
"lines": [
{
"i": 1,
"quantity": "12",
"item": {
"name": "Sambox product",
"price": "145.00",
"unit": "one"
},
"sum": "1740.00",
"taxes": [
{
"cat": "VAT",
"key": "export",
"ext": {
"cef-vatex": "VATEX-EU-G",
"untdid-tax-category": "G"
}
}
],
"total": "1740.00"
}
],
"payment": {
"terms": {
"notes": "Will be paid by 2026-06-02"
}
},
"totals": {
"sum": "1740.00",
"total": "1740.00",
"taxes": {
"categories": [
{
"code": "VAT",
"rates": [
{
"key": "export",
"ext": {
"cef-vatex": "VATEX-EU-G",
"untdid-tax-category": "G"
},
"base": "1740.00",
"amount": "0.00"
}
],
"amount": "0.00"
}
],
"sum": "0.00"
},
"tax": "0.00",
"total_with_tax": "1740.00",
"payable": "1740.00"
}
}
Peppol Belgium - B2B credit note
Peppol Belgium - B2B credit note
type to credit-note and reference the original invoice in the preceding array by series, code, and issue_date, optionally with a reason. The eu-en16931-v2017 addon will automatically set the UNTDID document type to 381 (credit note) when the silo entry is built.{
"$schema": "https://gobl.org/draft-0/bill/invoice",
"$regime": "BE",
"$addons": [
"eu-en16931-v2017"
],
"type": "credit-note",
"series": "CN",
"code": "PP000104",
"issue_date": "2025-04-10",
"currency": "EUR",
"preceding": [
{
"type": "standard",
"series": "INV",
"code": "PP000003",
"issue_date": "2025-04-03",
"reason": "Services not delivered"
}
],
"supplier": {
"name": "Benelux Industries SA/NV",
"tax_id": {
"country": "BE",
"code": "0316597904"
},
"inboxes": [
{
"key": "peppol",
"scheme": "0208",
"code": "0316597904"
}
],
"addresses": [
{
"num": "42",
"street": "Rue de la Loi",
"locality": "Brussels",
"region": "Brussels-Capital",
"code": "1040",
"country": "BE"
}
],
"emails": [
{
"addr": "test@example.com"
}
]
},
"customer": {
"name": "Benelux Industries SA/NV",
"tax_id": {
"country": "BE",
"code": "0859536301"
},
"inboxes": [
{
"key": "peppol",
"scheme": "0208",
"code": "0859536301"
}
],
"addresses": [
{
"num": "127",
"street": "Avenue Louise",
"locality": "Ixelles",
"region": "Brussels-Capital",
"code": "1050",
"country": "BE"
}
],
"emails": [
{
"addr": "test@example.com"
}
]
},
"lines": [
{
"quantity": "2",
"item": {
"name": "Sambox services",
"price": "145.00",
"unit": "one"
},
"taxes": [
{
"cat": "VAT",
"rate": "general"
}
]
}
]
}
{
"$schema": "https://gobl.org/draft-0/bill/invoice",
"$regime": "BE",
"$addons": [
"eu-en16931-v2017"
],
"type": "credit-note",
"series": "CN",
"code": "PP000104",
"issue_date": "2025-04-10",
"currency": "EUR",
"preceding": [
{
"type": "standard",
"issue_date": "2025-04-03",
"series": "INV",
"code": "PP000003",
"reason": "Services not delivered"
}
],
"tax": {
"ext": {
"untdid-document-type": "381"
}
},
"supplier": {
"name": "Benelux Industries SA/NV",
"tax_id": {
"country": "BE",
"code": "0316597904"
},
"endpoints": [
{
"uri": "iso6523-actorid-upis::0208:0316597904"
}
],
"inboxes": [
{
"key": "peppol",
"scheme": "0208",
"code": "0316597904"
}
],
"addresses": [
{
"num": "42",
"street": "Rue de la Loi",
"locality": "Brussels",
"region": "Brussels-Capital",
"code": "1040",
"country": "BE"
}
],
"emails": [
{
"addr": "test@example.com"
}
]
},
"customer": {
"name": "Benelux Industries SA/NV",
"tax_id": {
"country": "BE",
"code": "0859536301"
},
"endpoints": [
{
"uri": "iso6523-actorid-upis::0208:0859536301"
}
],
"inboxes": [
{
"key": "peppol",
"scheme": "0208",
"code": "0859536301"
}
],
"addresses": [
{
"num": "127",
"street": "Avenue Louise",
"locality": "Ixelles",
"region": "Brussels-Capital",
"code": "1050",
"country": "BE"
}
],
"emails": [
{
"addr": "test@example.com"
}
]
},
"lines": [
{
"i": 1,
"quantity": "2",
"item": {
"name": "Sambox services",
"price": "145.00",
"unit": "one"
},
"sum": "290.00",
"taxes": [
{
"cat": "VAT",
"key": "standard",
"rate": "general",
"percent": "21.0%",
"ext": {
"untdid-tax-category": "S"
}
}
],
"total": "290.00"
}
],
"totals": {
"sum": "290.00",
"total": "290.00",
"taxes": {
"categories": [
{
"code": "VAT",
"rates": [
{
"key": "standard",
"ext": {
"untdid-tax-category": "S"
},
"base": "290.00",
"percent": "21.0%",
"amount": "60.90"
}
],
"amount": "60.90"
}
],
"sum": "60.90"
},
"tax": "60.90",
"total_with_tax": "350.90",
"payable": "350.90"
}
}
Peppol Germany - B2B standard invoice
Peppol Germany - B2B standard invoice
- The customer is a registered business (has a tax identification number).
- The customer requires a full invoice.
- The customer needs a complete invoice with all tax details for accounting or tax purposes.
eu-en16931-v2017 addon and ensure the customer field contains valid tax identification details. The addon will automatically set the document type to 380 when the silo entry is built (which happens automatically when saving a silo entry through the API or console).supplier must be previously registered with the tax authority and the customer VAT ID must be valid.{
"$schema": "https://gobl.org/draft-0/bill/invoice",
"$regime": "DE",
"$addons": [
"eu-en16931-v2017"
],
"type": "standard",
"series": "INV",
"code": "PP000003",
"issue_date": "2025-04-03",
"currency": "EUR",
"supplier": {
"name": "Rheinland Technologies GmbH",
"tax_id": {
"country": "DE",
"code": "879558966"
},
"inboxes": [
{
"key": "peppol",
"scheme": "9930",
"code": "DE879558966"
}
],
"addresses": [
{
"num": "27",
"street": "Friedrichstraße",
"locality": "Berlin",
"region": "BE",
"code": "10117",
"country": "DE"
}
],
"emails": [
{
"addr": "rechnungen@rheinlandtech.de"
}
]
},
"customer": {
"name": "Bavaria Solutions GmbH",
"tax_id": {
"country": "DE",
"code": "993930191"
},
"inboxes": [
{
"key": "peppol",
"scheme": "9930",
"code": "DE993930191"
}
],
"addresses": [
{
"num": "15",
"street": "Marienplatz",
"locality": "München",
"region": "BY",
"code": "80331",
"country": "DE"
}
],
"emails": [
{
"addr": "test@example.com"
}
]
},
"lines": [
{
"i": 1,
"quantity": "12",
"item": {
"name": "Sambox services",
"price": "145.00",
"unit": "one"
},
"sum": "1740.00",
"taxes": [
{
"cat": "VAT",
"rate": "general"
}
],
"total": "1740.00"
}
],
"payment": {
"terms": {
"detail": "Will be paid by 2026-06-02"
}
}
}
{
"$schema": "https://gobl.org/draft-0/bill/invoice",
"$regime": "DE",
"$addons": [
"eu-en16931-v2017"
],
"type": "standard",
"series": "INV",
"code": "PP000003",
"issue_date": "2025-04-03",
"currency": "EUR",
"tax": {
"ext": {
"untdid-document-type": "380"
}
},
"supplier": {
"name": "Rheinland Technologies GmbH",
"tax_id": {
"country": "DE",
"code": "879558966"
},
"endpoints": [
{
"uri": "iso6523-actorid-upis::9930:DE879558966"
}
],
"inboxes": [
{
"key": "peppol",
"scheme": "9930",
"code": "DE879558966"
}
],
"addresses": [
{
"num": "27",
"street": "Friedrichstraße",
"locality": "Berlin",
"region": "BE",
"code": "10117",
"country": "DE"
}
],
"emails": [
{
"addr": "rechnungen@rheinlandtech.de"
}
]
},
"customer": {
"name": "Bavaria Solutions GmbH",
"tax_id": {
"country": "DE",
"code": "993930191"
},
"endpoints": [
{
"uri": "iso6523-actorid-upis::9930:DE993930191"
}
],
"inboxes": [
{
"key": "peppol",
"scheme": "9930",
"code": "DE993930191"
}
],
"addresses": [
{
"num": "15",
"street": "Marienplatz",
"locality": "München",
"region": "BY",
"code": "80331",
"country": "DE"
}
],
"emails": [
{
"addr": "test@example.com"
}
]
},
"lines": [
{
"i": 1,
"quantity": "12",
"item": {
"name": "Sambox services",
"price": "145.00",
"unit": "one"
},
"sum": "1740.00",
"taxes": [
{
"cat": "VAT",
"key": "standard",
"rate": "general",
"percent": "19%",
"ext": {
"untdid-tax-category": "S"
}
}
],
"total": "1740.00"
}
],
"payment": {
"terms": {
"notes": "Will be paid by 2026-06-02"
}
},
"totals": {
"sum": "1740.00",
"total": "1740.00",
"taxes": {
"categories": [
{
"code": "VAT",
"rates": [
{
"key": "standard",
"ext": {
"untdid-tax-category": "S"
},
"base": "1740.00",
"percent": "19%",
"amount": "330.60"
}
],
"amount": "330.60"
}
],
"sum": "330.60"
},
"tax": "330.60",
"total_with_tax": "2070.60",
"payable": "2070.60"
}
}
Peppol Germany - B2B exempt invoice
Peppol Germany - B2B exempt invoice
exempt in your invoice lines. The eu-en16931-v2017 addon will automatically set the UNTDID 5305 tax category to E when the silo entry is built. You must also state the reason for the exemption through the CEF VATEX - VAT exemption reason codes.supplier must be previously registered with the tax authority and the customer tax id must be valid.{
"$schema": "https://gobl.org/draft-0/bill/invoice",
"$addons": [
"eu-en16931-v2017"
],
"$regime": "DE",
"type": "standard",
"series": "INV",
"code": "PP000003",
"issue_date": "2025-04-03",
"currency": "EUR",
"supplier": {
"name": "Deutsche Sprachschule",
"tax_id": {
"country": "DE",
"code": "993930191"
},
"inboxes": [
{
"key": "peppol",
"scheme": "9930",
"code": "DE993930191"
}
],
"addresses": [
{
"num": "15",
"street": "Marienplatz",
"locality": "München",
"region": "BY",
"code": "80331",
"country": "DE"
}
],
"emails": [
{
"addr": "test@example.com"
}
]
},
"customer": {
"name": "Rheinland Technologies GmbH",
"tax_id": {
"country": "DE",
"code": "879558966"
},
"inboxes": [
{
"key": "peppol",
"scheme": "9930",
"code": "DE879558966"
}
],
"addresses": [
{
"num": "27",
"street": "Friedrichstraße",
"locality": "Berlin",
"region": "BE",
"code": "10117",
"country": "DE"
}
],
"emails": [
{
"addr": "rechnungen@rheinlandtech.de"
}
]
},
"lines": [
{
"i": 1,
"quantity": "1",
"item": {
"name": "Deutschkurs - Monat",
"price": "120.00",
"unit": "one"
},
"taxes": [
{
"cat": "VAT",
"key": "exempt",
"ext": {
"cef-vatex": "VATEX-EU-132-1I"
}
}
],
"total": "120.00"
}
],
"payment": {
"terms": {
"detail": "Will be paid by 2026-06-02"
}
}
}
{
"$schema": "https://gobl.org/draft-0/bill/invoice",
"$regime": "DE",
"$addons": [
"eu-en16931-v2017"
],
"type": "standard",
"series": "INV",
"code": "PP000003",
"issue_date": "2025-04-03",
"currency": "EUR",
"tax": {
"ext": {
"untdid-document-type": "380"
}
},
"supplier": {
"name": "Deutsche Sprachschule",
"tax_id": {
"country": "DE",
"code": "993930191"
},
"endpoints": [
{
"uri": "iso6523-actorid-upis::9930:DE993930191"
}
],
"inboxes": [
{
"key": "peppol",
"scheme": "9930",
"code": "DE993930191"
}
],
"addresses": [
{
"num": "15",
"street": "Marienplatz",
"locality": "München",
"region": "BY",
"code": "80331",
"country": "DE"
}
],
"emails": [
{
"addr": "test@example.com"
}
]
},
"customer": {
"name": "Rheinland Technologies GmbH",
"tax_id": {
"country": "DE",
"code": "879558966"
},
"endpoints": [
{
"uri": "iso6523-actorid-upis::9930:DE879558966"
}
],
"inboxes": [
{
"key": "peppol",
"scheme": "9930",
"code": "DE879558966"
}
],
"addresses": [
{
"num": "27",
"street": "Friedrichstraße",
"locality": "Berlin",
"region": "BE",
"code": "10117",
"country": "DE"
}
],
"emails": [
{
"addr": "rechnungen@rheinlandtech.de"
}
]
},
"lines": [
{
"i": 1,
"quantity": "1",
"item": {
"name": "Deutschkurs - Monat",
"price": "120.00",
"unit": "one"
},
"sum": "120.00",
"taxes": [
{
"cat": "VAT",
"key": "exempt",
"ext": {
"cef-vatex": "VATEX-EU-132-1I",
"untdid-tax-category": "E"
}
}
],
"total": "120.00"
}
],
"payment": {
"terms": {
"notes": "Will be paid by 2026-06-02"
}
},
"totals": {
"sum": "120.00",
"total": "120.00",
"taxes": {
"categories": [
{
"code": "VAT",
"rates": [
{
"key": "exempt",
"ext": {
"cef-vatex": "VATEX-EU-132-1I",
"untdid-tax-category": "E"
},
"base": "120.00",
"amount": "0.00"
}
],
"amount": "0.00"
}
],
"sum": "0.00"
},
"tax": "0.00",
"total_with_tax": "120.00",
"payable": "120.00"
}
}
Peppol Germany - B2B services → EU customer (Reverse Charge)
Peppol Germany - B2B services → EU customer (Reverse Charge)
- The customer is a registered business in another EU member state (has a valid EU VAT ID).
- The service is provided to a business customer (B2B), not a consumer.
- The service is subject to VAT but the customer accounts for the VAT in their own country.
reverse-charge in your invoice lines. The eu-en16931-v2017 addon will automatically set the UNTDID 5305 tax category to AE (reverse charge) when the silo entry is built.supplier and customer VAT ID must be valid and registered in the EU VIES system.{
"$schema": "https://gobl.org/draft-0/bill/invoice",
"$regime": "DE",
"$addons": [
"eu-en16931-v2017"
],
"type": "standard",
"series": "INV",
"code": "PP000003",
"issue_date": "2025-04-03",
"currency": "EUR",
"supplier": {
"name": "Rheinland Technologies GmbH",
"tax_id": {
"country": "DE",
"code": "879558966"
},
"inboxes": [
{
"key": "peppol",
"scheme": "9930",
"code": "DE879558966"
}
],
"addresses": [
{
"num": "27",
"street": "Friedrichstraße",
"locality": "Berlin",
"region": "BE",
"code": "10117",
"country": "DE"
}
],
"emails": [
{
"addr": "rechnungen@rheinlandtech.de"
}
]
},
"customer": {
"name": "Invopop SL",
"tax_id": {
"country": "ES",
"code": "B85905495"
},
"inboxes": [
{
"key": "peppol",
"scheme": "9920",
"code": "ESB85905495"
}
],
"addresses": [
{
"street": "Calle Pradillo 42",
"locality": "Madrid",
"region": "Madrid",
"code": "28002",
"country": "ES"
}
],
"emails": [
{
"addr": "billing+test@invopop.com"
}
]
},
"lines": [
{
"i": 1,
"quantity": "12",
"item": {
"name": "Sambox services",
"price": "145.00",
"unit": "one"
},
"sum": "1740.00",
"taxes": [
{
"cat": "VAT",
"key": "reverse-charge",
"ext": {
"cef-vatex": "VATEX-EU-AE"
}
}
],
"total": "1740.00"
}
],
"payment": {
"terms": {
"detail": "Will be paid by 2026-06-02"
}
}
}
{
"$schema": "https://gobl.org/draft-0/bill/invoice",
"$regime": "DE",
"$addons": [
"eu-en16931-v2017"
],
"type": "standard",
"series": "INV",
"code": "PP000003",
"issue_date": "2025-04-03",
"currency": "EUR",
"tax": {
"ext": {
"untdid-document-type": "380"
}
},
"supplier": {
"name": "Rheinland Technologies GmbH",
"tax_id": {
"country": "DE",
"code": "879558966"
},
"endpoints": [
{
"uri": "iso6523-actorid-upis::9930:DE879558966"
}
],
"inboxes": [
{
"key": "peppol",
"scheme": "9930",
"code": "DE879558966"
}
],
"addresses": [
{
"num": "27",
"street": "Friedrichstraße",
"locality": "Berlin",
"region": "BE",
"code": "10117",
"country": "DE"
}
],
"emails": [
{
"addr": "rechnungen@rheinlandtech.de"
}
]
},
"customer": {
"name": "Invopop SL",
"tax_id": {
"country": "ES",
"code": "B85905495"
},
"endpoints": [
{
"uri": "iso6523-actorid-upis::9920:ESB85905495"
}
],
"inboxes": [
{
"key": "peppol",
"scheme": "9920",
"code": "ESB85905495"
}
],
"addresses": [
{
"street": "Calle Pradillo 42",
"locality": "Madrid",
"region": "Madrid",
"code": "28002",
"country": "ES"
}
],
"emails": [
{
"addr": "billing+test@invopop.com"
}
]
},
"lines": [
{
"i": 1,
"quantity": "12",
"item": {
"name": "Sambox services",
"price": "145.00",
"unit": "one"
},
"sum": "1740.00",
"taxes": [
{
"cat": "VAT",
"key": "reverse-charge",
"ext": {
"cef-vatex": "VATEX-EU-AE",
"untdid-tax-category": "AE"
}
}
],
"total": "1740.00"
}
],
"payment": {
"terms": {
"notes": "Will be paid by 2026-06-02"
}
},
"totals": {
"sum": "1740.00",
"total": "1740.00",
"taxes": {
"categories": [
{
"code": "VAT",
"rates": [
{
"key": "reverse-charge",
"ext": {
"cef-vatex": "VATEX-EU-AE",
"untdid-tax-category": "AE"
},
"base": "1740.00",
"amount": "0.00"
}
],
"amount": "0.00"
}
],
"sum": "0.00"
},
"tax": "0.00",
"total_with_tax": "1740.00",
"payable": "1740.00"
}
}
Peppol Germany - B2B goods → EU customer (Intra-Community)
Peppol Germany - B2B goods → EU customer (Intra-Community)
- The customer is a registered business in another EU member state (has a valid EU VAT ID).
- Goods are physically delivered to another EU member state.
- The supply is exempt from VAT in the origin country and subject to VAT in the destination country.
intra-community in your invoice lines. The eu-en16931-v2017 addon will automatically set the UNTDID 5305 tax category to K (VAT exempt for EEA intra-community supply of goods and services) when the silo entry is built.supplier must be previously registered with the tax authority and the customer VAT ID must be valid and registered in the EU VIES system.{
"$schema": "https://gobl.org/draft-0/bill/invoice",
"$regime": "DE",
"$addons": [
"eu-en16931-v2017"
],
"type": "standard",
"series": "INV",
"code": "PP000003",
"issue_date": "2025-04-03",
"currency": "EUR",
"supplier": {
"name": "Rheinland Technologies GmbH",
"tax_id": {
"country": "DE",
"code": "879558966"
},
"inboxes": [
{
"key": "peppol",
"scheme": "9930",
"code": "DE879558966"
}
],
"addresses": [
{
"num": "27",
"street": "Friedrichstraße",
"locality": "Berlin",
"region": "BE",
"code": "10117",
"country": "DE"
}
],
"emails": [
{
"addr": "rechnungen@rheinlandtech.de"
}
]
},
"customer": {
"name": "Invopop SL",
"tax_id": {
"country": "ES",
"code": "B85905495"
},
"inboxes": [
{
"key": "peppol",
"scheme": "9920",
"code": "ESB85905495"
}
],
"addresses": [
{
"street": "Calle Pradillo 42",
"locality": "Madrid",
"region": "Madrid",
"code": "28002",
"country": "ES"
}
],
"emails": [
{
"addr": "billing+test@invopop.com"
}
]
},
"lines": [
{
"i": 1,
"quantity": "12",
"item": {
"name": "Sambox product",
"price": "145.00",
"unit": "one"
},
"sum": "1740.00",
"taxes": [
{
"cat": "VAT",
"key": "intra-community",
"ext": {
"cef-vatex": "VATEX-EU-IC"
}
}
],
"total": "1740.00"
}
],
"payment": {
"terms": {
"detail": "Will be paid by 2026-06-02"
}
}
}
{
"$schema": "https://gobl.org/draft-0/bill/invoice",
"$regime": "DE",
"$addons": [
"eu-en16931-v2017"
],
"type": "standard",
"series": "INV",
"code": "PP000003",
"issue_date": "2025-04-03",
"currency": "EUR",
"tax": {
"ext": {
"untdid-document-type": "380"
}
},
"supplier": {
"name": "Rheinland Technologies GmbH",
"tax_id": {
"country": "DE",
"code": "879558966"
},
"endpoints": [
{
"uri": "iso6523-actorid-upis::9930:DE879558966"
}
],
"inboxes": [
{
"key": "peppol",
"scheme": "9930",
"code": "DE879558966"
}
],
"addresses": [
{
"num": "27",
"street": "Friedrichstraße",
"locality": "Berlin",
"region": "BE",
"code": "10117",
"country": "DE"
}
],
"emails": [
{
"addr": "rechnungen@rheinlandtech.de"
}
]
},
"customer": {
"name": "Invopop SL",
"tax_id": {
"country": "ES",
"code": "B85905495"
},
"endpoints": [
{
"uri": "iso6523-actorid-upis::9920:ESB85905495"
}
],
"inboxes": [
{
"key": "peppol",
"scheme": "9920",
"code": "ESB85905495"
}
],
"addresses": [
{
"street": "Calle Pradillo 42",
"locality": "Madrid",
"region": "Madrid",
"code": "28002",
"country": "ES"
}
],
"emails": [
{
"addr": "billing+test@invopop.com"
}
]
},
"lines": [
{
"i": 1,
"quantity": "12",
"item": {
"name": "Sambox product",
"price": "145.00",
"unit": "one"
},
"sum": "1740.00",
"taxes": [
{
"cat": "VAT",
"key": "intra-community",
"ext": {
"cef-vatex": "VATEX-EU-IC",
"untdid-tax-category": "K"
}
}
],
"total": "1740.00"
}
],
"payment": {
"terms": {
"notes": "Will be paid by 2026-06-02"
}
},
"totals": {
"sum": "1740.00",
"total": "1740.00",
"taxes": {
"categories": [
{
"code": "VAT",
"rates": [
{
"key": "intra-community",
"ext": {
"cef-vatex": "VATEX-EU-IC",
"untdid-tax-category": "K"
},
"base": "1740.00",
"amount": "0.00"
}
],
"amount": "0.00"
}
],
"sum": "0.00"
},
"tax": "0.00",
"total_with_tax": "1740.00",
"payable": "1740.00"
}
}
Peppol Germany - B2B services → international customer (Outside Scope)
Peppol Germany - B2B services → international customer (Outside Scope)
outside-scope in your invoice lines. The eu-en16931-v2017 addon will automatically set the UNTDID 5305 tax category to O (Services outside scope of tax) when the silo entry is built.{
"$schema": "https://gobl.org/draft-0/bill/invoice",
"$regime": "DE",
"$addons": [
"eu-en16931-v2017"
],
"type": "standard",
"series": "INV",
"code": "PP000003",
"issue_date": "2025-04-03",
"currency": "EUR",
"supplier": {
"name": "Rheinland Technologies GmbH",
"tax_id": {
"country": "DE",
"code": "879558966"
},
"inboxes": [
{
"key": "peppol",
"scheme": "9930",
"code": "DE879558966"
}
],
"addresses": [
{
"num": "27",
"street": "Friedrichstraße",
"locality": "Berlin",
"region": "BE",
"code": "10117",
"country": "DE"
}
],
"emails": [
{
"addr": "rechnungen@rheinlandtech.de"
}
]
},
"customer": {
"name": "Singapore Company LTD",
"tax_id": {
"country": "SG",
"code": "199904785Z"
},
"inboxes": [
{
"key": "peppol",
"scheme": "0195",
"code": "SGUEN199904785Z"
}
],
"addresses": [
{
"street": "18 Marina Gardens Drive",
"locality": "Singapore",
"region": "Central Region",
"code": "018953",
"country": "SG"
}
],
"emails": [
{
"addr": "billing+test@invopop.com"
}
]
},
"lines": [
{
"i": 1,
"quantity": "12",
"item": {
"name": "Sambox service",
"price": "145.00",
"unit": "h"
},
"sum": "145.00",
"taxes": [
{
"cat": "VAT",
"key": "outside-scope",
"ext": {
"cef-vatex": "VATEX-EU-O"
}
}
],
"total": "145.00"
}
],
"payment": {
"terms": {
"detail": "Will be paid by 2026-06-02"
}
}
}
{
"$schema": "https://gobl.org/draft-0/bill/invoice",
"$regime": "DE",
"$addons": [
"eu-en16931-v2017"
],
"type": "standard",
"series": "INV",
"code": "PP000003",
"issue_date": "2025-04-03",
"currency": "EUR",
"tax": {
"ext": {
"untdid-document-type": "380"
}
},
"supplier": {
"name": "Rheinland Technologies GmbH",
"tax_id": {
"country": "DE",
"code": "879558966"
},
"endpoints": [
{
"uri": "iso6523-actorid-upis::9930:DE879558966"
}
],
"inboxes": [
{
"key": "peppol",
"scheme": "9930",
"code": "DE879558966"
}
],
"addresses": [
{
"num": "27",
"street": "Friedrichstraße",
"locality": "Berlin",
"region": "BE",
"code": "10117",
"country": "DE"
}
],
"emails": [
{
"addr": "rechnungen@rheinlandtech.de"
}
]
},
"customer": {
"name": "Singapore Company LTD",
"tax_id": {
"country": "SG",
"code": "199904785Z"
},
"endpoints": [
{
"uri": "iso6523-actorid-upis::0195:SGUEN199904785Z"
}
],
"inboxes": [
{
"key": "peppol",
"scheme": "0195",
"code": "SGUEN199904785Z"
}
],
"addresses": [
{
"street": "18 Marina Gardens Drive",
"locality": "Singapore",
"region": "Central Region",
"code": "018953",
"country": "SG"
}
],
"emails": [
{
"addr": "billing+test@invopop.com"
}
]
},
"lines": [
{
"i": 1,
"quantity": "12",
"item": {
"name": "Sambox service",
"price": "145.00",
"unit": "h"
},
"sum": "1740.00",
"taxes": [
{
"cat": "VAT",
"key": "outside-scope",
"ext": {
"cef-vatex": "VATEX-EU-O",
"untdid-tax-category": "O"
}
}
],
"total": "1740.00"
}
],
"payment": {
"terms": {
"notes": "Will be paid by 2026-06-02"
}
},
"totals": {
"sum": "1740.00",
"total": "1740.00",
"taxes": {
"categories": [
{
"code": "VAT",
"rates": [
{
"key": "outside-scope",
"ext": {
"cef-vatex": "VATEX-EU-O",
"untdid-tax-category": "O"
},
"base": "1740.00",
"amount": "0.00"
}
],
"amount": "0.00"
}
],
"sum": "0.00"
},
"tax": "0.00",
"total_with_tax": "1740.00",
"payable": "1740.00"
}
}
Peppol Germany - B2B goods → international customer (Export)
Peppol Germany - B2B goods → international customer (Export)
export in your invoice lines. The eu-en16931-v2017 addon will automatically set the UNTDID 5305 tax category to G (Free export item, tax not charged) when the silo entry is built.supplier must be previously registered with the tax authority. Customer tax identification is optional but recommended for record-keeping purposes.{
"$schema": "https://gobl.org/draft-0/bill/invoice",
"$regime": "DE",
"$addons": [
"eu-en16931-v2017"
],
"type": "standard",
"series": "INV",
"code": "PP000003",
"issue_date": "2025-04-03",
"currency": "EUR",
"supplier": {
"name": "Rheinland Technologies GmbH",
"tax_id": {
"country": "DE",
"code": "879558966"
},
"inboxes": [
{
"key": "peppol",
"scheme": "9930",
"code": "DE879558966"
}
],
"addresses": [
{
"num": "27",
"street": "Friedrichstraße",
"locality": "Berlin",
"region": "BE",
"code": "10117",
"country": "DE"
}
],
"emails": [
{
"addr": "rechnungen@rheinlandtech.de"
}
]
},
"customer": {
"name": "Singapore Company LTD",
"tax_id": {
"country": "SG",
"code": "199904785Z"
},
"inboxes": [
{
"key": "peppol",
"scheme": "0195",
"code": "SGUEN199904785Z"
}
],
"addresses": [
{
"street": "18 Marina Gardens Drive",
"locality": "Singapore",
"region": "Central Region",
"code": "018953",
"country": "SG"
}
],
"emails": [
{
"addr": "billing+test@invopop.com"
}
]
},
"lines": [
{
"i": 1,
"quantity": "12",
"item": {
"name": "Sambox product",
"price": "145.00",
"unit": "one"
},
"sum": "145.00",
"taxes": [
{
"cat": "VAT",
"key": "export",
"ext": {
"cef-vatex": "VATEX-EU-G"
}
}
],
"total": "145.00"
}
],
"payment": {
"terms": {
"detail": "Will be paid by 2026-06-02"
}
}
}
{
"$schema": "https://gobl.org/draft-0/bill/invoice",
"$regime": "DE",
"$addons": [
"eu-en16931-v2017"
],
"type": "standard",
"series": "INV",
"code": "PP000003",
"issue_date": "2025-04-03",
"currency": "EUR",
"tax": {
"ext": {
"untdid-document-type": "380"
}
},
"supplier": {
"name": "Rheinland Technologies GmbH",
"tax_id": {
"country": "DE",
"code": "879558966"
},
"endpoints": [
{
"uri": "iso6523-actorid-upis::9930:DE879558966"
}
],
"inboxes": [
{
"key": "peppol",
"scheme": "9930",
"code": "DE879558966"
}
],
"addresses": [
{
"num": "27",
"street": "Friedrichstraße",
"locality": "Berlin",
"region": "BE",
"code": "10117",
"country": "DE"
}
],
"emails": [
{
"addr": "rechnungen@rheinlandtech.de"
}
]
},
"customer": {
"name": "Singapore Company LTD",
"tax_id": {
"country": "SG",
"code": "199904785Z"
},
"endpoints": [
{
"uri": "iso6523-actorid-upis::0195:SGUEN199904785Z"
}
],
"inboxes": [
{
"key": "peppol",
"scheme": "0195",
"code": "SGUEN199904785Z"
}
],
"addresses": [
{
"street": "18 Marina Gardens Drive",
"locality": "Singapore",
"region": "Central Region",
"code": "018953",
"country": "SG"
}
],
"emails": [
{
"addr": "billing+test@invopop.com"
}
]
},
"lines": [
{
"i": 1,
"quantity": "12",
"item": {
"name": "Sambox product",
"price": "145.00",
"unit": "one"
},
"sum": "1740.00",
"taxes": [
{
"cat": "VAT",
"key": "export",
"ext": {
"cef-vatex": "VATEX-EU-G",
"untdid-tax-category": "G"
}
}
],
"total": "1740.00"
}
],
"payment": {
"terms": {
"notes": "Will be paid by 2026-06-02"
}
},
"totals": {
"sum": "1740.00",
"total": "1740.00",
"taxes": {
"categories": [
{
"code": "VAT",
"rates": [
{
"key": "export",
"ext": {
"cef-vatex": "VATEX-EU-G",
"untdid-tax-category": "G"
},
"base": "1740.00",
"amount": "0.00"
}
],
"amount": "0.00"
}
],
"sum": "0.00"
},
"tax": "0.00",
"total_with_tax": "1740.00",
"payable": "1740.00"
}
}
Peppol Germany - B2B credit note
Peppol Germany - B2B credit note
type to credit-note and reference the original invoice in the preceding array by series, code, and issue_date, optionally with a reason. The eu-en16931-v2017 addon will automatically set the UNTDID document type to 381 (credit note) when the silo entry is built.{
"$schema": "https://gobl.org/draft-0/bill/invoice",
"$regime": "DE",
"$addons": [
"eu-en16931-v2017"
],
"type": "credit-note",
"series": "CN",
"code": "PP000104",
"issue_date": "2025-04-10",
"currency": "EUR",
"preceding": [
{
"type": "standard",
"series": "INV",
"code": "PP000003",
"issue_date": "2025-04-03",
"reason": "Services not delivered"
}
],
"supplier": {
"name": "Rheinland Technologies GmbH",
"tax_id": {
"country": "DE",
"code": "879558966"
},
"inboxes": [
{
"key": "peppol",
"scheme": "9930",
"code": "DE879558966"
}
],
"addresses": [
{
"num": "27",
"street": "Friedrichstraße",
"locality": "Berlin",
"region": "BE",
"code": "10117",
"country": "DE"
}
],
"emails": [
{
"addr": "rechnungen@rheinlandtech.de"
}
]
},
"customer": {
"name": "Bavaria Solutions GmbH",
"tax_id": {
"country": "DE",
"code": "993930191"
},
"inboxes": [
{
"key": "peppol",
"scheme": "9930",
"code": "DE993930191"
}
],
"addresses": [
{
"num": "15",
"street": "Marienplatz",
"locality": "München",
"region": "BY",
"code": "80331",
"country": "DE"
}
],
"emails": [
{
"addr": "test@example.com"
}
]
},
"lines": [
{
"quantity": "2",
"item": {
"name": "Sambox services",
"price": "145.00",
"unit": "one"
},
"taxes": [
{
"cat": "VAT",
"rate": "general"
}
]
}
]
}
{
"$schema": "https://gobl.org/draft-0/bill/invoice",
"$regime": "DE",
"$addons": [
"eu-en16931-v2017"
],
"type": "credit-note",
"series": "CN",
"code": "PP000104",
"issue_date": "2025-04-10",
"currency": "EUR",
"preceding": [
{
"type": "standard",
"issue_date": "2025-04-03",
"series": "INV",
"code": "PP000003",
"reason": "Services not delivered"
}
],
"tax": {
"ext": {
"untdid-document-type": "381"
}
},
"supplier": {
"name": "Rheinland Technologies GmbH",
"tax_id": {
"country": "DE",
"code": "879558966"
},
"endpoints": [
{
"uri": "iso6523-actorid-upis::9930:DE879558966"
}
],
"inboxes": [
{
"key": "peppol",
"scheme": "9930",
"code": "DE879558966"
}
],
"addresses": [
{
"num": "27",
"street": "Friedrichstraße",
"locality": "Berlin",
"region": "BE",
"code": "10117",
"country": "DE"
}
],
"emails": [
{
"addr": "rechnungen@rheinlandtech.de"
}
]
},
"customer": {
"name": "Bavaria Solutions GmbH",
"tax_id": {
"country": "DE",
"code": "993930191"
},
"endpoints": [
{
"uri": "iso6523-actorid-upis::9930:DE993930191"
}
],
"inboxes": [
{
"key": "peppol",
"scheme": "9930",
"code": "DE993930191"
}
],
"addresses": [
{
"num": "15",
"street": "Marienplatz",
"locality": "München",
"region": "BY",
"code": "80331",
"country": "DE"
}
],
"emails": [
{
"addr": "test@example.com"
}
]
},
"lines": [
{
"i": 1,
"quantity": "2",
"item": {
"name": "Sambox services",
"price": "145.00",
"unit": "one"
},
"sum": "290.00",
"taxes": [
{
"cat": "VAT",
"key": "standard",
"rate": "general",
"percent": "19%",
"ext": {
"untdid-tax-category": "S"
}
}
],
"total": "290.00"
}
],
"totals": {
"sum": "290.00",
"total": "290.00",
"taxes": {
"categories": [
{
"code": "VAT",
"rates": [
{
"key": "standard",
"ext": {
"untdid-tax-category": "S"
},
"base": "290.00",
"percent": "19%",
"amount": "55.10"
}
],
"amount": "55.10"
}
],
"sum": "55.10"
},
"tax": "55.10",
"total_with_tax": "345.10",
"payable": "345.10"
}
}
Peppol Italy - B2B standard invoice
Peppol Italy - B2B standard invoice
eu-en16931-v2017 and it-sdi-v1 addons. The addons will automatically set the document type to 380 when the silo entry is built (which happens automatically when saving a silo entry through the API or console).supplier must be previously registered with the tax authority and the customer VAT ID must be valid.{
"$schema": "https://gobl.org/draft-0/bill/invoice",
"$regime": "IT",
"$addons": [
"eu-en16931-v2017",
"it-sdi-v1"
],
"type": "standard",
"series": "INV",
"code": "PP000003",
"issue_date": "2025-04-03",
"currency": "EUR",
"supplier": {
"name": "Tecnologie Adriatico S.r.l.",
"tax_id": {
"country": "IT",
"code": "00159560366"
},
"inboxes": [
{
"key": "peppol",
"scheme": "0205",
"code": "IT00159560366"
}
],
"addresses": [
{
"num": "15",
"street": "Via Giuseppe Verdi",
"locality": "Milano",
"region": "MI",
"code": "20121",
"country": "IT"
}
],
"emails": [
{
"addr": "fatturazione@tecnologieadriatico.it"
}
]
},
"customer": {
"name": "Roma Solutions S.r.l.",
"tax_id": {
"country": "IT",
"code": "05140920017"
},
"inboxes": [
{
"key": "peppol",
"scheme": "0205",
"code": "IT05140920017"
}
],
"addresses": [
{
"num": "10",
"street": "Via del Corso",
"locality": "Roma",
"region": "RM",
"code": "00186",
"country": "IT"
}
],
"emails": [
{
"addr": "test@example.com"
}
]
},
"lines": [
{
"i": 1,
"quantity": "12",
"item": {
"name": "Sambox services",
"price": "145.00",
"unit": "one"
},
"sum": "1740.00",
"taxes": [
{
"cat": "VAT",
"rate": "general"
}
],
"total": "1740.00"
}
],
"payment": {
"terms": {
"detail": "Will be paid by 2026-06-02"
}
}
}
{
"$schema": "https://gobl.org/draft-0/bill/invoice",
"$regime": "IT",
"$addons": [
"eu-en16931-v2017",
"it-sdi-v1"
],
"type": "standard",
"series": "INV",
"code": "PP000003",
"issue_date": "2025-04-03",
"currency": "EUR",
"tax": {
"ext": {
"it-sdi-document-type": "TD01",
"it-sdi-format": "FPR12",
"untdid-document-type": "380"
}
},
"supplier": {
"name": "Tecnologie Adriatico S.r.l.",
"tax_id": {
"country": "IT",
"code": "00159560366"
},
"endpoints": [
{
"uri": "iso6523-actorid-upis::0205:IT00159560366"
}
],
"inboxes": [
{
"key": "peppol",
"scheme": "0205",
"code": "IT00159560366"
}
],
"addresses": [
{
"num": "15",
"street": "Via Giuseppe Verdi",
"locality": "Milano",
"region": "MI",
"code": "20121",
"country": "IT"
}
],
"emails": [
{
"addr": "fatturazione@tecnologieadriatico.it"
}
],
"ext": {
"it-sdi-fiscal-regime": "RF01"
}
},
"customer": {
"name": "Roma Solutions S.r.l.",
"tax_id": {
"country": "IT",
"code": "05140920017"
},
"endpoints": [
{
"uri": "iso6523-actorid-upis::0205:IT05140920017"
}
],
"inboxes": [
{
"key": "peppol",
"scheme": "0205",
"code": "IT05140920017"
}
],
"addresses": [
{
"num": "10",
"street": "Via del Corso",
"locality": "Roma",
"region": "RM",
"code": "00186",
"country": "IT"
}
],
"emails": [
{
"addr": "test@example.com"
}
]
},
"lines": [
{
"i": 1,
"quantity": "12",
"item": {
"name": "Sambox services",
"price": "145.00",
"unit": "one"
},
"sum": "1740.00",
"taxes": [
{
"cat": "VAT",
"key": "standard",
"rate": "general",
"percent": "22.0%",
"ext": {
"untdid-tax-category": "S"
}
}
],
"total": "1740.00"
}
],
"payment": {
"terms": {
"notes": "Will be paid by 2026-06-02"
}
},
"totals": {
"sum": "1740.00",
"total": "1740.00",
"taxes": {
"categories": [
{
"code": "VAT",
"rates": [
{
"key": "standard",
"ext": {
"untdid-tax-category": "S"
},
"base": "1740.00",
"percent": "22.0%",
"amount": "382.80"
}
],
"amount": "382.80"
}
],
"sum": "382.80"
},
"tax": "382.80",
"total_with_tax": "2122.80",
"payable": "2122.80"
}
}
Peppol Italy - B2B zero rated goods invoice
Peppol Italy - B2B zero rated goods invoice
- Daily and weekly newspapers, as well as periodical publications that meet a specific criteria.
- Recyclable materials such as waste and scrap intended for recycling.
- Educational materials under specific conditions.
zero in your invoice lines. Include the eu-en16931-v2017 and it-sdi-v1 addons to automatically set the UNTDID 5305 tax category to Z (zero rated goods) when the silo entry is built.{
"$schema": "https://gobl.org/draft-0/bill/invoice",
"$regime": "IT",
"$addons": [
"eu-en16931-v2017",
"it-sdi-v1"
],
"type": "standard",
"series": "INV",
"code": "PP000003",
"issue_date": "2025-04-03",
"currency": "EUR",
"supplier": {
"name": "Tecnologie Adriatico S.r.l.",
"tax_id": {
"country": "IT",
"code": "00159560366"
},
"inboxes": [
{
"key": "peppol",
"scheme": "0205",
"code": "IT00159560366"
}
],
"addresses": [
{
"num": "15",
"street": "Via Giuseppe Verdi",
"locality": "Milano",
"region": "MI",
"code": "20121",
"country": "IT"
}
],
"emails": [
{
"addr": "fatturazione@tecnologieadriatico.it"
}
]
},
"customer": {
"name": "Roma Solutions S.r.l.",
"tax_id": {
"country": "IT",
"code": "05140920017"
},
"inboxes": [
{
"key": "peppol",
"scheme": "0205",
"code": "IT05140920017"
}
],
"addresses": [
{
"num": "10",
"street": "Via del Corso",
"locality": "Roma",
"region": "RM",
"code": "00186",
"country": "IT"
}
],
"emails": [
{
"addr": "test@example.com"
}
]
},
"lines": [
{
"i": 1,
"quantity": "1",
"item": {
"name": "La Repubblica",
"price": "2.00",
"unit": "one"
},
"taxes": [
{
"cat": "VAT",
"key": "zero"
}
],
"total": "2.00"
}
],
"payment": {
"terms": {
"detail": "Will be paid by 2026-06-02"
}
}
}
{
"$schema": "https://gobl.org/draft-0/bill/invoice",
"$regime": "IT",
"$addons": [
"eu-en16931-v2017",
"it-sdi-v1"
],
"type": "standard",
"series": "INV",
"code": "PP000003",
"issue_date": "2025-04-03",
"currency": "EUR",
"tax": {
"ext": {
"it-sdi-document-type": "TD01",
"it-sdi-format": "FPR12",
"untdid-document-type": "380"
}
},
"supplier": {
"name": "Tecnologie Adriatico S.r.l.",
"tax_id": {
"country": "IT",
"code": "00159560366"
},
"endpoints": [
{
"uri": "iso6523-actorid-upis::0205:IT00159560366"
}
],
"inboxes": [
{
"key": "peppol",
"scheme": "0205",
"code": "IT00159560366"
}
],
"addresses": [
{
"num": "15",
"street": "Via Giuseppe Verdi",
"locality": "Milano",
"region": "MI",
"code": "20121",
"country": "IT"
}
],
"emails": [
{
"addr": "fatturazione@tecnologieadriatico.it"
}
],
"ext": {
"it-sdi-fiscal-regime": "RF01"
}
},
"customer": {
"name": "Roma Solutions S.r.l.",
"tax_id": {
"country": "IT",
"code": "05140920017"
},
"endpoints": [
{
"uri": "iso6523-actorid-upis::0205:IT05140920017"
}
],
"inboxes": [
{
"key": "peppol",
"scheme": "0205",
"code": "IT05140920017"
}
],
"addresses": [
{
"num": "10",
"street": "Via del Corso",
"locality": "Roma",
"region": "RM",
"code": "00186",
"country": "IT"
}
],
"emails": [
{
"addr": "test@example.com"
}
]
},
"lines": [
{
"i": 1,
"quantity": "1",
"item": {
"name": "La Repubblica",
"price": "2.00",
"unit": "one"
},
"sum": "2.00",
"taxes": [
{
"cat": "VAT",
"key": "zero",
"percent": "0%",
"ext": {
"it-sdi-exempt": "N1",
"untdid-tax-category": "Z"
}
}
],
"total": "2.00"
}
],
"payment": {
"terms": {
"notes": "Will be paid by 2026-06-02"
}
},
"totals": {
"sum": "2.00",
"total": "2.00",
"taxes": {
"categories": [
{
"code": "VAT",
"rates": [
{
"key": "zero",
"ext": {
"it-sdi-exempt": "N1",
"untdid-tax-category": "Z"
},
"base": "2.00",
"percent": "0%",
"amount": "0.00"
}
],
"amount": "0.00"
}
],
"sum": "0.00"
},
"tax": "0.00",
"total_with_tax": "2.00",
"payable": "2.00"
}
}
Peppol Italy - B2B exempt invoice
Peppol Italy - B2B exempt invoice
exempt in your invoice lines. Include the eu-en16931-v2017 and it-sdi-v1 addons to automatically set the UNTDID 5305 tax category to E when the silo entry is built. You must also state the reason for the exemption through the CEF VATEX - VAT exemption reason codes.supplier must be previously registered with the tax authority and the customer tax id must be valid.{
"$schema": "https://gobl.org/draft-0/bill/invoice",
"$addons": [
"eu-en16931-v2017",
"it-sdi-v1"
],
"$regime": "IT",
"type": "standard",
"series": "INV",
"code": "PP000003",
"issue_date": "2025-04-03",
"currency": "EUR",
"supplier": {
"name": "Scuola di Lingua Italiana",
"tax_id": {
"country": "IT",
"code": "00159560366"
},
"inboxes": [
{
"key": "peppol",
"scheme": "0205",
"code": "IT00159560366"
}
],
"addresses": [
{
"num": "10",
"street": "Via del Corso",
"locality": "Roma",
"region": "Milano-Capital",
"code": "00186",
"country": "IT"
}
],
"emails": [
{
"addr": "fatturazione@tecnologieadriatico.it"
}
]
},
"customer": {
"name": "Tecnologie Adriatico S.r.l.",
"tax_id": {
"country": "IT",
"code": "00159560366"
},
"inboxes": [
{
"key": "peppol",
"scheme": "0205",
"code": "IT00159560366"
}
],
"addresses": [
{
"num": "15",
"street": "Via Giuseppe Verdi",
"locality": "Milano",
"region": "Milano-Capital",
"code": "20121",
"country": "IT"
}
],
"emails": [
{
"addr": "fatturazione@tecnologieadriatico.it"
}
]
},
"lines": [
{
"i": 1,
"quantity": "1",
"item": {
"name": "Corso di Italiano - Mese",
"price": "120.00",
"unit": "one"
},
"taxes": [
{
"cat": "VAT",
"key": "exempt",
"ext": {
"cef-vatex": "VATEX-EU-132-1I"
}
}
],
"total": "120.00"
}
],
"payment": {
"terms": {
"detail": "Will be paid by 2026-06-02"
}
}
}
{
"$schema": "https://gobl.org/draft-0/bill/invoice",
"$regime": "IT",
"$addons": [
"eu-en16931-v2017",
"it-sdi-v1"
],
"type": "standard",
"series": "INV",
"code": "PP000003",
"issue_date": "2025-04-03",
"currency": "EUR",
"tax": {
"ext": {
"it-sdi-document-type": "TD01",
"it-sdi-format": "FPR12",
"untdid-document-type": "380"
}
},
"supplier": {
"name": "Scuola di Lingua Italiana",
"tax_id": {
"country": "IT",
"code": "00159560366"
},
"endpoints": [
{
"uri": "iso6523-actorid-upis::0205:IT00159560366"
}
],
"inboxes": [
{
"key": "peppol",
"scheme": "0205",
"code": "IT00159560366"
}
],
"addresses": [
{
"num": "10",
"street": "Via del Corso",
"locality": "Roma",
"region": "Milano-Capital",
"code": "00186",
"country": "IT"
}
],
"emails": [
{
"addr": "fatturazione@tecnologieadriatico.it"
}
],
"ext": {
"it-sdi-fiscal-regime": "RF01"
}
},
"customer": {
"name": "Tecnologie Adriatico S.r.l.",
"tax_id": {
"country": "IT",
"code": "00159560366"
},
"endpoints": [
{
"uri": "iso6523-actorid-upis::0205:IT00159560366"
}
],
"inboxes": [
{
"key": "peppol",
"scheme": "0205",
"code": "IT00159560366"
}
],
"addresses": [
{
"num": "15",
"street": "Via Giuseppe Verdi",
"locality": "Milano",
"region": "Milano-Capital",
"code": "20121",
"country": "IT"
}
],
"emails": [
{
"addr": "fatturazione@tecnologieadriatico.it"
}
]
},
"lines": [
{
"i": 1,
"quantity": "1",
"item": {
"name": "Corso di Italiano - Mese",
"price": "120.00",
"unit": "one"
},
"sum": "120.00",
"taxes": [
{
"cat": "VAT",
"key": "exempt",
"ext": {
"cef-vatex": "VATEX-EU-132-1I",
"it-sdi-exempt": "N4",
"untdid-tax-category": "E"
}
}
],
"total": "120.00"
}
],
"payment": {
"terms": {
"notes": "Will be paid by 2026-06-02"
}
},
"totals": {
"sum": "120.00",
"total": "120.00",
"taxes": {
"categories": [
{
"code": "VAT",
"rates": [
{
"key": "exempt",
"ext": {
"cef-vatex": "VATEX-EU-132-1I",
"it-sdi-exempt": "N4",
"untdid-tax-category": "E"
},
"base": "120.00",
"amount": "0.00"
}
],
"amount": "0.00"
}
],
"sum": "0.00"
},
"tax": "0.00",
"total_with_tax": "120.00",
"payable": "120.00"
}
}
Peppol Italy - B2B services → EU customer (Reverse Charge)
Peppol Italy - B2B services → EU customer (Reverse Charge)
- The customer is a registered business in another EU member state (has a valid EU VAT ID).
- The service is provided to a business customer (B2B), not a consumer.
- The service is subject to VAT but the customer accounts for the VAT in their own country.
reverse-charge in your invoice lines. Include the eu-en16931-v2017 and it-sdi-v1 addons to automatically set the UNTDID 5305 tax category to AE (reverse charge) when the silo entry is built.supplier and customer VAT ID must be valid and registered in the EU VIES system.{
"$schema": "https://gobl.org/draft-0/bill/invoice",
"$regime": "IT",
"$addons": [
"eu-en16931-v2017",
"it-sdi-v1"
],
"type": "standard",
"series": "INV",
"code": "PP000003",
"issue_date": "2025-04-03",
"currency": "EUR",
"supplier": {
"name": "Tecnologie Adriatico S.r.l.",
"tax_id": {
"country": "IT",
"code": "00159560366"
},
"inboxes": [
{
"key": "peppol",
"scheme": "0205",
"code": "IT00159560366"
}
],
"addresses": [
{
"num": "15",
"street": "Via Giuseppe Verdi",
"locality": "Milano",
"region": "Milano-Capital",
"code": "20121",
"country": "IT"
}
],
"emails": [
{
"addr": "fatturazione@tecnologieadriatico.it"
}
]
},
"customer": {
"name": "Invopop SL",
"tax_id": {
"country": "ES",
"code": "B85905495"
},
"inboxes": [
{
"key": "peppol",
"scheme": "9920",
"code": "ESB85905495"
}
],
"addresses": [
{
"street": "Calle Pradillo 42",
"locality": "Madrid",
"region": "Madrid",
"code": "28002",
"country": "ES"
}
],
"emails": [
{
"addr": "billing+test@invopop.com"
}
]
},
"lines": [
{
"i": 1,
"quantity": "12",
"item": {
"name": "Sambox services",
"price": "145.00",
"unit": "one"
},
"sum": "1740.00",
"taxes": [
{
"cat": "VAT",
"key": "reverse-charge",
"ext": {
"cef-vatex": "VATEX-EU-AE"
}
}
],
"total": "1740.00"
}
],
"payment": {
"terms": {
"detail": "Will be paid by 2026-06-02"
}
}
}
{
"$schema": "https://gobl.org/draft-0/bill/invoice",
"$regime": "IT",
"$addons": [
"eu-en16931-v2017",
"it-sdi-v1"
],
"type": "standard",
"series": "INV",
"code": "PP000003",
"issue_date": "2025-04-03",
"currency": "EUR",
"tax": {
"ext": {
"it-sdi-document-type": "TD01",
"it-sdi-format": "FPR12",
"untdid-document-type": "380"
}
},
"supplier": {
"name": "Tecnologie Adriatico S.r.l.",
"tax_id": {
"country": "IT",
"code": "00159560366"
},
"endpoints": [
{
"uri": "iso6523-actorid-upis::0205:IT00159560366"
}
],
"inboxes": [
{
"key": "peppol",
"scheme": "0205",
"code": "IT00159560366"
}
],
"addresses": [
{
"num": "15",
"street": "Via Giuseppe Verdi",
"locality": "Milano",
"region": "Milano-Capital",
"code": "20121",
"country": "IT"
}
],
"emails": [
{
"addr": "fatturazione@tecnologieadriatico.it"
}
],
"ext": {
"it-sdi-fiscal-regime": "RF01"
}
},
"customer": {
"name": "Invopop SL",
"tax_id": {
"country": "ES",
"code": "B85905495"
},
"endpoints": [
{
"uri": "iso6523-actorid-upis::9920:ESB85905495"
}
],
"inboxes": [
{
"key": "peppol",
"scheme": "9920",
"code": "ESB85905495"
}
],
"addresses": [
{
"street": "Calle Pradillo 42",
"locality": "Madrid",
"region": "Madrid",
"code": "28002",
"country": "ES"
}
],
"emails": [
{
"addr": "billing+test@invopop.com"
}
]
},
"lines": [
{
"i": 1,
"quantity": "12",
"item": {
"name": "Sambox services",
"price": "145.00",
"unit": "one"
},
"sum": "1740.00",
"taxes": [
{
"cat": "VAT",
"key": "reverse-charge",
"ext": {
"cef-vatex": "VATEX-EU-AE",
"it-sdi-exempt": "N6.9",
"untdid-tax-category": "AE"
}
}
],
"total": "1740.00"
}
],
"payment": {
"terms": {
"notes": "Will be paid by 2026-06-02"
}
},
"totals": {
"sum": "1740.00",
"total": "1740.00",
"taxes": {
"categories": [
{
"code": "VAT",
"rates": [
{
"key": "reverse-charge",
"ext": {
"cef-vatex": "VATEX-EU-AE",
"it-sdi-exempt": "N6.9",
"untdid-tax-category": "AE"
},
"base": "1740.00",
"amount": "0.00"
}
],
"amount": "0.00"
}
],
"sum": "0.00"
},
"tax": "0.00",
"total_with_tax": "1740.00",
"payable": "1740.00"
}
}
Peppol Italy - B2B goods → EU customer (Intra-Community)
Peppol Italy - B2B goods → EU customer (Intra-Community)
- The customer is a registered business in another EU member state (has a valid EU VAT ID).
- Goods are physically delivered to another EU member state.
- The supply is exempt from VAT in the origin country and subject to VAT in the destination country.
intra-community in your invoice lines. Include the eu-en16931-v2017 and it-sdi-v1 addons to automatically set the UNTDID 5305 tax category to K (VAT exempt for EEA intra-community supply of goods and services) when the silo entry is built.supplier must be previously registered with the tax authority and the customer VAT ID must be valid and registered in the EU VIES system.{
"$schema": "https://gobl.org/draft-0/bill/invoice",
"$regime": "IT",
"$addons": [
"eu-en16931-v2017",
"it-sdi-v1"
],
"type": "standard",
"series": "INV",
"code": "PP000003",
"issue_date": "2025-04-03",
"currency": "EUR",
"supplier": {
"name": "Tecnologie Adriatico S.r.l.",
"tax_id": {
"country": "IT",
"code": "00159560366"
},
"inboxes": [
{
"key": "peppol",
"scheme": "0205",
"code": "IT00159560366"
}
],
"addresses": [
{
"num": "15",
"street": "Via Giuseppe Verdi",
"locality": "Milano",
"region": "Milano-Capital",
"code": "20121",
"country": "IT"
}
],
"emails": [
{
"addr": "fatturazione@tecnologieadriatico.it"
}
]
},
"customer": {
"name": "Invopop SL",
"tax_id": {
"country": "ES",
"code": "B85905495"
},
"inboxes": [
{
"key": "peppol",
"scheme": "9920",
"code": "ESB85905495"
}
],
"addresses": [
{
"street": "Calle Pradillo 42",
"locality": "Madrid",
"region": "Madrid",
"code": "28002",
"country": "ES"
}
],
"emails": [
{
"addr": "billing+test@invopop.com"
}
]
},
"lines": [
{
"i": 1,
"quantity": "12",
"item": {
"name": "Sambox product",
"price": "145.00",
"unit": "one"
},
"sum": "1740.00",
"taxes": [
{
"cat": "VAT",
"key": "intra-community",
"ext": {
"cef-vatex": "VATEX-EU-IC"
}
}
],
"total": "1740.00"
}
],
"payment": {
"terms": {
"detail": "Will be paid by 2026-06-02"
}
}
}
{
"$schema": "https://gobl.org/draft-0/bill/invoice",
"$regime": "IT",
"$addons": [
"eu-en16931-v2017",
"it-sdi-v1"
],
"type": "standard",
"series": "INV",
"code": "PP000003",
"issue_date": "2025-04-03",
"currency": "EUR",
"tax": {
"ext": {
"it-sdi-document-type": "TD01",
"it-sdi-format": "FPR12",
"untdid-document-type": "380"
}
},
"supplier": {
"name": "Tecnologie Adriatico S.r.l.",
"tax_id": {
"country": "IT",
"code": "00159560366"
},
"endpoints": [
{
"uri": "iso6523-actorid-upis::0205:IT00159560366"
}
],
"inboxes": [
{
"key": "peppol",
"scheme": "0205",
"code": "IT00159560366"
}
],
"addresses": [
{
"num": "15",
"street": "Via Giuseppe Verdi",
"locality": "Milano",
"region": "Milano-Capital",
"code": "20121",
"country": "IT"
}
],
"emails": [
{
"addr": "fatturazione@tecnologieadriatico.it"
}
],
"ext": {
"it-sdi-fiscal-regime": "RF01"
}
},
"customer": {
"name": "Invopop SL",
"tax_id": {
"country": "ES",
"code": "B85905495"
},
"endpoints": [
{
"uri": "iso6523-actorid-upis::9920:ESB85905495"
}
],
"inboxes": [
{
"key": "peppol",
"scheme": "9920",
"code": "ESB85905495"
}
],
"addresses": [
{
"street": "Calle Pradillo 42",
"locality": "Madrid",
"region": "Madrid",
"code": "28002",
"country": "ES"
}
],
"emails": [
{
"addr": "billing+test@invopop.com"
}
]
},
"lines": [
{
"i": 1,
"quantity": "12",
"item": {
"name": "Sambox product",
"price": "145.00",
"unit": "one"
},
"sum": "1740.00",
"taxes": [
{
"cat": "VAT",
"key": "intra-community",
"ext": {
"cef-vatex": "VATEX-EU-IC",
"it-sdi-exempt": "N3.2",
"untdid-tax-category": "K"
}
}
],
"total": "1740.00"
}
],
"payment": {
"terms": {
"notes": "Will be paid by 2026-06-02"
}
},
"totals": {
"sum": "1740.00",
"total": "1740.00",
"taxes": {
"categories": [
{
"code": "VAT",
"rates": [
{
"key": "intra-community",
"ext": {
"cef-vatex": "VATEX-EU-IC",
"it-sdi-exempt": "N3.2",
"untdid-tax-category": "K"
},
"base": "1740.00",
"amount": "0.00"
}
],
"amount": "0.00"
}
],
"sum": "0.00"
},
"tax": "0.00",
"total_with_tax": "1740.00",
"payable": "1740.00"
}
}
Peppol Italy - B2B services → international customer (Outside Scope)
Peppol Italy - B2B services → international customer (Outside Scope)
outside-scope in your invoice lines. Include the eu-en16931-v2017 and it-sdi-v1 addons to automatically set the UNTDID 5305 tax category to O (Services outside scope of tax) when the silo entry is built.{
"$schema": "https://gobl.org/draft-0/bill/invoice",
"$regime": "IT",
"$addons": [
"eu-en16931-v2017",
"it-sdi-v1"
],
"type": "standard",
"series": "INV",
"code": "PP000003",
"issue_date": "2025-04-03",
"currency": "EUR",
"supplier": {
"name": "Tecnologie Adriatico S.r.l.",
"tax_id": {
"country": "IT",
"code": "00159560366"
},
"inboxes": [
{
"key": "peppol",
"scheme": "0205",
"code": "IT00159560366"
}
],
"addresses": [
{
"num": "15",
"street": "Via Giuseppe Verdi",
"locality": "Milano",
"region": "Milano-Capital",
"code": "20121",
"country": "IT"
}
],
"emails": [
{
"addr": "fatturazione@tecnologieadriatico.it"
}
]
},
"customer": {
"name": "Singapore Company LTD",
"tax_id": {
"country": "SG",
"code": "199904785Z"
},
"inboxes": [
{
"key": "peppol",
"scheme": "0195",
"code": "SGUEN199904785Z"
}
],
"addresses": [
{
"street": "18 Marina Gardens Drive",
"locality": "Singapore",
"region": "Central Region",
"code": "018953",
"country": "SG"
}
],
"emails": [
{
"addr": "billing+test@invopop.com"
}
]
},
"lines": [
{
"i": 1,
"quantity": "12",
"item": {
"name": "Sambox service",
"price": "145.00",
"unit": "h"
},
"sum": "145.00",
"taxes": [
{
"cat": "VAT",
"key": "outside-scope",
"ext": {
"cef-vatex": "VATEX-EU-O"
}
}
],
"total": "145.00"
}
],
"payment": {
"terms": {
"detail": "Will be paid by 2026-06-02"
}
}
}
{
"$schema": "https://gobl.org/draft-0/bill/invoice",
"$regime": "IT",
"$addons": [
"eu-en16931-v2017",
"it-sdi-v1"
],
"type": "standard",
"series": "INV",
"code": "PP000003",
"issue_date": "2025-04-03",
"currency": "EUR",
"tax": {
"ext": {
"it-sdi-document-type": "TD01",
"it-sdi-format": "FPR12",
"untdid-document-type": "380"
}
},
"supplier": {
"name": "Tecnologie Adriatico S.r.l.",
"tax_id": {
"country": "IT",
"code": "00159560366"
},
"endpoints": [
{
"uri": "iso6523-actorid-upis::0205:IT00159560366"
}
],
"inboxes": [
{
"key": "peppol",
"scheme": "0205",
"code": "IT00159560366"
}
],
"addresses": [
{
"num": "15",
"street": "Via Giuseppe Verdi",
"locality": "Milano",
"region": "Milano-Capital",
"code": "20121",
"country": "IT"
}
],
"emails": [
{
"addr": "fatturazione@tecnologieadriatico.it"
}
],
"ext": {
"it-sdi-fiscal-regime": "RF01"
}
},
"customer": {
"name": "Singapore Company LTD",
"tax_id": {
"country": "SG",
"code": "199904785Z"
},
"endpoints": [
{
"uri": "iso6523-actorid-upis::0195:SGUEN199904785Z"
}
],
"inboxes": [
{
"key": "peppol",
"scheme": "0195",
"code": "SGUEN199904785Z"
}
],
"addresses": [
{
"street": "18 Marina Gardens Drive",
"locality": "Singapore",
"region": "Central Region",
"code": "018953",
"country": "SG"
}
],
"emails": [
{
"addr": "billing+test@invopop.com"
}
]
},
"lines": [
{
"i": 1,
"quantity": "12",
"item": {
"name": "Sambox service",
"price": "145.00",
"unit": "h"
},
"sum": "1740.00",
"taxes": [
{
"cat": "VAT",
"key": "outside-scope",
"ext": {
"cef-vatex": "VATEX-EU-O",
"it-sdi-exempt": "N2.1",
"untdid-tax-category": "O"
}
}
],
"total": "1740.00"
}
],
"payment": {
"terms": {
"notes": "Will be paid by 2026-06-02"
}
},
"totals": {
"sum": "1740.00",
"total": "1740.00",
"taxes": {
"categories": [
{
"code": "VAT",
"rates": [
{
"key": "outside-scope",
"ext": {
"cef-vatex": "VATEX-EU-O",
"it-sdi-exempt": "N2.1",
"untdid-tax-category": "O"
},
"base": "1740.00",
"amount": "0.00"
}
],
"amount": "0.00"
}
],
"sum": "0.00"
},
"tax": "0.00",
"total_with_tax": "1740.00",
"payable": "1740.00"
}
}
Peppol Italy - B2B goods → international customer (Export)
Peppol Italy - B2B goods → international customer (Export)
export in your invoice lines. Include the eu-en16931-v2017 and it-sdi-v1 addons to automatically set the UNTDID 5305 tax category to G (Free export item, tax not charged) when the silo entry is built.supplier must be previously registered with the tax authority. Customer tax identification is optional but recommended for record-keeping purposes.{
"$schema": "https://gobl.org/draft-0/bill/invoice",
"$regime": "IT",
"$addons": [
"eu-en16931-v2017",
"it-sdi-v1"
],
"type": "standard",
"series": "INV",
"code": "PP000003",
"issue_date": "2025-04-03",
"currency": "EUR",
"supplier": {
"name": "Tecnologie Adriatico S.r.l.",
"tax_id": {
"country": "IT",
"code": "00159560366"
},
"inboxes": [
{
"key": "peppol",
"scheme": "0205",
"code": "IT00159560366"
}
],
"addresses": [
{
"num": "15",
"street": "Via Giuseppe Verdi",
"locality": "Milano",
"region": "Milano-Capital",
"code": "20121",
"country": "IT"
}
],
"emails": [
{
"addr": "fatturazione@tecnologieadriatico.it"
}
]
},
"customer": {
"name": "Singapore Company LTD",
"tax_id": {
"country": "SG",
"code": "199904785Z"
},
"inboxes": [
{
"key": "peppol",
"scheme": "0195",
"code": "SGUEN199904785Z"
}
],
"addresses": [
{
"street": "18 Marina Gardens Drive",
"locality": "Singapore",
"region": "Central Region",
"code": "018953",
"country": "SG"
}
],
"emails": [
{
"addr": "billing+test@invopop.com"
}
]
},
"lines": [
{
"i": 1,
"quantity": "12",
"item": {
"name": "Sambox product",
"price": "145.00",
"unit": "one"
},
"sum": "145.00",
"taxes": [
{
"cat": "VAT",
"key": "export",
"ext": {
"cef-vatex": "VATEX-EU-G"
}
}
],
"total": "145.00"
}
],
"payment": {
"terms": {
"detail": "Will be paid by 2026-06-02"
}
}
}
{
"$schema": "https://gobl.org/draft-0/bill/invoice",
"$regime": "IT",
"$addons": [
"eu-en16931-v2017",
"it-sdi-v1"
],
"type": "standard",
"series": "INV",
"code": "PP000003",
"issue_date": "2025-04-03",
"currency": "EUR",
"tax": {
"ext": {
"it-sdi-document-type": "TD01",
"it-sdi-format": "FPR12",
"untdid-document-type": "380"
}
},
"supplier": {
"name": "Tecnologie Adriatico S.r.l.",
"tax_id": {
"country": "IT",
"code": "00159560366"
},
"endpoints": [
{
"uri": "iso6523-actorid-upis::0205:IT00159560366"
}
],
"inboxes": [
{
"key": "peppol",
"scheme": "0205",
"code": "IT00159560366"
}
],
"addresses": [
{
"num": "15",
"street": "Via Giuseppe Verdi",
"locality": "Milano",
"region": "Milano-Capital",
"code": "20121",
"country": "IT"
}
],
"emails": [
{
"addr": "fatturazione@tecnologieadriatico.it"
}
],
"ext": {
"it-sdi-fiscal-regime": "RF01"
}
},
"customer": {
"name": "Singapore Company LTD",
"tax_id": {
"country": "SG",
"code": "199904785Z"
},
"endpoints": [
{
"uri": "iso6523-actorid-upis::0195:SGUEN199904785Z"
}
],
"inboxes": [
{
"key": "peppol",
"scheme": "0195",
"code": "SGUEN199904785Z"
}
],
"addresses": [
{
"street": "18 Marina Gardens Drive",
"locality": "Singapore",
"region": "Central Region",
"code": "018953",
"country": "SG"
}
],
"emails": [
{
"addr": "billing+test@invopop.com"
}
]
},
"lines": [
{
"i": 1,
"quantity": "12",
"item": {
"name": "Sambox product",
"price": "145.00",
"unit": "one"
},
"sum": "1740.00",
"taxes": [
{
"cat": "VAT",
"key": "export",
"ext": {
"cef-vatex": "VATEX-EU-G",
"it-sdi-exempt": "N3.1",
"untdid-tax-category": "G"
}
}
],
"total": "1740.00"
}
],
"payment": {
"terms": {
"notes": "Will be paid by 2026-06-02"
}
},
"totals": {
"sum": "1740.00",
"total": "1740.00",
"taxes": {
"categories": [
{
"code": "VAT",
"rates": [
{
"key": "export",
"ext": {
"cef-vatex": "VATEX-EU-G",
"it-sdi-exempt": "N3.1",
"untdid-tax-category": "G"
},
"base": "1740.00",
"amount": "0.00"
}
],
"amount": "0.00"
}
],
"sum": "0.00"
},
"tax": "0.00",
"total_with_tax": "1740.00",
"payable": "1740.00"
}
}
Peppol Spain - B2B standard invoice
Peppol Spain - B2B standard invoice
- The customer is a registered business (has a tax identification number).
- The transaction amount is €400 VAT included or above, or the customer requires a full invoice.
- The customer needs a complete invoice with all tax details for accounting or tax purposes.
eu-en16931-v2017 and es-verifactu-v1 addons and ensure the customer field contains valid tax identification details. The addons will automatically set the document type to 380 when the silo entry is built (which happens automatically when saving a silo entry through the API or console).supplier must be previously registered with the tax authority and the customer VAT ID must be valid.{
"$schema": "https://gobl.org/draft-0/bill/invoice",
"$addons": [
"eu-en16931-v2017",
"es-verifactu-v1"
],
"$regime": "ES",
"type": "standard",
"series": "INV",
"code": "PP000003",
"issue_date": "2025-04-03",
"currency": "EUR",
"supplier": {
"name": "Invopop S.L.",
"tax_id": {
"country": "ES",
"code": "B85905495"
},
"inboxes": [
{
"key": "peppol",
"scheme": "9920",
"code": "ESB85905495"
}
],
"addresses": [
{
"num": "42",
"street": "Calle Pradillo",
"locality": "Madrid",
"region": "Madrid",
"code": "28002",
"country": "ES"
}
],
"emails": [
{
"addr": "billing@example.com"
}
]
},
"customer": {
"name": "Barcelona Commerce S.L.",
"tax_id": {
"country": "ES",
"code": "B48994131"
},
"inboxes": [
{
"key": "peppol",
"scheme": "9920",
"code": "ESB48994131"
}
],
"addresses": [
{
"num": "20",
"street": "Passeig de Gràcia",
"locality": "Barcelona",
"region": "Cataluña",
"code": "08008",
"country": "ES"
}
],
"emails": [
{
"addr": "test@example.com"
}
]
},
"lines": [
{
"i": 1,
"quantity": "12",
"item": {
"name": "Sambox services",
"price": "145.00",
"unit": "one"
},
"sum": "1740.00",
"taxes": [
{
"cat": "VAT",
"rate": "general"
}
],
"total": "1740.00"
}
],
"payment": {
"terms": {
"detail": "Will be paid by 2026-06-02"
}
}
}
{
"$schema": "https://gobl.org/draft-0/bill/invoice",
"$regime": "ES",
"$addons": [
"eu-en16931-v2017",
"es-verifactu-v1"
],
"type": "standard",
"series": "INV",
"code": "PP000003",
"issue_date": "2025-04-03",
"currency": "EUR",
"tax": {
"ext": {
"es-verifactu-doc-type": "F1",
"untdid-document-type": "380"
}
},
"supplier": {
"name": "Invopop S.L.",
"tax_id": {
"country": "ES",
"code": "B85905495"
},
"endpoints": [
{
"uri": "iso6523-actorid-upis::9920:ESB85905495"
}
],
"inboxes": [
{
"key": "peppol",
"scheme": "9920",
"code": "ESB85905495"
}
],
"addresses": [
{
"num": "42",
"street": "Calle Pradillo",
"locality": "Madrid",
"region": "Madrid",
"code": "28002",
"country": "ES"
}
],
"emails": [
{
"addr": "billing@example.com"
}
]
},
"customer": {
"name": "Barcelona Commerce S.L.",
"tax_id": {
"country": "ES",
"code": "B48994131"
},
"endpoints": [
{
"uri": "iso6523-actorid-upis::9920:ESB48994131"
}
],
"inboxes": [
{
"key": "peppol",
"scheme": "9920",
"code": "ESB48994131"
}
],
"addresses": [
{
"num": "20",
"street": "Passeig de Gràcia",
"locality": "Barcelona",
"region": "Cataluña",
"code": "08008",
"country": "ES"
}
],
"emails": [
{
"addr": "test@example.com"
}
]
},
"lines": [
{
"i": 1,
"quantity": "12",
"item": {
"name": "Sambox services",
"price": "145.00",
"unit": "one"
},
"sum": "1740.00",
"taxes": [
{
"cat": "VAT",
"key": "standard",
"rate": "general",
"percent": "21.0%",
"ext": {
"es-verifactu-op-class": "S1",
"es-verifactu-regime": "01",
"untdid-tax-category": "S"
}
}
],
"total": "1740.00"
}
],
"payment": {
"terms": {
"notes": "Will be paid by 2026-06-02"
}
},
"totals": {
"sum": "1740.00",
"total": "1740.00",
"taxes": {
"categories": [
{
"code": "VAT",
"rates": [
{
"key": "standard",
"ext": {
"es-verifactu-op-class": "S1",
"es-verifactu-regime": "01",
"untdid-tax-category": "S"
},
"base": "1740.00",
"percent": "21.0%",
"amount": "365.40"
}
],
"amount": "365.40"
}
],
"sum": "365.40"
},
"tax": "365.40",
"total_with_tax": "2105.40",
"payable": "2105.40"
}
}
Peppol Spain - B2B zero-rated invoice
Peppol Spain - B2B zero-rated invoice
zero in your invoice lines. The eu-en16931-v2017 and es-verifactu-v1 addons will automatically set the UNTDID 5305 tax category to Z (zero rated goods) when the silo entry is built.{
"$schema": "https://gobl.org/draft-0/bill/invoice",
"$addons": [
"eu-en16931-v2017",
"es-verifactu-v1"
],
"$regime": "ES",
"type": "standard",
"series": "INV",
"code": "PP000003",
"issue_date": "2025-04-03",
"currency": "EUR",
"supplier": {
"name": "Invopop S.L.",
"tax_id": {
"country": "ES",
"code": "B85905495"
},
"inboxes": [
{
"key": "peppol",
"scheme": "9920",
"code": "ESB85905495"
}
],
"addresses": [
{
"num": "42",
"street": "Calle Pradillo",
"locality": "Madrid",
"region": "Madrid",
"code": "28002",
"country": "ES"
}
],
"emails": [
{
"addr": "billing@example.com"
}
]
},
"customer": {
"name": "Barcelona Commerce S.L.",
"tax_id": {
"country": "ES",
"code": "B03176864"
},
"inboxes": [
{
"key": "peppol",
"scheme": "9920",
"code": "ESB03176864"
}
],
"addresses": [
{
"num": "20",
"street": "Passeig de Gràcia",
"locality": "Barcelona",
"region": "Cataluña",
"code": "08008",
"country": "ES"
}
],
"emails": [
{
"addr": "test@example.com"
}
]
},
"lines": [
{
"i": 1,
"quantity": "1",
"item": {
"name": "El País",
"price": "2.00",
"unit": "one"
},
"taxes": [
{
"cat": "VAT",
"key": "zero"
}
],
"total": "2.00"
}
],
"payment": {
"terms": {
"detail": "Will be paid by 2026-06-02"
}
}
}
{
"$schema": "https://gobl.org/draft-0/bill/invoice",
"$regime": "ES",
"$addons": [
"eu-en16931-v2017",
"es-verifactu-v1"
],
"type": "standard",
"series": "INV",
"code": "PP000003",
"issue_date": "2025-04-03",
"currency": "EUR",
"tax": {
"ext": {
"es-verifactu-doc-type": "F1",
"untdid-document-type": "380"
}
},
"supplier": {
"name": "Invopop S.L.",
"tax_id": {
"country": "ES",
"code": "B85905495"
},
"endpoints": [
{
"uri": "iso6523-actorid-upis::9920:ESB85905495"
}
],
"inboxes": [
{
"key": "peppol",
"scheme": "9920",
"code": "ESB85905495"
}
],
"addresses": [
{
"num": "42",
"street": "Calle Pradillo",
"locality": "Madrid",
"region": "Madrid",
"code": "28002",
"country": "ES"
}
],
"emails": [
{
"addr": "billing@example.com"
}
]
},
"customer": {
"name": "Barcelona Commerce S.L.",
"tax_id": {
"country": "ES",
"code": "B03176864"
},
"endpoints": [
{
"uri": "iso6523-actorid-upis::9920:ESB03176864"
}
],
"inboxes": [
{
"key": "peppol",
"scheme": "9920",
"code": "ESB03176864"
}
],
"addresses": [
{
"num": "20",
"street": "Passeig de Gràcia",
"locality": "Barcelona",
"region": "Cataluña",
"code": "08008",
"country": "ES"
}
],
"emails": [
{
"addr": "test@example.com"
}
]
},
"lines": [
{
"i": 1,
"quantity": "1",
"item": {
"name": "El País",
"price": "2.00",
"unit": "one"
},
"sum": "2.00",
"taxes": [
{
"cat": "VAT",
"key": "zero",
"percent": "0%",
"ext": {
"es-verifactu-op-class": "S1",
"es-verifactu-regime": "01",
"untdid-tax-category": "Z"
}
}
],
"total": "2.00"
}
],
"payment": {
"terms": {
"notes": "Will be paid by 2026-06-02"
}
},
"totals": {
"sum": "2.00",
"total": "2.00",
"taxes": {
"categories": [
{
"code": "VAT",
"rates": [
{
"key": "zero",
"ext": {
"es-verifactu-op-class": "S1",
"es-verifactu-regime": "01",
"untdid-tax-category": "Z"
},
"base": "2.00",
"percent": "0%",
"amount": "0.00"
}
],
"amount": "0.00"
}
],
"sum": "0.00"
},
"tax": "0.00",
"total_with_tax": "2.00",
"payable": "2.00"
}
}
Peppol Spain - B2B exempt invoice
Peppol Spain - B2B exempt invoice
exempt in your invoice lines. The eu-en16931-v2017 and es-verifactu-v1 addons will automatically set the UNTDID 5305 tax category to E when the silo entry is built. You must also state the reason for the exemption through the CEF VATEX - VAT exemption reason codes.supplier must be previously registered with the tax authority and the customer tax id must be valid.{
"$schema": "https://gobl.org/draft-0/bill/invoice",
"$addons": [
"eu-en16931-v2017",
"es-verifactu-v1"
],
"$regime": "ES",
"type": "standard",
"series": "INV",
"code": "PP000003",
"issue_date": "2025-04-03",
"currency": "EUR",
"supplier": {
"name": "Escuela de Lengua Española",
"tax_id": {
"country": "ES",
"code": "B71353213"
},
"inboxes": [
{
"key": "peppol",
"scheme": "9920",
"code": "ESB71353213"
}
],
"addresses": [
{
"num": "20",
"street": "Passeig de Gràcia",
"locality": "Barcelona",
"region": "Madrid-Capital",
"code": "08008",
"country": "ES"
}
],
"emails": [
{
"addr": "billing@example.com"
}
]
},
"customer": {
"name": "Invopop S.L.",
"tax_id": {
"country": "ES",
"code": "B85905495"
},
"inboxes": [
{
"key": "peppol",
"scheme": "9920",
"code": "ESB85905495"
}
],
"addresses": [
{
"num": "42",
"street": "Calle Pradillo",
"locality": "Madrid",
"region": "Madrid-Capital",
"code": "28002",
"country": "ES"
}
],
"emails": [
{
"addr": "billing@example.com"
}
]
},
"lines": [
{
"i": 1,
"quantity": "1",
"item": {
"name": "Curso de Español - Mes",
"price": "120.00",
"unit": "one"
},
"taxes": [
{
"cat": "VAT",
"key": "exempt",
"ext": {
"cef-vatex": "VATEX-EU-132-1I"
}
}
],
"total": "120.00"
}
],
"payment": {
"terms": {
"detail": "Will be paid by 2026-06-02"
}
}
}
{
"$schema": "https://gobl.org/draft-0/bill/invoice",
"$regime": "ES",
"$addons": [
"eu-en16931-v2017",
"es-verifactu-v1"
],
"type": "standard",
"series": "INV",
"code": "PP000003",
"issue_date": "2025-04-03",
"currency": "EUR",
"tax": {
"ext": {
"es-verifactu-doc-type": "F1",
"untdid-document-type": "380"
}
},
"supplier": {
"name": "Escuela de Lengua Española",
"tax_id": {
"country": "ES",
"code": "B71353213"
},
"endpoints": [
{
"uri": "iso6523-actorid-upis::9920:ESB71353213"
}
],
"inboxes": [
{
"key": "peppol",
"scheme": "9920",
"code": "ESB71353213"
}
],
"addresses": [
{
"num": "20",
"street": "Passeig de Gràcia",
"locality": "Barcelona",
"region": "Madrid-Capital",
"code": "08008",
"country": "ES"
}
],
"emails": [
{
"addr": "billing@example.com"
}
]
},
"customer": {
"name": "Invopop S.L.",
"tax_id": {
"country": "ES",
"code": "B85905495"
},
"endpoints": [
{
"uri": "iso6523-actorid-upis::9920:ESB85905495"
}
],
"inboxes": [
{
"key": "peppol",
"scheme": "9920",
"code": "ESB85905495"
}
],
"addresses": [
{
"num": "42",
"street": "Calle Pradillo",
"locality": "Madrid",
"region": "Madrid-Capital",
"code": "28002",
"country": "ES"
}
],
"emails": [
{
"addr": "billing@example.com"
}
]
},
"lines": [
{
"i": 1,
"quantity": "1",
"item": {
"name": "Curso de Español - Mes",
"price": "120.00",
"unit": "one"
},
"sum": "120.00",
"taxes": [
{
"cat": "VAT",
"key": "exempt",
"ext": {
"cef-vatex": "VATEX-EU-132-1I",
"es-verifactu-exempt": "E1",
"es-verifactu-regime": "01",
"untdid-tax-category": "E"
}
}
],
"total": "120.00"
}
],
"payment": {
"terms": {
"notes": "Will be paid by 2026-06-02"
}
},
"totals": {
"sum": "120.00",
"total": "120.00",
"taxes": {
"categories": [
{
"code": "VAT",
"rates": [
{
"key": "exempt",
"ext": {
"cef-vatex": "VATEX-EU-132-1I",
"es-verifactu-exempt": "E1",
"es-verifactu-regime": "01",
"untdid-tax-category": "E"
},
"base": "120.00",
"amount": "0.00"
}
],
"amount": "0.00"
}
],
"sum": "0.00"
},
"tax": "0.00",
"total_with_tax": "120.00",
"payable": "120.00"
}
}
Peppol Spain - B2B services → EU customer (Reverse Charge)
Peppol Spain - B2B services → EU customer (Reverse Charge)
- The customer is a registered business in another EU member state (has a valid EU VAT ID).
- The service is provided to a business customer (B2B), not a consumer.
- The service is subject to VAT but the customer accounts for the VAT in their own country.
reverse-charge in your invoice lines. The eu-en16931-v2017 and es-verifactu-v1 addons will automatically set the UNTDID 5305 tax category to AE (reverse charge) when the silo entry is built.supplier and customer VAT ID must be valid and registered in the EU VIES system.{
"$schema": "https://gobl.org/draft-0/bill/invoice",
"$addons": [
"eu-en16931-v2017",
"es-verifactu-v1"
],
"$regime": "ES",
"type": "standard",
"series": "INV",
"code": "PP000003",
"issue_date": "2025-04-03",
"currency": "EUR",
"supplier": {
"name": "Invopop S.L.",
"tax_id": {
"country": "ES",
"code": "B85905495"
},
"inboxes": [
{
"key": "peppol",
"scheme": "9920",
"code": "ESB85905495"
}
],
"addresses": [
{
"num": "42",
"street": "Calle Pradillo",
"locality": "Madrid",
"region": "Madrid-Capital",
"code": "28002",
"country": "ES"
}
],
"emails": [
{
"addr": "billing@example.com"
}
]
},
"customer": {
"name": "Benelux Industries SA/NV",
"tax_id": {
"country": "BE",
"code": "0316597904"
},
"inboxes": [
{
"key": "peppol",
"scheme": "0208",
"code": "0316597904"
}
],
"addresses": [
{
"num": "42",
"street": "Rue de la Loi",
"locality": "Brussels",
"region": "Brussels-Capital",
"code": "1040",
"country": "BE"
}
],
"emails": [
{
"addr": "test@example.com"
}
]
},
"lines": [
{
"i": 1,
"quantity": "12",
"item": {
"name": "Sambox services",
"price": "145.00",
"unit": "one"
},
"sum": "1740.00",
"taxes": [
{
"cat": "VAT",
"key": "reverse-charge",
"ext": {
"cef-vatex": "VATEX-EU-AE"
}
}
],
"total": "1740.00"
}
],
"payment": {
"terms": {
"detail": "Will be paid by 2026-06-02"
}
}
}
{
"$schema": "https://gobl.org/draft-0/bill/invoice",
"$regime": "ES",
"$addons": [
"eu-en16931-v2017",
"es-verifactu-v1"
],
"type": "standard",
"series": "INV",
"code": "PP000003",
"issue_date": "2025-04-03",
"currency": "EUR",
"tax": {
"ext": {
"es-verifactu-doc-type": "F1",
"untdid-document-type": "380"
}
},
"supplier": {
"name": "Invopop S.L.",
"tax_id": {
"country": "ES",
"code": "B85905495"
},
"endpoints": [
{
"uri": "iso6523-actorid-upis::9920:ESB85905495"
}
],
"inboxes": [
{
"key": "peppol",
"scheme": "9920",
"code": "ESB85905495"
}
],
"addresses": [
{
"num": "42",
"street": "Calle Pradillo",
"locality": "Madrid",
"region": "Madrid-Capital",
"code": "28002",
"country": "ES"
}
],
"emails": [
{
"addr": "billing@example.com"
}
]
},
"customer": {
"name": "Benelux Industries SA/NV",
"tax_id": {
"country": "BE",
"code": "0316597904"
},
"endpoints": [
{
"uri": "iso6523-actorid-upis::0208:0316597904"
}
],
"inboxes": [
{
"key": "peppol",
"scheme": "0208",
"code": "0316597904"
}
],
"addresses": [
{
"num": "42",
"street": "Rue de la Loi",
"locality": "Brussels",
"region": "Brussels-Capital",
"code": "1040",
"country": "BE"
}
],
"emails": [
{
"addr": "test@example.com"
}
]
},
"lines": [
{
"i": 1,
"quantity": "12",
"item": {
"name": "Sambox services",
"price": "145.00",
"unit": "one"
},
"sum": "1740.00",
"taxes": [
{
"cat": "VAT",
"key": "reverse-charge",
"ext": {
"cef-vatex": "VATEX-EU-AE",
"es-verifactu-op-class": "S2",
"es-verifactu-regime": "01",
"untdid-tax-category": "AE"
}
}
],
"total": "1740.00"
}
],
"payment": {
"terms": {
"notes": "Will be paid by 2026-06-02"
}
},
"totals": {
"sum": "1740.00",
"total": "1740.00",
"taxes": {
"categories": [
{
"code": "VAT",
"rates": [
{
"key": "reverse-charge",
"ext": {
"cef-vatex": "VATEX-EU-AE",
"es-verifactu-op-class": "S2",
"es-verifactu-regime": "01",
"untdid-tax-category": "AE"
},
"base": "1740.00",
"amount": "0.00"
}
],
"amount": "0.00"
}
],
"sum": "0.00"
},
"tax": "0.00",
"total_with_tax": "1740.00",
"payable": "1740.00"
}
}
Peppol Spain - B2B goods → EU customer (Intra-Community)
Peppol Spain - B2B goods → EU customer (Intra-Community)
- The customer is a registered business in another EU member state (has a valid EU VAT ID).
- Goods are physically delivered to another EU member state.
- The supply is exempt from VAT in the origin country and subject to VAT in the destination country.
intra-community in your invoice lines. The eu-en16931-v2017 and es-verifactu-v1 addons will automatically set the UNTDID 5305 tax category to K (VAT exempt for EEA intra-community supply of goods and services) when the silo entry is built.supplier must be previously registered with the tax authority and the customer VAT ID must be valid and registered in the EU VIES system.{
"$schema": "https://gobl.org/draft-0/bill/invoice",
"$addons": [
"eu-en16931-v2017",
"es-verifactu-v1"
],
"$regime": "ES",
"type": "standard",
"series": "INV",
"code": "PP000003",
"issue_date": "2025-04-03",
"currency": "EUR",
"supplier": {
"name": "Invopop S.L.",
"tax_id": {
"country": "ES",
"code": "B85905495"
},
"inboxes": [
{
"key": "peppol",
"scheme": "9920",
"code": "ESB85905495"
}
],
"addresses": [
{
"num": "42",
"street": "Calle Pradillo",
"locality": "Madrid",
"region": "Madrid-Capital",
"code": "28002",
"country": "ES"
}
],
"emails": [
{
"addr": "billing@example.com"
}
]
},
"customer": {
"name": "Benelux Industries SA/NV",
"tax_id": {
"country": "BE",
"code": "0316597904"
},
"inboxes": [
{
"key": "peppol",
"scheme": "0208",
"code": "0316597904"
}
],
"addresses": [
{
"num": "42",
"street": "Rue de la Loi",
"locality": "Brussels",
"region": "Brussels-Capital",
"code": "1040",
"country": "BE"
}
],
"emails": [
{
"addr": "test@example.com"
}
]
},
"lines": [
{
"i": 1,
"quantity": "12",
"item": {
"name": "Sambox product",
"price": "145.00",
"unit": "one"
},
"sum": "1740.00",
"taxes": [
{
"cat": "VAT",
"key": "intra-community",
"ext": {
"cef-vatex": "VATEX-EU-IC"
}
}
],
"total": "1740.00"
}
],
"payment": {
"terms": {
"detail": "Will be paid by 2026-06-02"
}
}
}
{
"$schema": "https://gobl.org/draft-0/bill/invoice",
"$regime": "ES",
"$addons": [
"eu-en16931-v2017",
"es-verifactu-v1"
],
"type": "standard",
"series": "INV",
"code": "PP000003",
"issue_date": "2025-04-03",
"currency": "EUR",
"tax": {
"ext": {
"es-verifactu-doc-type": "F1",
"untdid-document-type": "380"
}
},
"supplier": {
"name": "Invopop S.L.",
"tax_id": {
"country": "ES",
"code": "B85905495"
},
"endpoints": [
{
"uri": "iso6523-actorid-upis::9920:ESB85905495"
}
],
"inboxes": [
{
"key": "peppol",
"scheme": "9920",
"code": "ESB85905495"
}
],
"addresses": [
{
"num": "42",
"street": "Calle Pradillo",
"locality": "Madrid",
"region": "Madrid-Capital",
"code": "28002",
"country": "ES"
}
],
"emails": [
{
"addr": "billing@example.com"
}
]
},
"customer": {
"name": "Benelux Industries SA/NV",
"tax_id": {
"country": "BE",
"code": "0316597904"
},
"endpoints": [
{
"uri": "iso6523-actorid-upis::0208:0316597904"
}
],
"inboxes": [
{
"key": "peppol",
"scheme": "0208",
"code": "0316597904"
}
],
"addresses": [
{
"num": "42",
"street": "Rue de la Loi",
"locality": "Brussels",
"region": "Brussels-Capital",
"code": "1040",
"country": "BE"
}
],
"emails": [
{
"addr": "test@example.com"
}
]
},
"lines": [
{
"i": 1,
"quantity": "12",
"item": {
"name": "Sambox product",
"price": "145.00",
"unit": "one"
},
"sum": "1740.00",
"taxes": [
{
"cat": "VAT",
"key": "intra-community",
"ext": {
"cef-vatex": "VATEX-EU-IC",
"es-verifactu-exempt": "E5",
"es-verifactu-regime": "01",
"untdid-tax-category": "K"
}
}
],
"total": "1740.00"
}
],
"payment": {
"terms": {
"notes": "Will be paid by 2026-06-02"
}
},
"totals": {
"sum": "1740.00",
"total": "1740.00",
"taxes": {
"categories": [
{
"code": "VAT",
"rates": [
{
"key": "intra-community",
"ext": {
"cef-vatex": "VATEX-EU-IC",
"es-verifactu-exempt": "E5",
"es-verifactu-regime": "01",
"untdid-tax-category": "K"
},
"base": "1740.00",
"amount": "0.00"
}
],
"amount": "0.00"
}
],
"sum": "0.00"
},
"tax": "0.00",
"total_with_tax": "1740.00",
"payable": "1740.00"
}
}
Peppol Spain - B2B services → international customer (Outside Scope)
Peppol Spain - B2B services → international customer (Outside Scope)
outside-scope in your invoice lines. The eu-en16931-v2017 and es-verifactu-v1 addons will automatically set the UNTDID 5305 tax category to O (Services outside scope of tax) when the silo entry is built.{
"$schema": "https://gobl.org/draft-0/bill/invoice",
"$addons": [
"eu-en16931-v2017"
],
"$regime": "ES",
"type": "standard",
"series": "INV",
"code": "PP000003",
"issue_date": "2025-04-03",
"currency": "EUR",
"supplier": {
"name": "Invopop S.L.",
"tax_id": {
"country": "ES",
"code": "B85905495"
},
"inboxes": [
{
"key": "peppol",
"scheme": "9920",
"code": "ESB85905495"
}
],
"addresses": [
{
"num": "42",
"street": "Calle Pradillo",
"locality": "Madrid",
"region": "Madrid-Capital",
"code": "28002",
"country": "ES"
}
],
"emails": [
{
"addr": "billing@example.com"
}
]
},
"customer": {
"name": "Singapore Company LTD",
"tax_id": {
"country": "SG",
"code": "199904785Z"
},
"inboxes": [
{
"key": "peppol",
"scheme": "0195",
"code": "SGUEN199904785Z"
}
],
"addresses": [
{
"street": "18 Marina Gardens Drive",
"locality": "Singapore",
"region": "Central Region",
"code": "018953",
"country": "SG"
}
],
"emails": [
{
"addr": "billing+test@invopop.com"
}
]
},
"lines": [
{
"i": 1,
"quantity": "12",
"item": {
"name": "Sambox service",
"price": "145.00",
"unit": "h"
},
"sum": "145.00",
"taxes": [
{
"cat": "VAT",
"key": "outside-scope",
"ext": {
"cef-vatex": "VATEX-EU-O"
}
}
],
"total": "145.00"
}
],
"payment": {
"terms": {
"detail": "Will be paid by 2026-06-02"
}
}
}
{
"$schema": "https://gobl.org/draft-0/bill/invoice",
"$regime": "ES",
"$addons": [
"eu-en16931-v2017"
],
"type": "standard",
"series": "INV",
"code": "PP000003",
"issue_date": "2025-04-03",
"currency": "EUR",
"tax": {
"ext": {
"untdid-document-type": "380"
}
},
"supplier": {
"name": "Invopop S.L.",
"tax_id": {
"country": "ES",
"code": "B85905495"
},
"endpoints": [
{
"uri": "iso6523-actorid-upis::9920:ESB85905495"
}
],
"inboxes": [
{
"key": "peppol",
"scheme": "9920",
"code": "ESB85905495"
}
],
"addresses": [
{
"num": "42",
"street": "Calle Pradillo",
"locality": "Madrid",
"region": "Madrid-Capital",
"code": "28002",
"country": "ES"
}
],
"emails": [
{
"addr": "billing@example.com"
}
]
},
"customer": {
"name": "Singapore Company LTD",
"tax_id": {
"country": "SG",
"code": "199904785Z"
},
"endpoints": [
{
"uri": "iso6523-actorid-upis::0195:SGUEN199904785Z"
}
],
"inboxes": [
{
"key": "peppol",
"scheme": "0195",
"code": "SGUEN199904785Z"
}
],
"addresses": [
{
"street": "18 Marina Gardens Drive",
"locality": "Singapore",
"region": "Central Region",
"code": "018953",
"country": "SG"
}
],
"emails": [
{
"addr": "billing+test@invopop.com"
}
]
},
"lines": [
{
"i": 1,
"quantity": "12",
"item": {
"name": "Sambox service",
"price": "145.00",
"unit": "h"
},
"sum": "1740.00",
"taxes": [
{
"cat": "VAT",
"key": "outside-scope",
"ext": {
"cef-vatex": "VATEX-EU-O",
"untdid-tax-category": "O"
}
}
],
"total": "1740.00"
}
],
"payment": {
"terms": {
"notes": "Will be paid by 2026-06-02"
}
},
"totals": {
"sum": "1740.00",
"total": "1740.00",
"taxes": {
"categories": [
{
"code": "VAT",
"rates": [
{
"key": "outside-scope",
"ext": {
"cef-vatex": "VATEX-EU-O",
"untdid-tax-category": "O"
},
"base": "1740.00",
"amount": "0.00"
}
],
"amount": "0.00"
}
],
"sum": "0.00"
},
"tax": "0.00",
"total_with_tax": "1740.00",
"payable": "1740.00"
}
}
Peppol Spain - B2B goods → international customer (Export)
Peppol Spain - B2B goods → international customer (Export)
export in your invoice lines. The eu-en16931-v2017 and es-verifactu-v1 addons will automatically set the UNTDID 5305 tax category to G (Free export item, tax not charged) when the silo entry is built.supplier must be previously registered with the tax authority. Customer tax identification is optional but recommended for record-keeping purposes.{
"$schema": "https://gobl.org/draft-0/bill/invoice",
"$addons": [
"eu-en16931-v2017"
],
"$regime": "ES",
"type": "standard",
"series": "INV",
"code": "PP000003",
"issue_date": "2025-04-03",
"currency": "EUR",
"supplier": {
"name": "Invopop S.L.",
"tax_id": {
"country": "ES",
"code": "B71353213"
},
"inboxes": [
{
"key": "peppol",
"scheme": "9920",
"code": "ESB71353213"
}
],
"addresses": [
{
"num": "42",
"street": "Calle Pradillo",
"locality": "Madrid",
"region": "Madrid-Capital",
"code": "28002",
"country": "ES"
}
],
"emails": [
{
"addr": "billing@example.com"
}
]
},
"customer": {
"name": "Singapore Company LTD",
"tax_id": {
"country": "SG",
"code": "199904785Z"
},
"inboxes": [
{
"key": "peppol",
"scheme": "0195",
"code": "SGUEN199904785Z"
}
],
"addresses": [
{
"street": "18 Marina Gardens Drive",
"locality": "Singapore",
"region": "Central Region",
"code": "018953",
"country": "SG"
}
],
"emails": [
{
"addr": "billing+test@invopop.com"
}
]
},
"lines": [
{
"i": 1,
"quantity": "12",
"item": {
"name": "Sambox product",
"price": "145.00",
"unit": "one"
},
"sum": "145.00",
"taxes": [
{
"cat": "VAT",
"key": "export",
"ext": {
"cef-vatex": "VATEX-EU-G"
}
}
],
"total": "145.00"
}
],
"payment": {
"terms": {
"detail": "Will be paid by 2026-06-02"
}
}
}
{
"$schema": "https://gobl.org/draft-0/bill/invoice",
"$regime": "ES",
"$addons": [
"eu-en16931-v2017"
],
"type": "standard",
"series": "INV",
"code": "PP000003",
"issue_date": "2025-04-03",
"currency": "EUR",
"tax": {
"ext": {
"untdid-document-type": "380"
}
},
"supplier": {
"name": "Invopop S.L.",
"tax_id": {
"country": "ES",
"code": "B71353213"
},
"endpoints": [
{
"uri": "iso6523-actorid-upis::9920:ESB71353213"
}
],
"inboxes": [
{
"key": "peppol",
"scheme": "9920",
"code": "ESB71353213"
}
],
"addresses": [
{
"num": "42",
"street": "Calle Pradillo",
"locality": "Madrid",
"region": "Madrid-Capital",
"code": "28002",
"country": "ES"
}
],
"emails": [
{
"addr": "billing@example.com"
}
]
},
"customer": {
"name": "Singapore Company LTD",
"tax_id": {
"country": "SG",
"code": "199904785Z"
},
"endpoints": [
{
"uri": "iso6523-actorid-upis::0195:SGUEN199904785Z"
}
],
"inboxes": [
{
"key": "peppol",
"scheme": "0195",
"code": "SGUEN199904785Z"
}
],
"addresses": [
{
"street": "18 Marina Gardens Drive",
"locality": "Singapore",
"region": "Central Region",
"code": "018953",
"country": "SG"
}
],
"emails": [
{
"addr": "billing+test@invopop.com"
}
]
},
"lines": [
{
"i": 1,
"quantity": "12",
"item": {
"name": "Sambox product",
"price": "145.00",
"unit": "one"
},
"sum": "1740.00",
"taxes": [
{
"cat": "VAT",
"key": "export",
"ext": {
"cef-vatex": "VATEX-EU-G",
"untdid-tax-category": "G"
}
}
],
"total": "1740.00"
}
],
"payment": {
"terms": {
"notes": "Will be paid by 2026-06-02"
}
},
"totals": {
"sum": "1740.00",
"total": "1740.00",
"taxes": {
"categories": [
{
"code": "VAT",
"rates": [
{
"key": "export",
"ext": {
"cef-vatex": "VATEX-EU-G",
"untdid-tax-category": "G"
},
"base": "1740.00",
"amount": "0.00"
}
],
"amount": "0.00"
}
],
"sum": "0.00"
},
"tax": "0.00",
"total_with_tax": "1740.00",
"payable": "1740.00"
}
}
payment: { "terms": {"detail": "..."}} field is required for EN16931 (EU) invoices and should be filled in with due dates or payment terms.Receiving invoices
Invopop automatically processes invoices received from the Peppol network using your configured Incoming Workflow. The workflow converts Peppol documents to GOBL format and creates Silo Entries for each invoice. Configure your workflow with webhooks or Google Drive integration to deliver these invoices to your systems.FAQ
Please contact the Invopop support team if you have any questions that are not listed here.What visibility do I need to have in my Peppol Party?
What visibility do I need to have in my Peppol Party?
smp: Only SMP, should be used for testingsmp+sml: SMP and SML, useful when you want to send documents but not receive themsmp+sml+peppol: SMP, SML, and Peppol Directory, recommended for both sending and receiving documents as you will be visible in the Peppol Directory
Can I remove UBL or CII from the 'Peppol receive invoice' workflow if I only use one format?
Can I remove UBL or CII from the 'Peppol receive invoice' workflow if I only use one format?
What are Participant IDs?
What are Participant IDs?
- Scheme: Identifies the type of identifier being used (e.g.,
9920for Spanish VAT numbers,0208for Belgian KBO/BCE numbers) - Code: The actual identification number
0208 (KBO/BCE number) as the preferred default, but some entities are registered under 9925 (VAT number). When sending invoices, if you get a “receiver not found” error, the recipient may be registered under an alternative scheme. See the Belgium FAQ for details.When registering a supplier we get an error: 'XXXX:XXXXXXXXX is already registered' on the Register party on Peppol step
When registering a supplier we get an error: 'XXXX:XXXXXXXXX is already registered' on the Register party on Peppol step
Should I set the $regime in Peppol?
Should I set the $regime in Peppol?
How do I assign multiple inboxes to a single supplier?
How do I assign multiple inboxes to a single supplier?
What should we do if the customer doesn't belong to the Peppol network?
What should we do if the customer doesn't belong to the Peppol network?
- Set up a separate workflow that generates the XML without sending it via Peppol
- Alternatively, use your current workflow without the customer Peppol ID (the send Peppol document step will automatically skip)
- Fetch the generated XML
- Deliver it through an agreed-upon method, typically email
How do I handle B2C invoices in Peppol?
How do I handle B2C invoices in Peppol?
- Check for Peppol capability – Using the If/Else workflow step, detect the presence of the customer’s inbox via the following expr:
count(customer.inboxes, true) > 0 - Set up an alternative flow - Adding a workflow condition, select “OK” and code
false. Then set-up your alternative flow (Generate PDF and send by email, for example). Make sure to stop the flow within the workflow condition at the end.