

Introduction
VERI*FACTU is a fiscal initiative by the Spanish Tax Agency (AEAT) that requires businesses to report invoices through certified software. The system generates unique identifiers for each invoice and creates digitally signed XML files that are submitted to the tax authorities.Prerequisites
To issue your first VERI*FACTU invoice, you must have had registered at least one supplier. Make sure you read and implemented the VERI*FACTU supplier registration guide before continuing with this guide.Setup
Add a new workflow to your workspace for issuing invoices. You can start with the template below.- Template
- Code
- Build from scratch
VERI*FACTU invoice workflow
Workflow ID at hand, you’ll use it later.
Issue an Invoice
Upload an Invoice
regime:ES- Add the
es-verifactu-v1addon supplier: Use the details of the supplier you’ve registered before.
B2C Simplified Invoice
B2C Simplified Invoice
simplified tag in your GOBL document with the es-verifactu-v1 addon.B2B Standard Invoice
B2B Standard Invoice
- The customer is a registered business (has a tax identification number).
- The transaction amount is €400 VAT included or above, or the customer requires a full invoice.
- The customer needs a complete invoice with all tax details for accounting or tax purposes.
es-verifactu-v1 addon and ensure the customer field contains valid tax identification details. The addon will automatically set the document type to F1 when the silo entry is built (which happens automatically when saving a silo entry through the API or console).supplier must be previously registered with the tax authority and the customer NIF or VAT ID must be valid.B2B Services EU Client (Reverse Charge)
B2B Services EU Client (Reverse Charge)
- The customer is a registered business in another EU member state (has a valid EU VAT ID).
- The service is provided to a business customer (B2B), not a consumer.
- The service is subject to VAT but the customer accounts for the VAT in their own country.
reverse-charge in your invoice lines. The es-verifactu-v1 addon will automatically set the operation class to S2 (Subject and Not Exempt - With reverse charge) when the silo entry is built.supplier must be previously registered with the tax authority and the customer VAT ID must be valid and registered in the EU VIES system.B2B Goods EU Client (Intra-Community)
B2B Goods EU Client (Intra-Community)
- The customer is a registered business in another EU member state (has a valid EU VAT ID).
- Goods are physically delivered to another EU member state.
- The supply is exempt from VAT in the origin country (Spain) and subject to VAT in the destination country.
intra-community in your invoice lines. The es-verifactu-v1 addon will automatically set the exemption code to E5 (Artículo 25 Ley de IVA) when the silo entry is built.supplier must be previously registered with the tax authority and the customer VAT ID must be valid and registered in the EU VIES system.B2B Services International Client (Outside Scope)
B2B Services International Client (Outside Scope)
outside-scope in your invoice lines. The es-verifactu-v1 addon will automatically set the operation class to N2 (Not Subject - Due to location rules) when the silo entry is built.supplier must be previously registered with the tax authority. Customer tax identification is optional but recommended for record-keeping purposes.B2B Goods International Client (Export)
B2B Goods International Client (Export)
export in your invoice lines. The es-verifactu-v1 addon will automatically set the exemption code to E2 (Artículo 21 Ley de IVA) and regime code to 02 (Export) when the silo entry is built.supplier must be previously registered with the tax authority. Customer tax identification is optional but recommended for record-keeping purposes.B2B Exempt E1 Invoice
B2B Exempt E1 Invoice
E1 invoices are used for B2B transactions that are exempt from VAT pursuant (Artículo 20 Ley de IVA), which covers exemptions in internal operations.To create an exempt E1 VERI*FACTU invoice, use the tax key exempt in your invoice lines. The es-verifactu-v1 addon will automatically set the exemption code to E1 when the silo entry is built.supplier must be previously registered with the tax authority and the customer NIF must be valid.B2C One-Stop-Shop Invoice
B2C One-Stop-Shop Invoice
simplified tag in your GOBL document with the es-verifactu-v1 addon. The invoice will be treated as a simplified invoice (document type F2) and VAT is accounted for through the OSS scheme in the destination country.supplier must be previously registered with the tax authority and enrolled in the OSS scheme.Credit note (rectificativa por diferencias)
Credit note (rectificativa por diferencias)
Corrective invoice (rectificativa por sustitución)
Corrective invoice (rectificativa por sustitución)
Replacement invoice (factura de canje)
Replacement invoice (factura de canje)
B2C Hotel + IEET (Catalonia tourist tax)
B2C Hotel + IEET (Catalonia tourist tax)
charge with key: "tax". This keeps it outside the VAT base (Art. 35 of Llei 5/2017 requires it to be shown separately from the consideration) and lets it flow into the invoice’s ImporteTotal for VERI*FACTU without being reported as a tax category.VAT tax line — it is a fixed amount per night, not a percentage, and should not be reported to the AEAT. The reason field on the charge is what appears on the guest’s invoice, so include the establishment type, location, nights, and rate for a clear breakdown.Empty.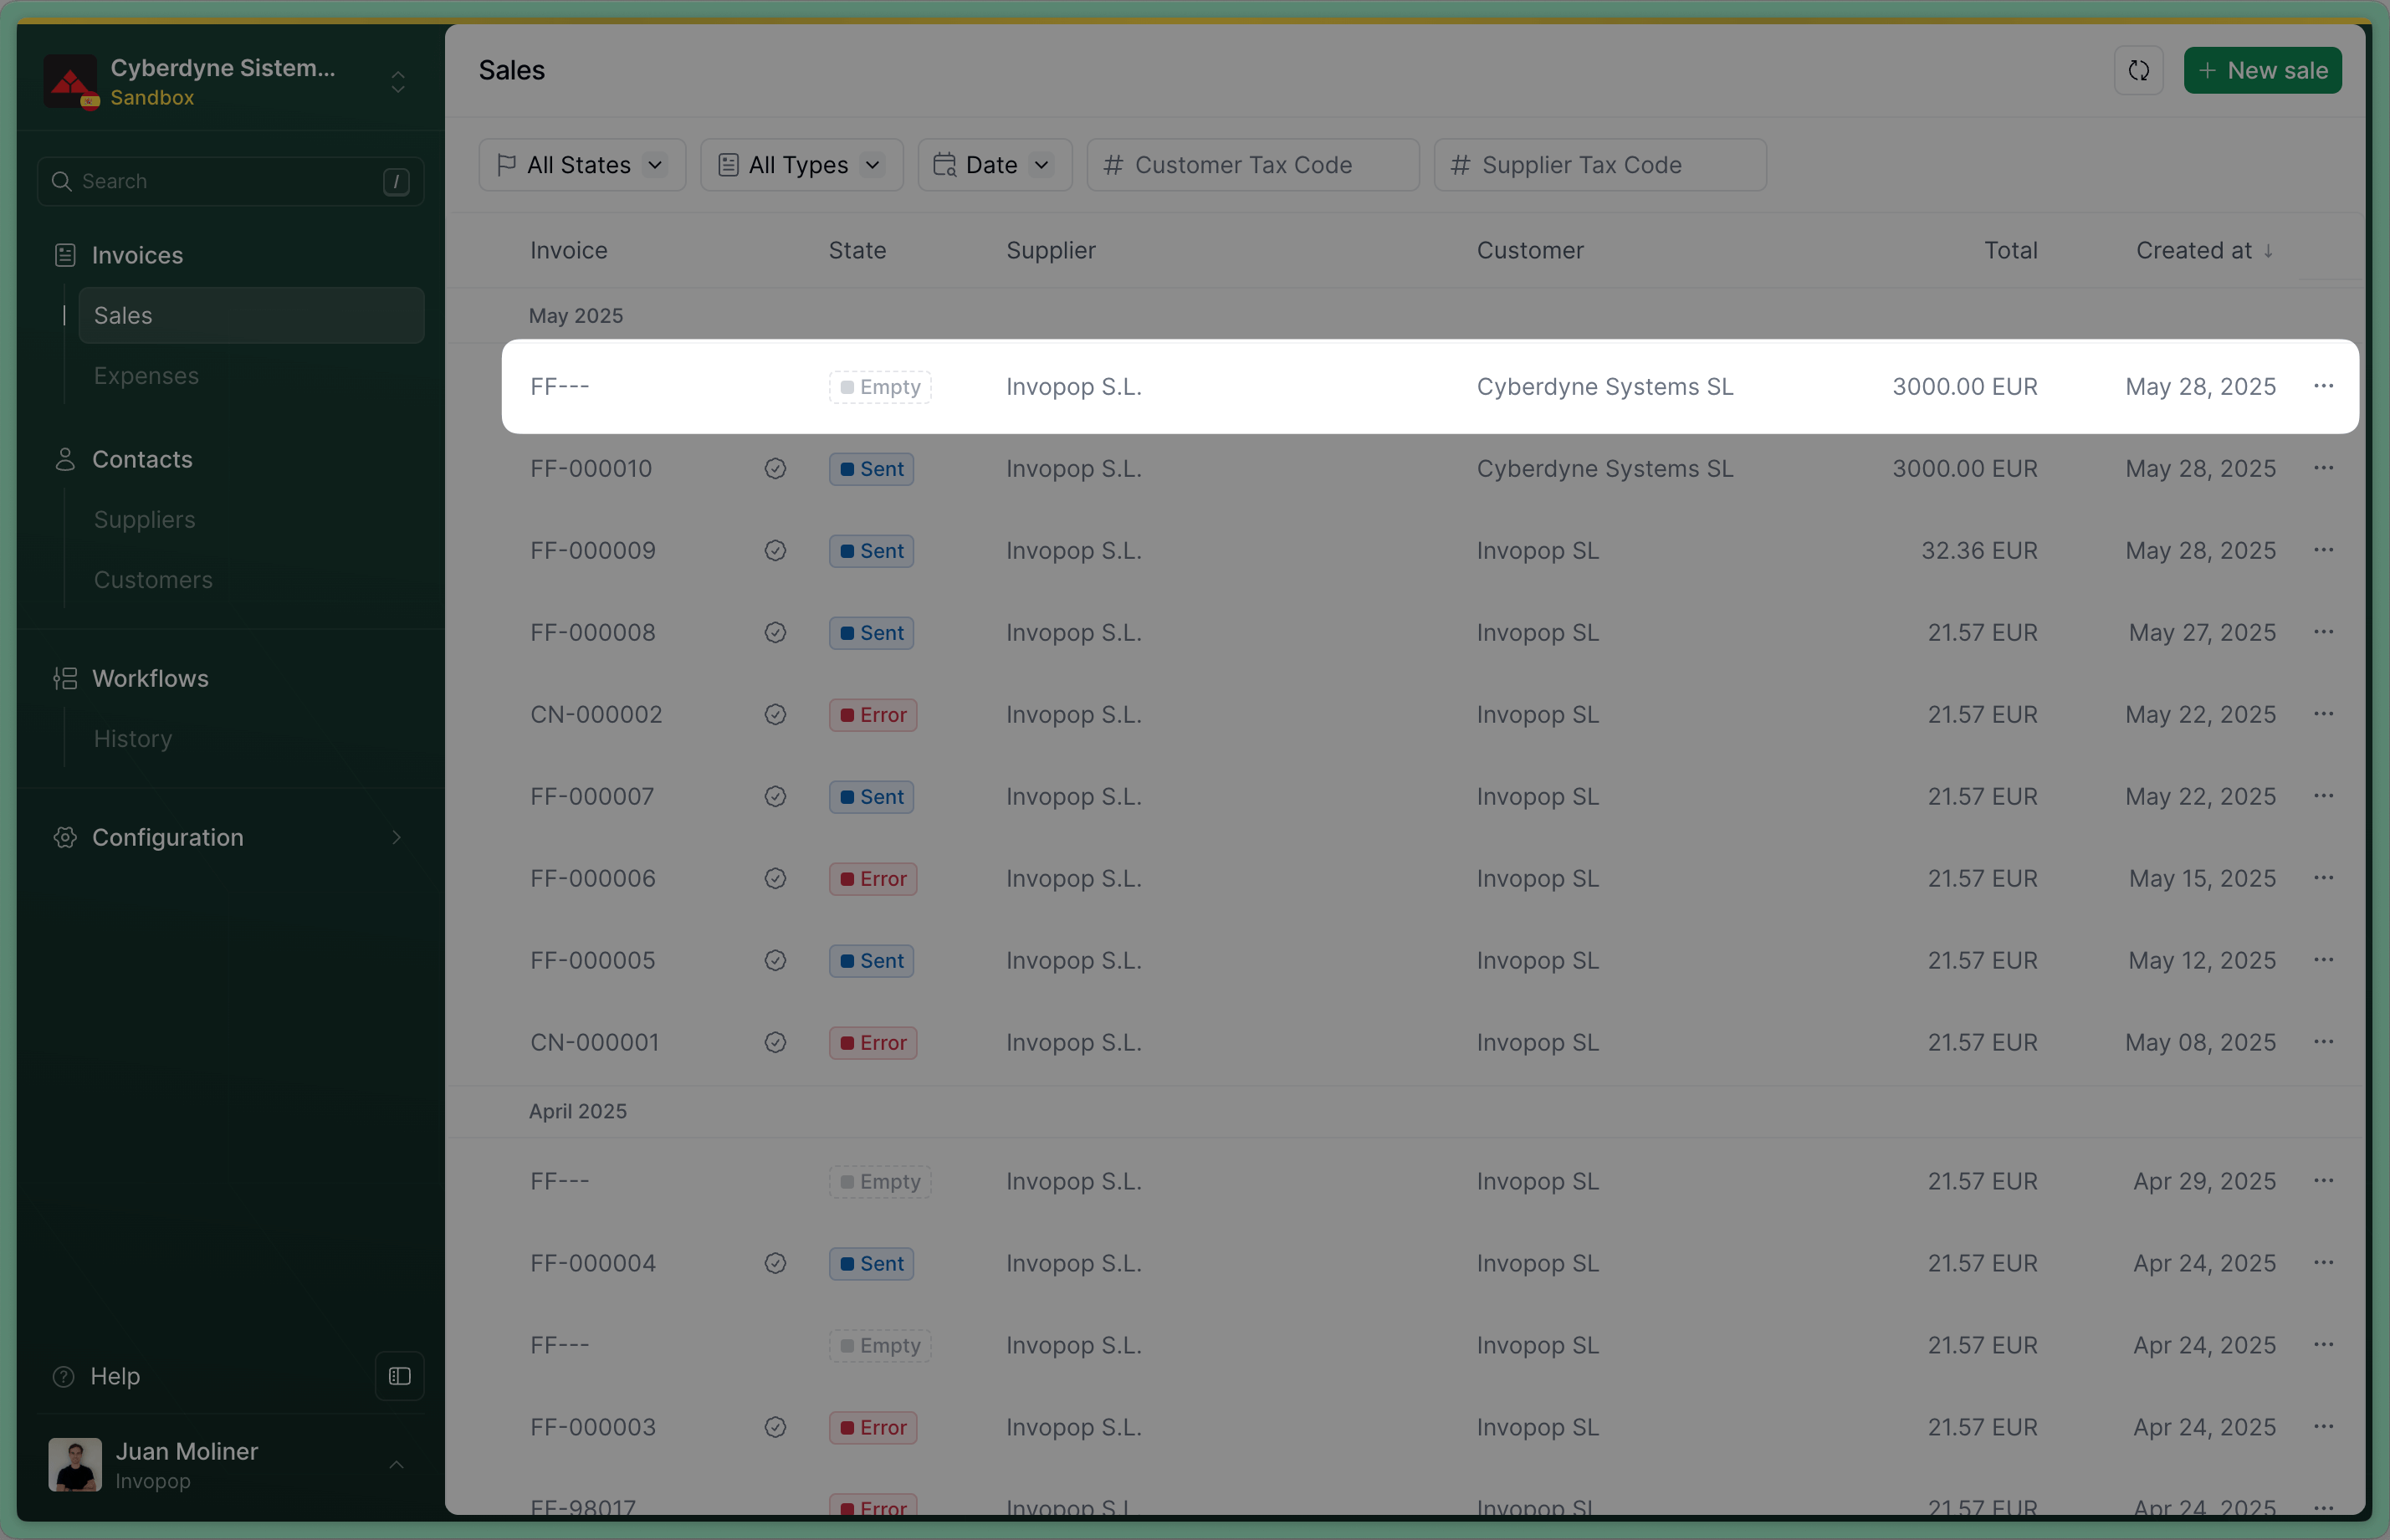
Send the Invoice to the VERI*FACTU invoice workflow
workflow_id: use the Workflow ID of the VERI*FACTU invoice workflow we created during setupsilo_entry_id: use the Silo Entry ID of the invoice you’ve just uploaded.
Sent when the workflow completes successfully.
Issue a Credit Note (Rectificativa por Diferencias)
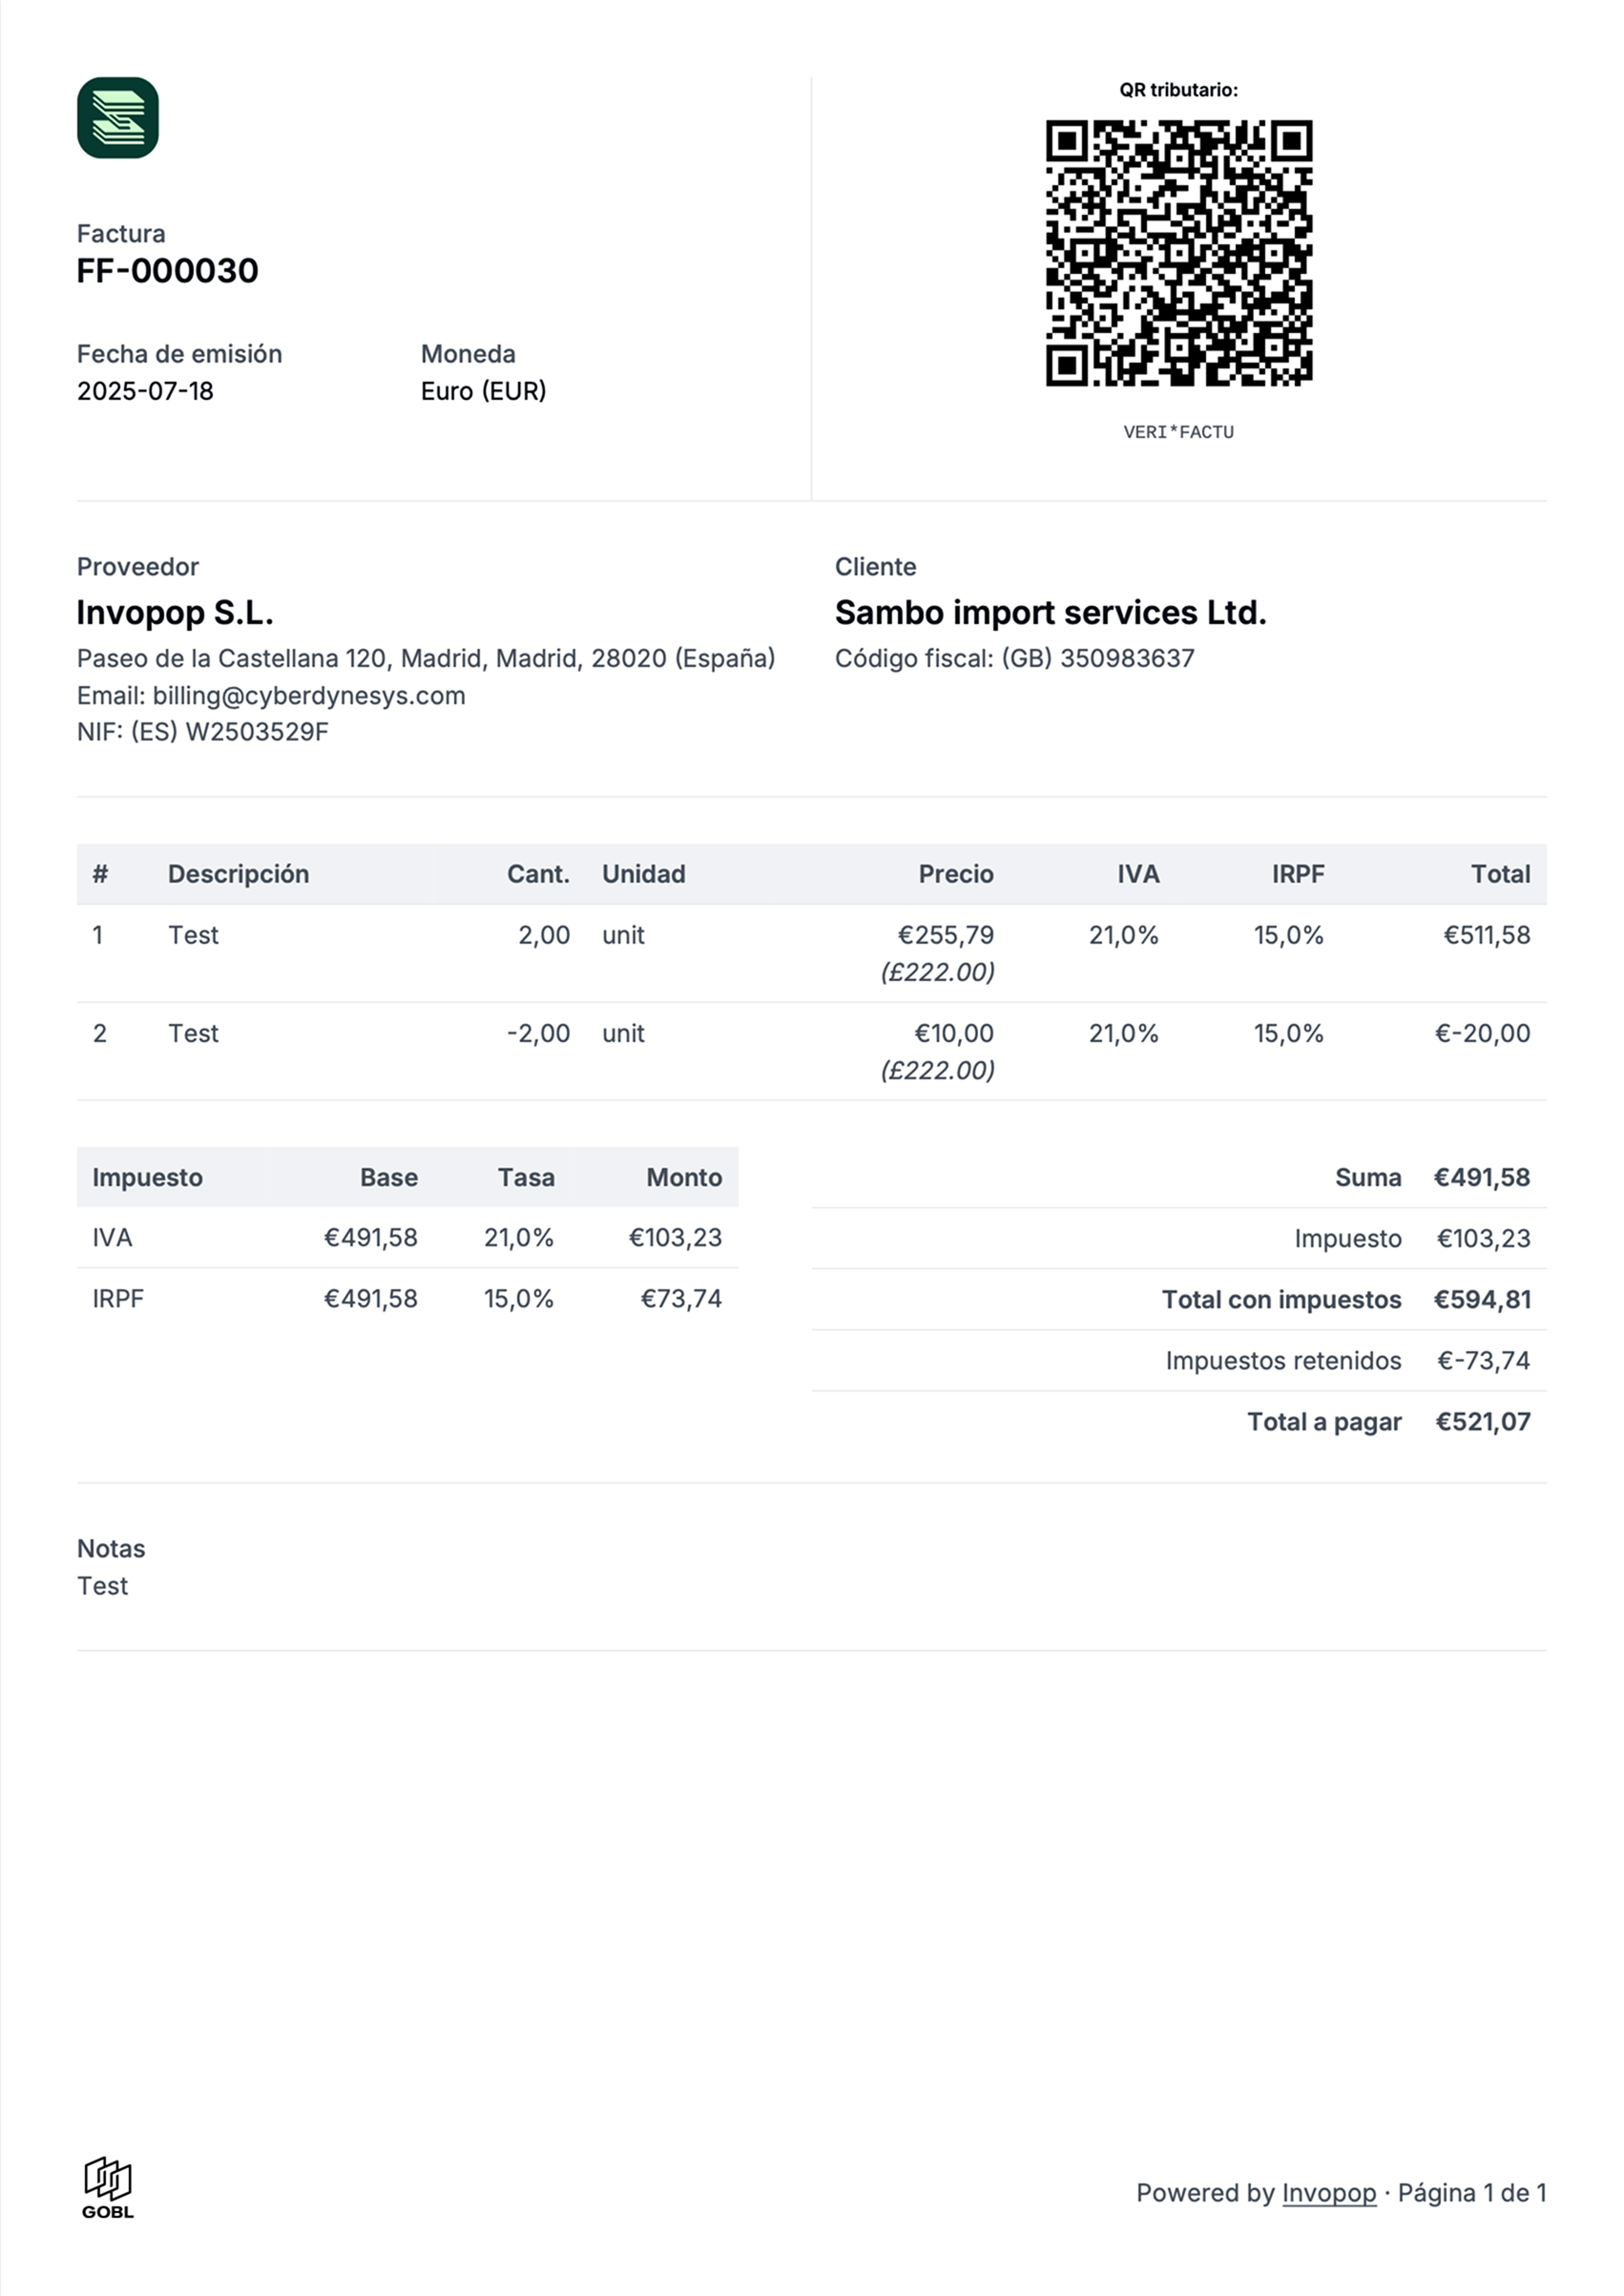
In Spain, one way to correct an invoice is by issuing a credit note, known as a Rectificativa por Diferencias. An alternative method is to issue a Rectificativa por Sustitución, which involves creating a new invoice with the type corrective. The difference between the two is subtle but important:- A credit note adjusts the value of the original invoice.
- A corrective invoice replaces the original invoice entirely.
- Issue a credit note for €20, or
- Issue a corrective invoice for €80.
Upload a Credit Note
regime:ES- Add the
es-verifactu-v1addon supplier: use the same supplier details as in the original invoicetype:credit-notepreceding: references the original invoice, within it, you must include:uuid: the UUID of the original invoice (optional but recommended)type: type of the original invoiceissue_date: the date of the original invoiceseries: the series of the original invoicecode: the code of the original invoice
Empty. If you’ve included the uuid of the invoice in preceding, you’ll see a link to the credit note we’ve just created in the Related tab of the invoice.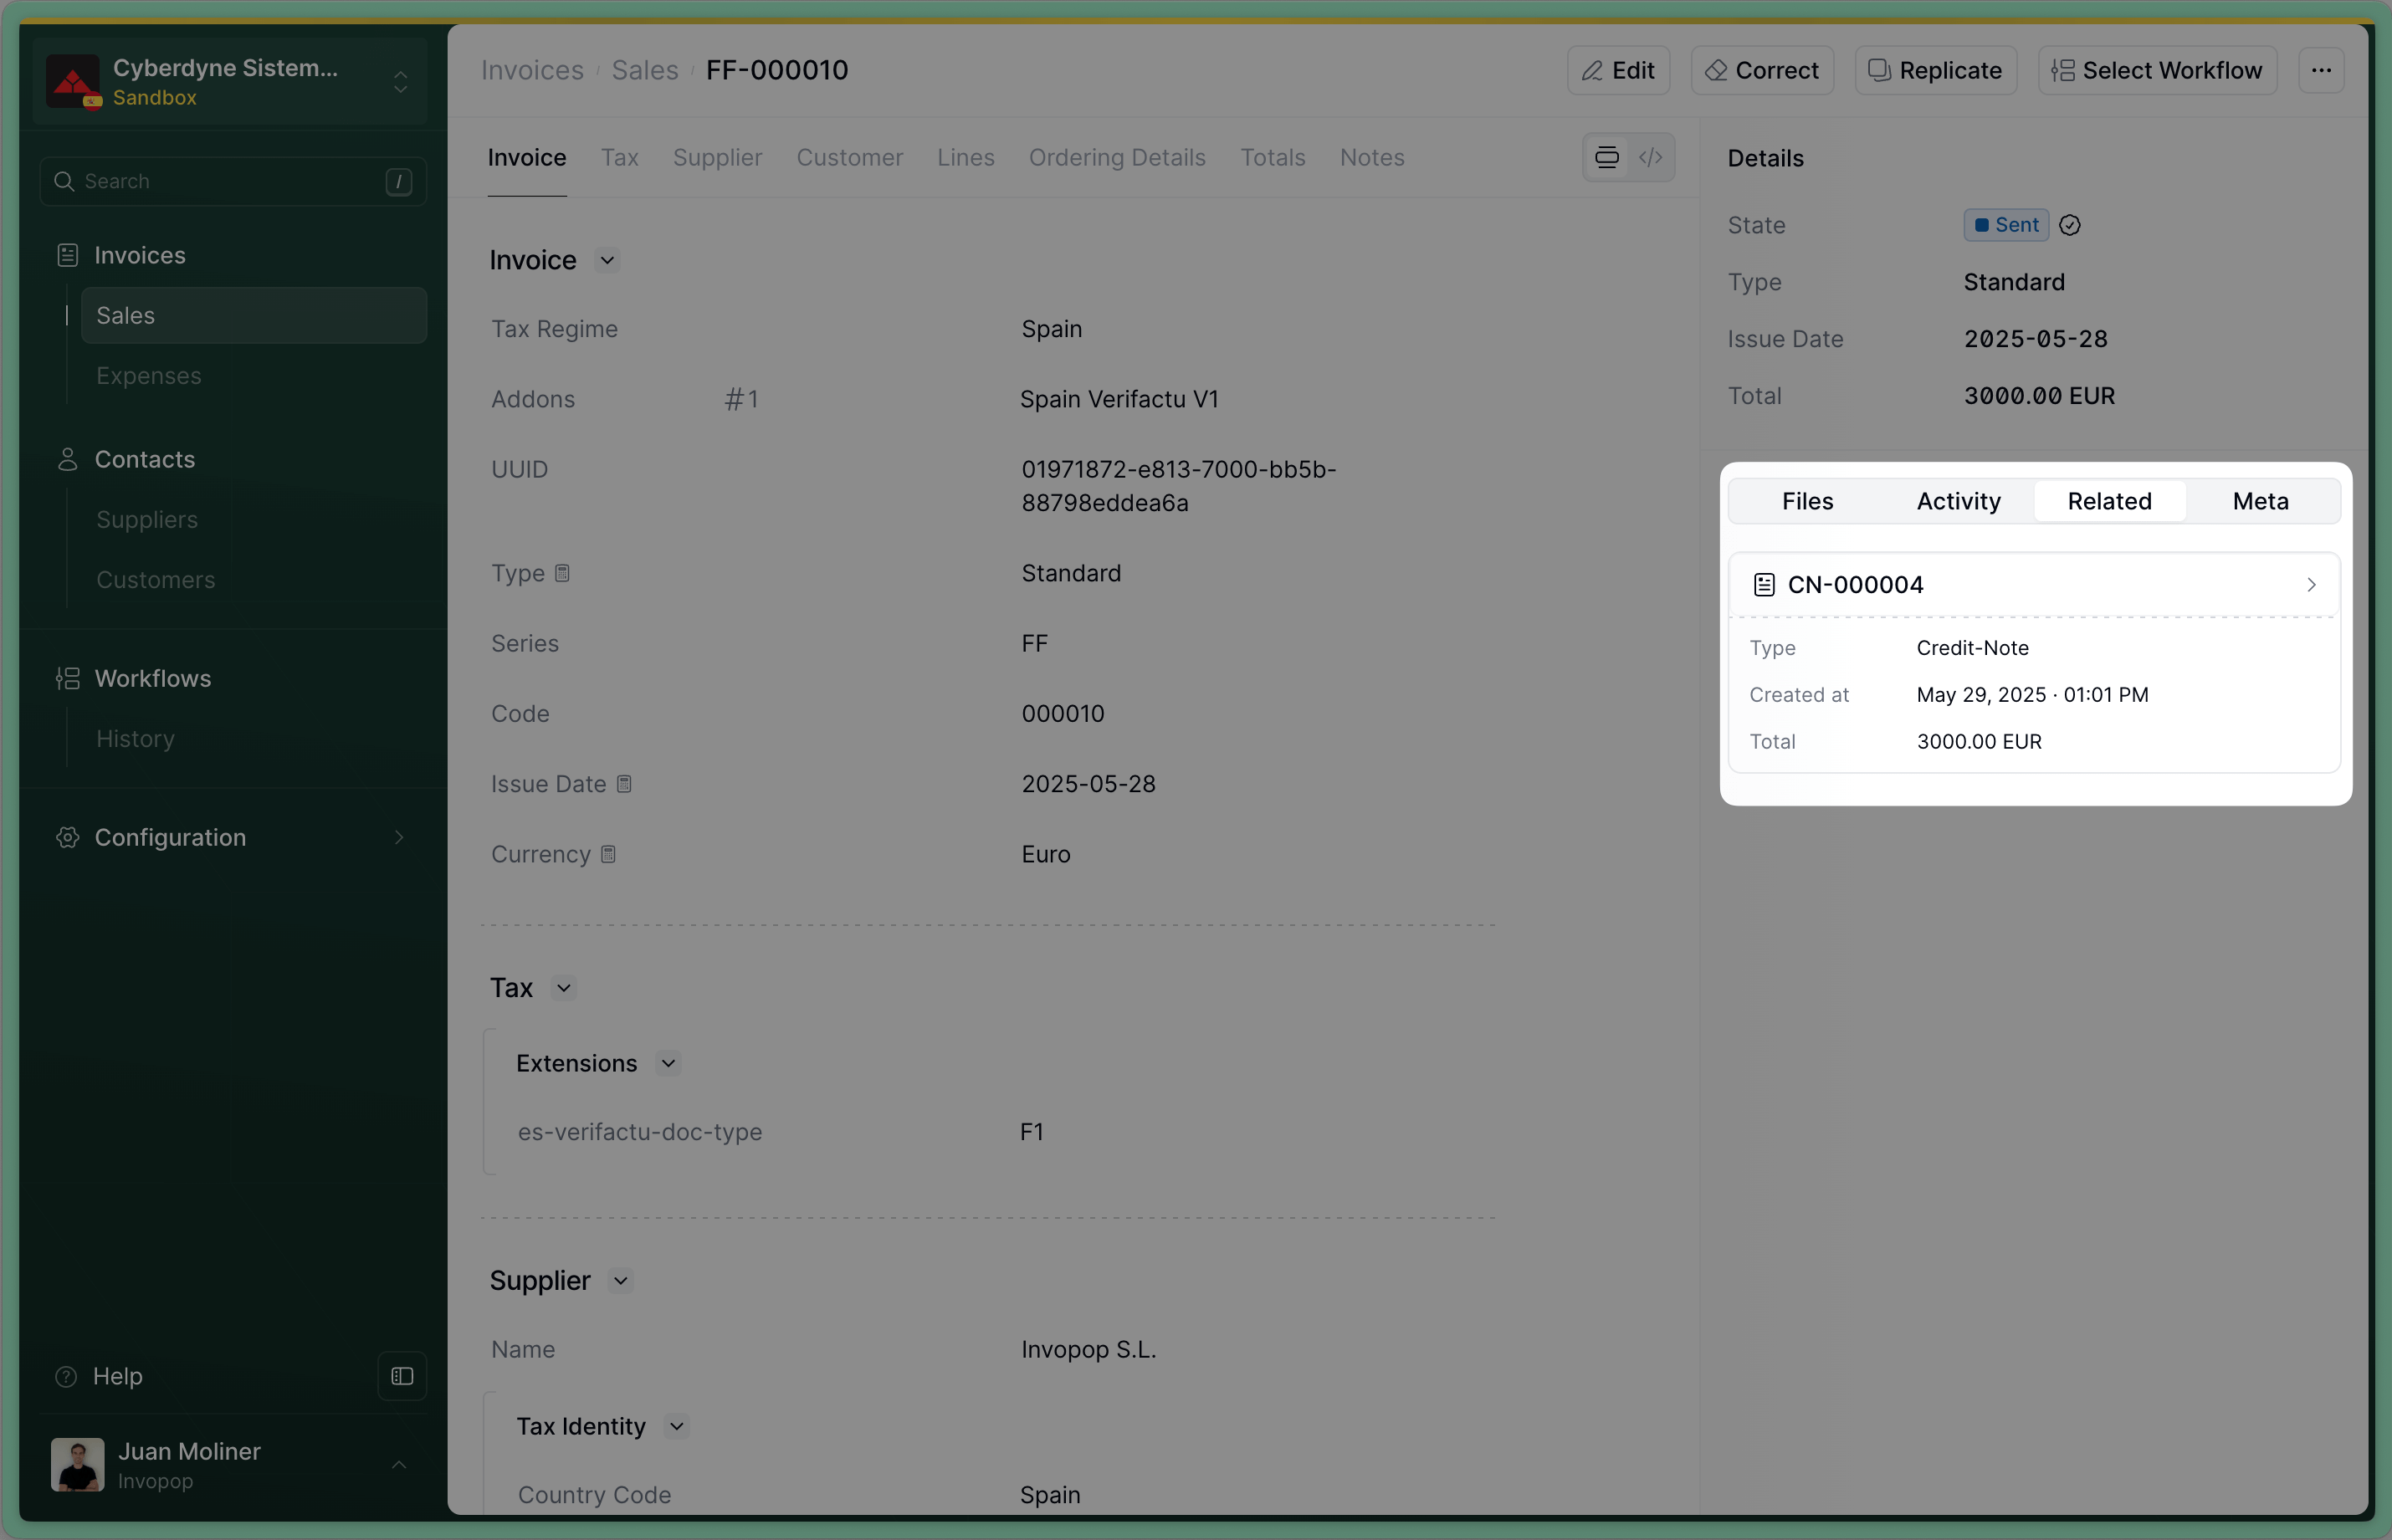
Send the Credit Note to the VERI*FACTU invoice workflow
workflow_id: use the Workflow ID of the _VERI*FACTU invoice _workflow we created during setupsilo_entry_id: use the The Silo Entry ID of the credit note you’ve just uploaded.
Sent when the workflow completes successfully.Issue a Corrective Invoice (Rectificativa por Sustitución)
Upload a Corrective Invoice
corrective. The process is very similar to uploading an invoice, use the Create an entry endpoint to upload a corrective invoice. Include an invoice object in the data, with these required fields:regime:ES- Add the
es-verifactu-v1addon supplier_id: use the same supplier details as in the original invoicetype:correctivepreceding: references the original invoice, within it, you must include:uuid: the UUID of the original invoice (optional but recommended)type: type of the original invoiceissue_date: the date of the original invoiceseries: the series of the original invoicecode: the code of the original invoicetax: the tax section of the original invoice, you can copy it from the original invoice
Empty. If you’ve included the uuid of the invoice in preceding, you’ll see a link to the corrective invoice we’ve just created in the Related tab of the invoice.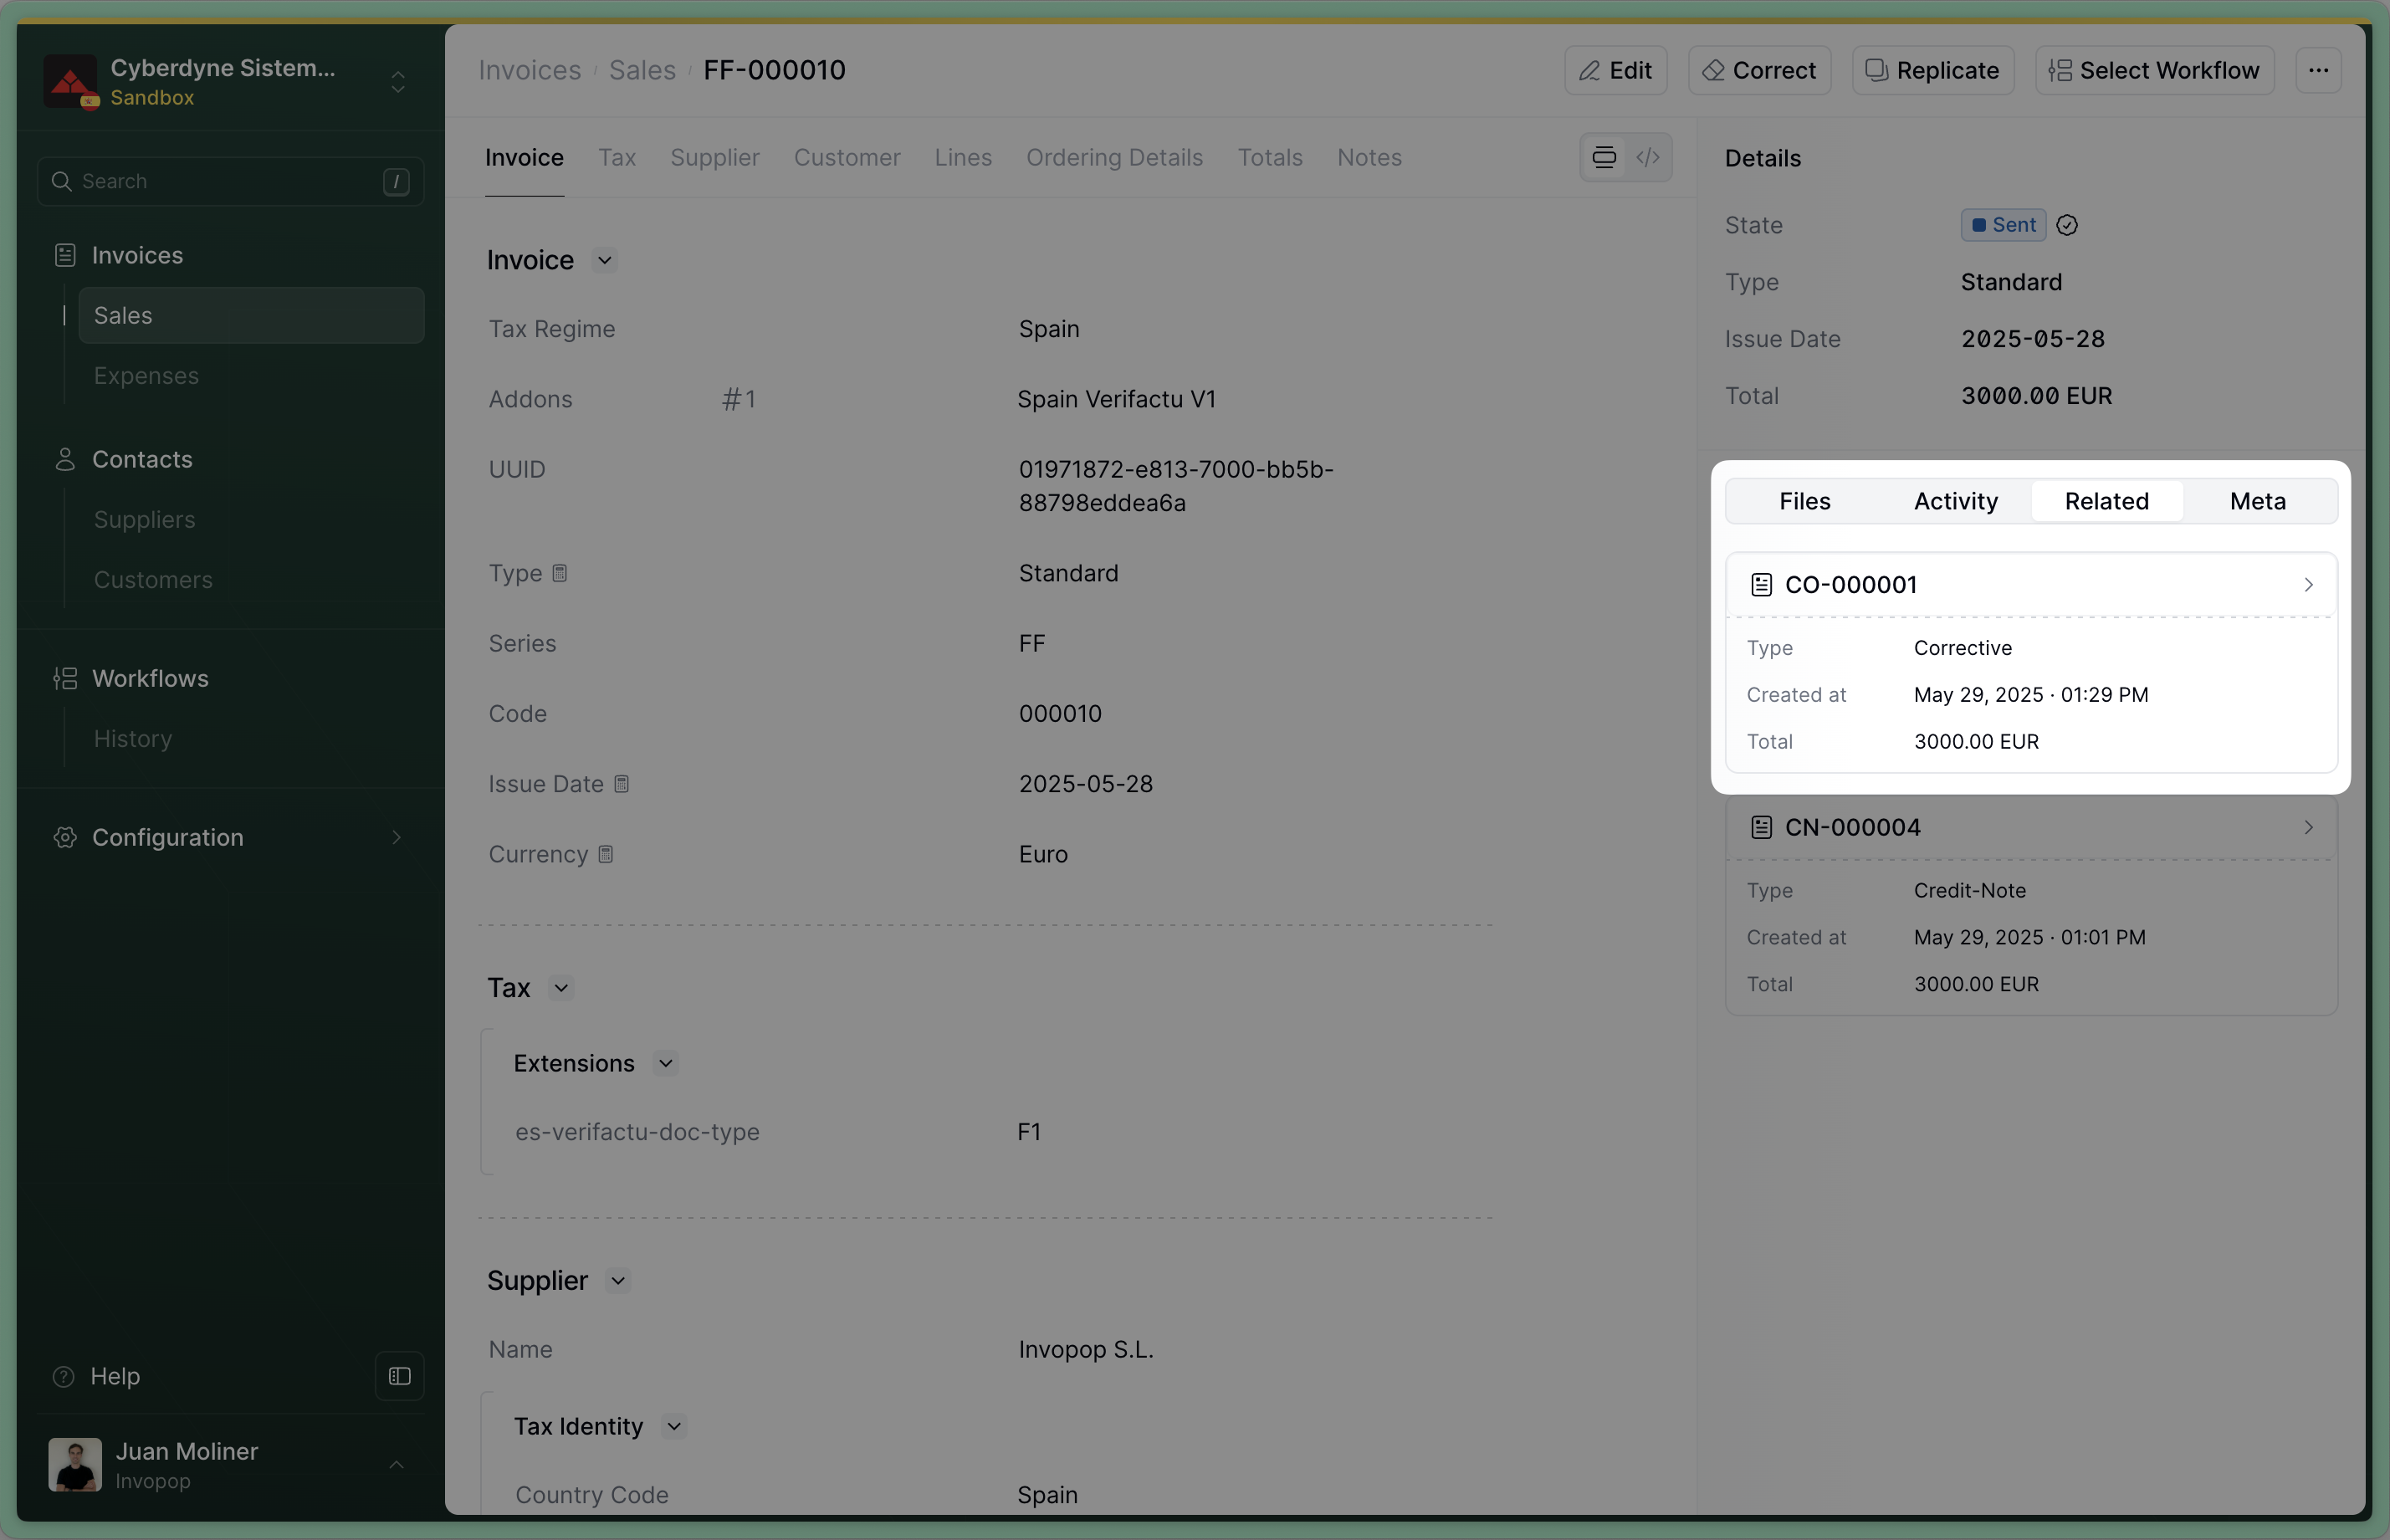
Send the Corrective Invoice to the VERI*FACTU invoice workflow
workflow_id: use the Workflow ID of the VERI*FACTU invoice workflow we created during setupsilo_entry_id: use the The Silo Entry ID of the corrective invoice you’ve just uploaded.
Sent when the workflow completes successfully.Issue a Replacement Invoice (Factura de Canje)
A replacement invoice (Factura de Canje) is used to replace a simplified invoice with a full invoice. This is common when a customer who originally received a simplified invoice (e.g., a receipt) later requests a full invoice with their tax identification details.Upload a Replacement Invoice
replacement tag. Use the Create an entry endpoint to upload the replacement invoice. Include an invoice object in the data, with these required fields:regime:ES- Add the
es-verifactu-v1addon type:standardtax.tags: includereplacementsupplier: use the same supplier details as in the original invoicepreceding: references the original simplified invoice, within it, you must include:type: type of the original invoiceissue_date: the date of the original invoiceseries: the series of the original invoicecode: the code of the original invoice
Empty.Send the Replacement Invoice to the VERI*FACTU invoice workflow
workflow_id: use the Workflow ID of the VERI*FACTU invoice workflow we created during setupsilo_entry_id: use the Silo Entry ID of the replacement invoice you’ve just uploaded.
Sent when the workflow completes successfully.Cancel an Invoice
VERI*FACTU also allows you to cancel an invoice. In general, you should only cancel an invoice if it hasn’t been handed to the customer nor accepted by the tax authority. Different from a credit note or a corrective, canceling an invoice doesn’t produce a second document, which means you don’t have a paper to hand to your customer to show the cancellation. That’s why, if the invoice has been handed to the customer, we recommend issuing a credit note instead.Add a cancel invoice workflow (only once)
- Template
- Code
- Build from scratch
VERI*FACTU cancel invoice workflow
Send to cancellation workflow
Void when the workflow completes successfully.FAQ
Should I send credit notes with positive or negative values?
Should I send credit notes with positive or negative values?
type set to credit-note.Where do I find Spain-specific GOBL documentation?
Where do I find Spain-specific GOBL documentation?
es-verifactu-v1, es-tbai-v1, es-facturae-v3.When should I cancel invoices in VERI*FACTU?
When should I cancel invoices in VERI*FACTU?
What should I do if an invoice is rejected by VERI*FACTU?
What should I do if an invoice is rejected by VERI*FACTU?
Once a VERI*FACTU invoice is issued, can I get the QR code image url?
Once a VERI*FACTU invoice is issued, can I get the QR code image url?
The “QR” code must have a size between 30x30 and 40x40 millimeters and follow the specifications of the ISO/IEC 18004:2015 standard. For the generation of the “QR” code, the M (medium) error correction level shall be used.Generate your own QR code image as follows:
Obtain the VERI*FACTU URL
- API: fetch the entry and get
data -> head -> stamps -> verifactu-qr. - Console: in the invoice entry click on the kebab
···menu and select View Headers.
Generate the QR image
Store or use the image
What is the VERI*FACTU chain?
What is the VERI*FACTU chain?
What are the most common errors when submitting invoices to VERI*FACTU?
What are the most common errors when submitting invoices to VERI*FACTU?
es-verifactu-v1 addon validations. These prevent most of the typical problems before they reach the submission stage.Among the errors that aren’t yet validated on our side, the five most frequent ones are:4104: Error en la cabecera: el valor del campo NIF del bloque ObligadoEmision no está identificado.→ The issuer’s name must match what’s registered for that NIF (tax ID).4102: El XML no cumple el esquema. Falta informar campo obligatorio.→ Usually occurs when a required field is missing in the XML, often within the Desglose (taxes) section.1110: El NIF no está identificado en el censo de la AEAT.→ The provided NIF (tax ID) isn’t found in the AEAT registry (often due to typos or testing data).3000: Registro de facturación duplicado.→ Triggered when issuing the same invoice series/code twice.2001: El NIF del bloque Destinatarios no está identificado en el censo de la AEAT.→ Similar to 1110, but applies to the NIF (tax ID) of the customer.
In my VERI*FACTU's XML, DescripcionOperacion is being populated with line item descriptions, how do I change this?
In my VERI*FACTU's XML, DescripcionOperacion is being populated with line item descriptions, how do I change this?
What $tags are supported in GOBL with the 'es-verifactu-v1' addon?
What $tags are supported in GOBL with the 'es-verifactu-v1' addon?
🇪🇸 Invopop resources for Spain
🇪🇸 Invopop resources for Spain
